
27 Cozy Outdoor Lighting Ideas for Fall That Actually Feel Warm

By the second week of October, the yard goes dark before dinner is even on the table. That is the real thing cozy outdoor lighting ideas are solving in fall, and it is not decoration. It is the ninety minutes of outdoor time you quietly stop using once the sun clocks out at 6:15.
Most fall lighting advice hands you a shopping list and wishes you luck. The trouble is that you can buy every object on that list and still end up with a yard that feels like a gas station forecourt, because the objects were never the variable. Light height and light color were.
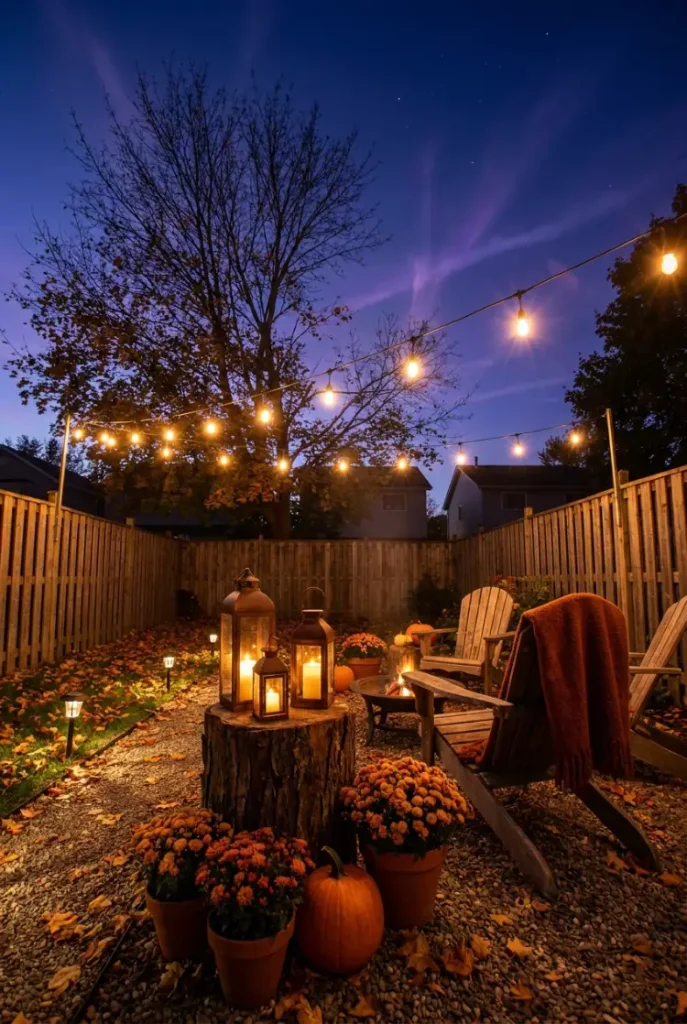
So this is a layering plan with 27 ideas hanging off it. Some cost a Saturday afternoon and a trip to Home Depot. A good handful cost under $20 and take fifteen minutes. Work down the list in order if you are starting from a bare patio, or skip straight to the section that matches whatever you are staring at right now.
The 3-Glow Rule
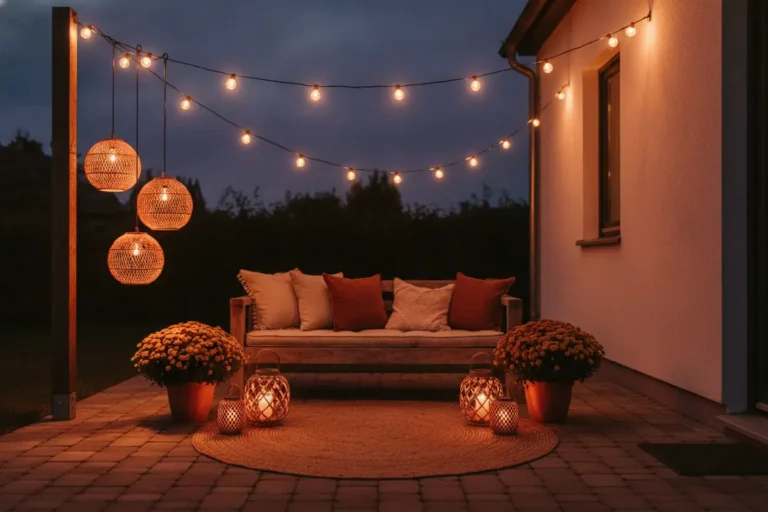
Every outdoor space that reads warm after dark has light at three heights at once. Overhead glow sits at 8 to 10 feet and sets the ceiling. Eye-level glow sits at 3 to 5 feet and is what your face actually sees from a chair. Ground glow sits under 18 inches and tells your brain where the edges are.
Miss one and the space goes flat. Miss two and no amount of pumpkins will save it. Most backyards in September have exactly one layer, usually a single blue-white floodlight bolted over the door, which is why they feel like a loading dock instead of a room.
1. Swap every outdoor bulb to 2700K before you buy a single new thing
Bulb color does more work for a fall yard than any amount of new hardware. Kelvin is the number printed in small type on the box, and it is the whole ballgame. 2700K is candle-adjacent and flattering. 4000K and up is the color of a self-checkout lane.
Walk outside tonight and look at your porch fixture. If the light reads slightly blue against the brick, that bulb is fighting you. A four-pack of 2700K outdoor-rated Feit or Brightech bulbs runs under $20 at Lowe’s, and it is the only idea here that improves all 26 of the others at the same time. LEDs also carry the practical argument, since why LEDs use far less energy comes down to a 75 percent cut in energy use and a lifespan up to 25 times longer than incandescent.
| Bulb temperature | What it actually looks like outside |
|---|---|
| 2200K to 2400K | Candle and firelight. Beautiful, and almost too dim to read a menu by. |
| 2700K | The fall target. Warm, flattering on skin, makes rust and orange sing. |
| 3000K | Still warm, slightly crisper. Fine for task areas like a grill station. |
| 4000K and up | Blue cast. Kills the mood instantly and makes every plant look grey. |
Do this one first. Everything below assumes it.
2. Hang cafe bulbs at 8 feet, not at the top of the fence
Height is where most string light setups quietly go wrong. People run the line as high as the hardware allows, which spreads the glow thin and puts every bulb outside your sightline. Drop it and the same strand suddenly feels like a ceiling.
Eight feet is the sweet spot over a seating area. High enough that nobody taller than six feet clips it, low enough that the bulbs sit in the frame when you are slouched in a chair with a blanket.
Mark your two anchor points at 9 feet, because the strand will sag about a foot in the middle once the bulbs are in.
Run a stainless guide wire first and clip the strand to it. The wire takes the wind load, the strand just hangs.
Sit down in the actual chair before you tighten anything. Judge the height from there, not from the ladder.
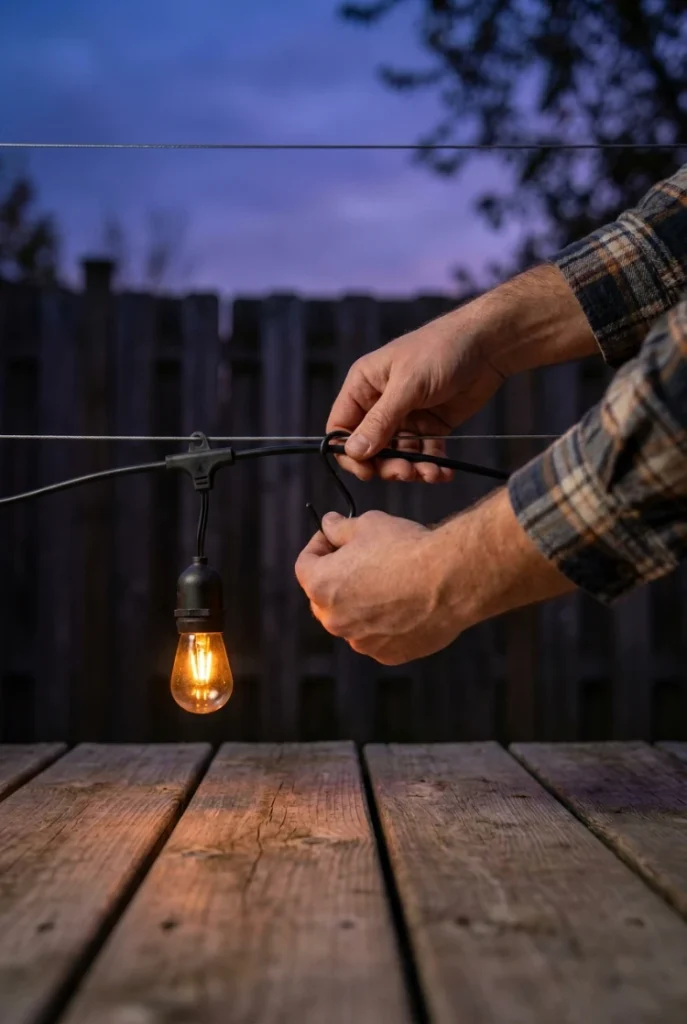
3. Zigzag one line across the middle instead of looping the perimeter
Perimeter loops look tidy from an upstairs window and flat from a chair. Running the strand around the fence line pushes all the light to the edges and leaves a dark hole exactly where people sit.
A single zigzag across the middle does the opposite. Two runs back and forth over the seating zone gives you a lit ceiling, real shadows, and about half the strand length of a full loop.
Light the zone people occupy, then let the edges fall dark.
Cross the space at a slight angle so the lines are not parallel to the fence.
Tracing the whole fence line and calling it ambience.
Buying 100 feet when 48 feet placed well does more.
Layout matters more than strand count, and there are plenty more outdoor string light ideas for any backyard once you have the crossing line up.
4. Reset the timer in October, because the dark moves
Sunset slides earlier fast between Labor Day and Halloween, and in most of the country the difference between early September and early November lands somewhere around an hour and a half, before the clock change even gets involved. Every timer you set in July is now firing well after the yard already went black.
Fall lighting is a before-dinner amenity, not an after-dinner one. That single mental shift changes when you want the lights on and how long they need to run.
📌 Good To Know
Swap the plug timer for a dusk-to-dawn photocell and the problem solves itself for the rest of the year. They cost about the same, and the yard never gets that awkward twenty minutes of grey.
Put a reminder on the calendar for the first weekend in October. Future you will not remember.
5. Aim every fixture down, never out
Glare is what separates warm from interrogation. A fixture pointed sideways sends light straight into your eyes and blows out everything behind it, which is why so many yards manage to be both too bright and too dark at once.
Point the source at the ground, the wall, or the plant. Let the reflection do the work. It is the same reason restaurants light the table and not your face.
One badly aimed floodlight will undo six good decisions.
6. Wrap the railing, skip the posts
Railings catch light better than posts do, and the reason is simple geometry. A wrapped post is a vertical stripe nobody looks at. A wrapped railing is a horizontal line that traces the shape of your porch and reads from the street.
Get the railing wrap right
Daylight matters too, since your porch spends half the day unlit and you still have to look at it.
7. Put micro lights inside the fall wreath
Wreaths get completely overlooked after dark. All that texture, all those dried seed heads and orange oak leaves, and by 6:30 it is a grey circle on a door.
A single battery strand of 20 warm white micro lights threaded from the back fixes it. Thread from the inside out so the copper wire disappears into the greenery, and set the built-in timer once so it comes on at the same hour every evening without you touching it.
Lighting a thing you already own beats adding a new thing, because the glow lands on texture instead of on empty air.
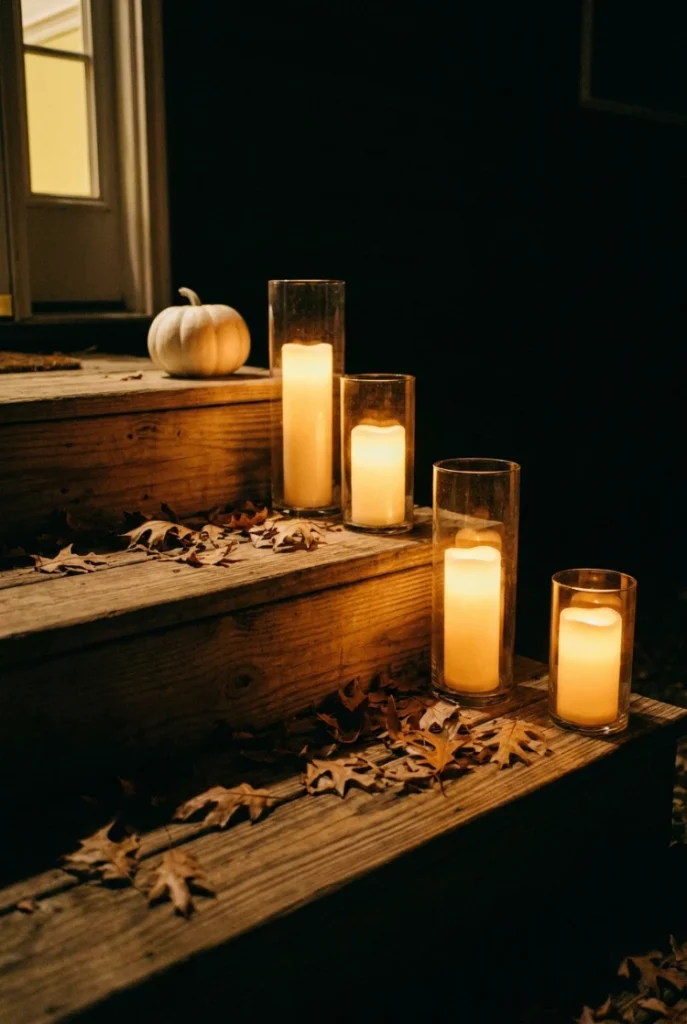
8. Line the steps with battery pillars in glass hurricanes
Steps are the one place where pretty and useful stop arguing. A row of glass hurricanes down one side of the stairs marks the tread edge, throws light exactly where feet go, and looks like you planned it.
Battery pillar candles are the move here rather than real wax. Wind is a real factor by October, and nothing ruins the effect faster than relighting a candle four times during one conversation. Dollar Tree carries the glass for a couple of dollars a piece, and the flameless pillars with a 6-hour timer run around $5 each at Target.
⚠️ Watch Out
Keep the hurricanes tight against the riser and off the walking line. A glass cylinder on a dark step is a trip hazard first and decor second.
9. Add one plug-in sconce beside the back door
Back doors usually get one harsh fixture mounted dead center, and that single blue-white disc is doing all the work for the entire rear of the house. Adding a second warm source to one side breaks the symmetry and instantly makes the doorway feel like an entrance rather than an exit.
Plug-in outdoor sconces exist specifically so you can do this without an electrician. They mount with two screws and the cord runs to an existing outlet.
Use outdoor-rated, UL-listed lights and cords on a GFCI outlet. Anything beyond plugging into an existing outlet is a job for a licensed electrician. Worth knowing before you run anything across the patio: the CPSC is clear that you should only use cords marked for outdoor use outside, and that cords should be at least 16 AWG unless they are 18 AWG with fuse protection.
| Plug-in sconce | Hardwired fixture |
|---|---|
| Two screws and a weekend hour. | Electrician visit, usually a few hundred dollars. |
| Comes down when you move out. | Stays with the house. |
| Visible cord to hide with a clip run. | No cord at all. |
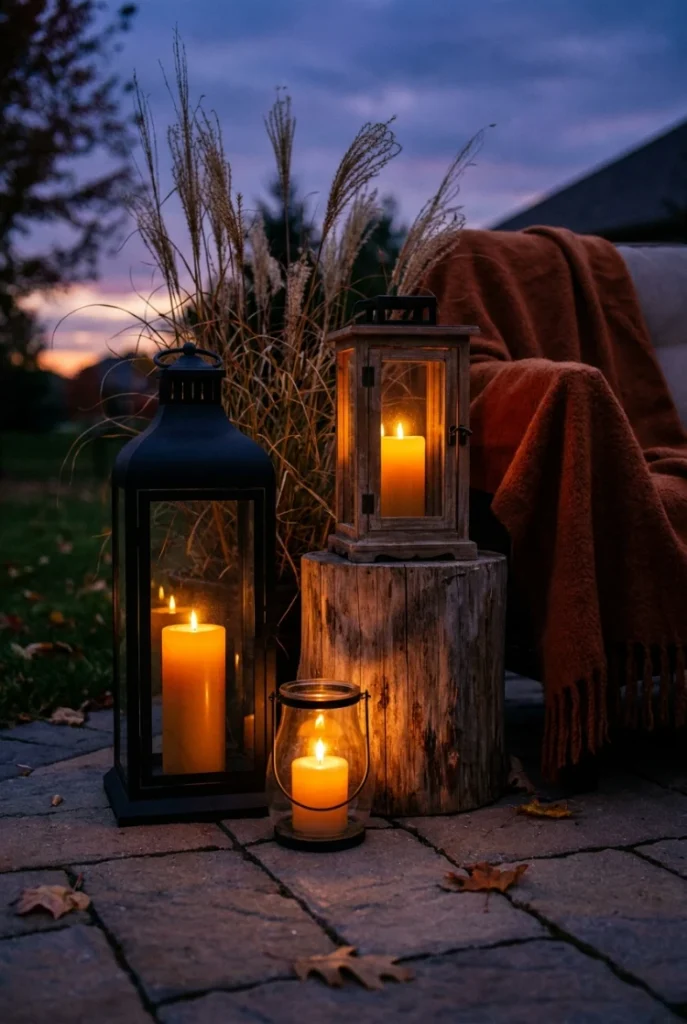
10. Cluster three lanterns at three different heights
Odd numbers read as intentional. Even numbers read as a store display. Three lanterns of clearly different heights, grouped in one corner rather than spaced politely apart, is the single fastest way to fill the eye-level layer of the 3-Glow Rule.
Vary the material, not just the size. One black metal, one warm wood, one clear glass. Same bulb color inside all three, or the grouping falls apart.
11. Keep path lights low and wide, under 18 inches
Ground level is where fall lighting earns its keep, because wet leaves and early dark turn a familiar walkway into a genuine hazard by the end of October. The instinct is to buy taller path lights. The better move is shorter ones, spaced closer.
Set fixtures no taller than 18 inches so the shade caps the glare and pushes light onto the ground.
Space them 6 to 8 feet apart and stagger sides. A matched row down both edges reads like an airport runway.
Set them back 6 inches from the path edge so the pools of light overlap slightly on the walking surface.
Overlapping pools. That is the whole trick.
12. Drop solar stakes straight into the mums
Mums already pull the eye in October, so they are the obvious place to hide a light source. Push two or three solar stakes down into the pot itself, angled up through the foliage, and the whole plant turns into a glowing orange mound after dark.
One honest caveat about solar in fall: shorter days and low sun angles mean less charge, so a stake that ran until midnight in July may quit by 9pm in November. Buy the ones with a replaceable battery and put them where they still catch afternoon sun.
Solar that survives a US fall
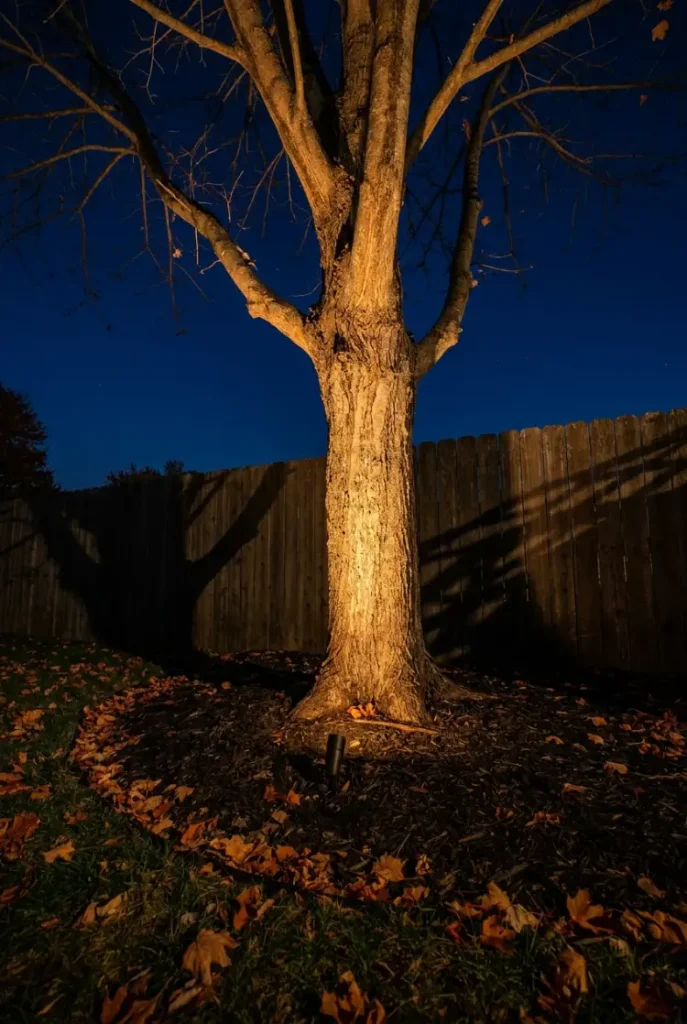
13. Uplight one trunk, not the whole tree line
A single lit trunk beats five lit trunks, every time. Light everything and you flatten the yard back out, which is exactly the problem you were trying to fix. Pick the tree with the best bark or the widest branch structure and give it one well-aimed uplight.
Set the fixture about 18 inches out from the base and tilt it to graze the bark rather than blast it. October is the right month for this, because a half-bare maple throws far more interesting shadow than a full summer canopy.
One tree, one fixture, grazing the trunk from 18 inches out.
Aim so the beam stops below the neighbor’s window line.
Lighting every trunk along the back fence at equal brightness.
Wrapping a trunk in string lights and calling it uplighting. Different effect entirely.
14. Hang lanterns from shepherd’s hooks down the walkway
Shepherd’s hooks cost almost nothing and they solve a problem most yards have, which is that there is nowhere to hang anything between the house and the fence. Three hooks down a walkway give you instant eye-level light with zero drilling and zero wiring.
They pull straight out of the ground in spring, which makes them one of the better renter moves on this list.
- ▸Buy the heavy gauge hooks, not the thin ones. Thin hooks bend under a full lantern in wind.
- ▸Push them in after rain, when the ground is soft, and step them down to the collar.
- ▸Hang battery lanterns with a built-in timer so you are not walking the path every night.
- ▸Stagger the heights slightly. Three at identical height looks like a fence.
15. Hide a cove light under the deck rail
Hidden sources feel expensive because you see the effect without seeing the cause. Running a warm white rope light or LED tape along the underside of the deck rail cap gives you a floating band of light along the whole perimeter, and the fixture itself never appears.
Aim it down and slightly inward so it washes the deck boards. Outdoor-rated tape only, and run the power lead to a single GFCI outlet rather than daisy chaining across the deck.
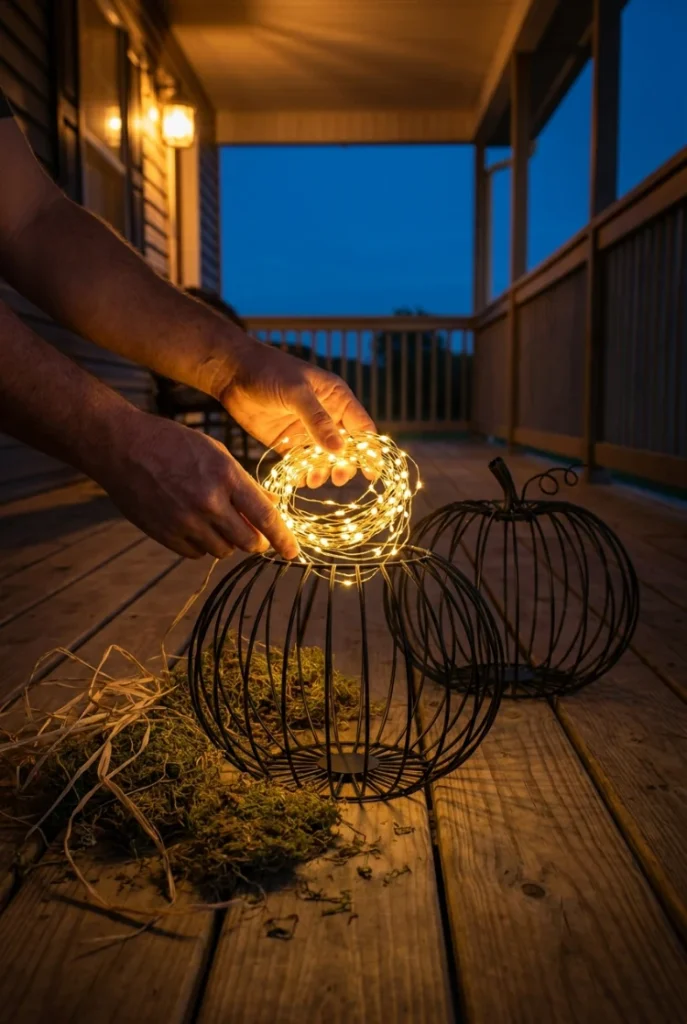
16. Stuff a wire pumpkin with a warm fairy light bundle
Wire pumpkins get sold empty, which is a small design crime given that the whole shape exists to hold something. A coiled bundle of warm white fairy lights inside turns a $12 metal frame into the best object on the porch.
Coil a 20 foot copper wire strand loosely into a ball rather than winding it around the frame ribs.
Drop the ball in through the top opening and push the battery pack toward the back, out of sight.
Add a handful of dried moss or raffia on top to diffuse the points into one soft glow.
17. Put fairy lights under a glass cloche on the table
Glass multiplies a small amount of light into something that looks like far more. A cake dome or a thrifted cloche over a coiled fairy strand, a couple of acorns, and one dried hydrangea head becomes the centerpiece you did not have to arrange.
It also survives wind, which matters in October when a real taper is a losing battle.
Glass turns twenty tiny points into one soft globe, so a strand that looks cheap on a fence looks deliberate under a dome.
18. Turn a galvanized bucket into a stump light
Galvanized metal rusts into exactly the color fall wants, and a bucket with a few holes punched through the side makes a lantern that throws pinprick patterns across the patio. Set it on a cedar stump or an upturned crate so the pattern lands at eye level instead of on your shoes.
Punch the holes from the inside out with a nail set, so the burrs face outward and catch the light.
What you need
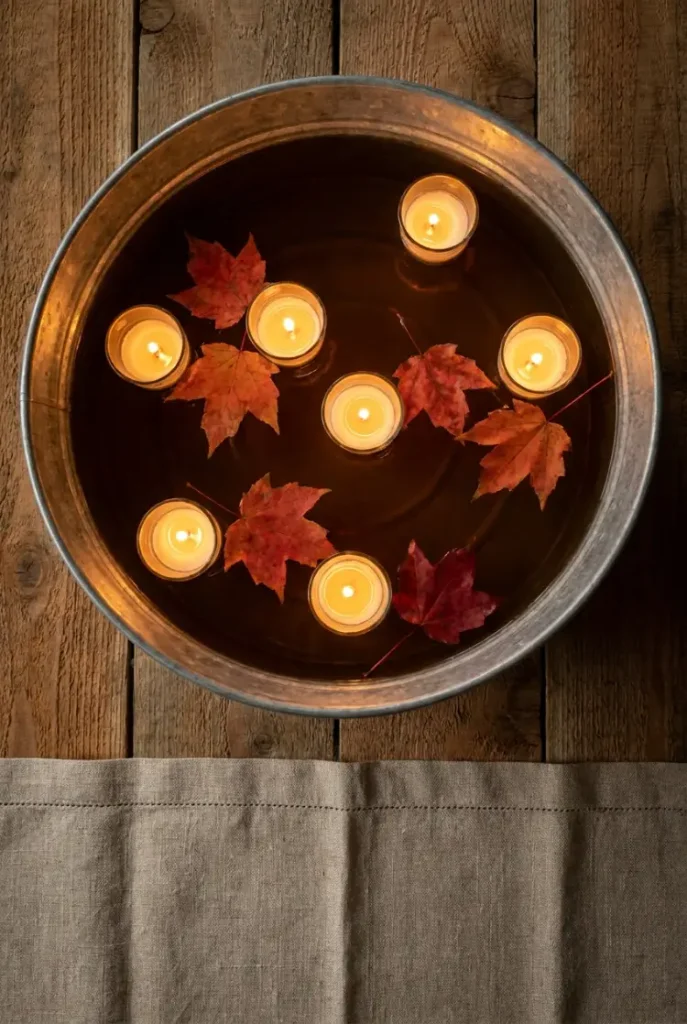
19. Float tea lights in a tub of water and fallen leaves
Water doubles every flame above it, which is why a shallow galvanized tub of floating tea lights reads as twice the light it actually is. Add a few red maple leaves on the surface and you have a centerpiece that costs about four dollars and photographs absurdly well.
Use the flameless floating kind if the tub sits anywhere near a table edge or a kid. The reflection works exactly the same.
⚠️ Watch Out
Keep the tub well away from any plugged-in strand, cord, or power strip. Water and outdoor wiring share space badly, and a tipped tub near a cord run is how a nice evening ends early.
20. Backlight the ornamental grasses against the fence
Ornamental grasses go translucent in fall, and that is the entire reason to light them from behind rather than in front. Miscanthus, little bluestem, and even a tired clump of fountain grass will glow from the inside out when a small fixture sits between the plant and the fence.
Front lighting kills it. You get a flat wall of beige and lose the whole effect.
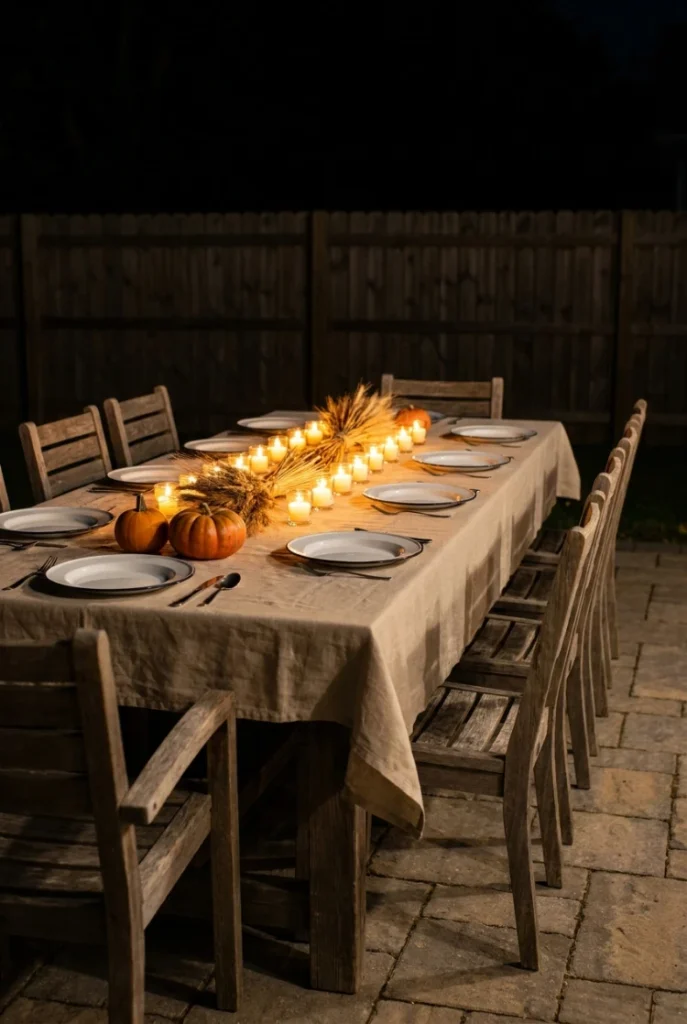
21. Light under the dining table, not over it
Overhead light on an outdoor dinner table does something unkind to faces, and most people blame the food or the evening rather than the fixture. Shift the source lower than the tabletop and the same gathering suddenly looks like the photo you wanted.
Two small lanterns on the bench, a row of low votives down the center, a puck light clipped under the table edge. That fills the eye-level layer of the 3-Glow Rule right where people are actually sitting, and it is the part almost everyone forgets.
| Light source position | What it does to the table |
|---|---|
| Directly overhead | Hard shadows under eyes, food looks grey. |
| On the table, at or below chin | Soft upward fill, warm skin, this is the one. |
| Off to one side only | Half the table lit, half in the dark. Fix with a second source. |
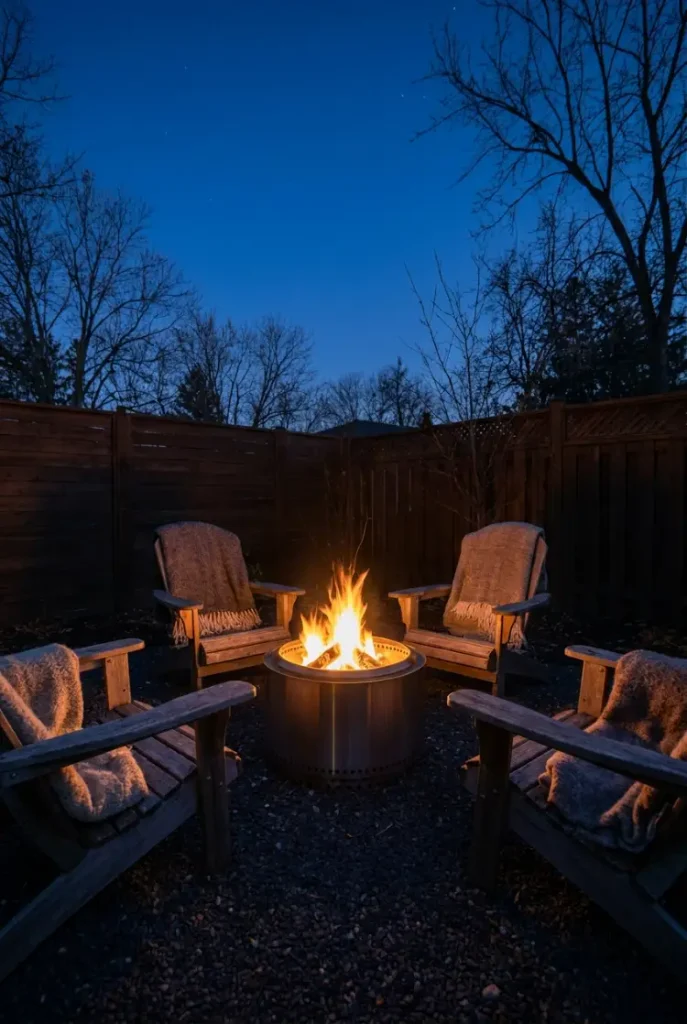
22. Make a smokeless fire pit the anchor of the whole layout
Fire is the warmest light source you will ever own, and it is the one that makes people stay outside in 48 degree weather instead of drifting back indoors. A smokeless pit like a Solo Stove or a Sunnydaze model burns cleaner and lower, which means the light stays steady instead of pulsing with every gust.
Build the seating around it at roughly arm’s reach plus two feet, and let that circle be the brightest part of the yard. Everything else on this list becomes supporting light once the pit is lit. If you are starting from bare gravel, a budget fire pit seating area is the cheapest way to get the circle right before you spend anything on fixtures.
23. Fill a cold fire pit with a candle cluster on no-burn nights
A cold fire pit still works as a light source, which is useful on the nights when it is too windy to burn or your city has a restriction in place. Fill the bowl with eight or ten pillar candles at different heights, or a single cluster of flameless ones, and the shape does the rest.
Check your city’s burn rules before you light anything, keep the clearance from structures and branches that your fire pit’s manual and local code call for, and never leave a fire unattended.
💡 Quick Tip
Set the candles on a bed of sand or lava rock rather than straight on the steel. It levels them, catches drips, and keeps the bowl from scorching in one spot.
24. Run downlights along the fence cap, aimed at the ground
Fence caps make a natural shelf, and small warm downlights mounted along the top rail wash the boards below in a way that makes a plain pressure-treated fence look like a considered backdrop. Space them 6 to 8 feet apart and aim straight down.
Fall is the right time to do this, because once the perennials in front die back the fence becomes the most visible surface in the yard and it is usually the ugliest.
Aim the beam straight down the boards so the wood grain catches.
Keep them all at one height and one spacing. Rhythm is the effect.
Angling them outward, which lights your neighbor’s yard and your own eyes.
Mixing bulb temperatures along one run. One cool unit ruins the whole line.
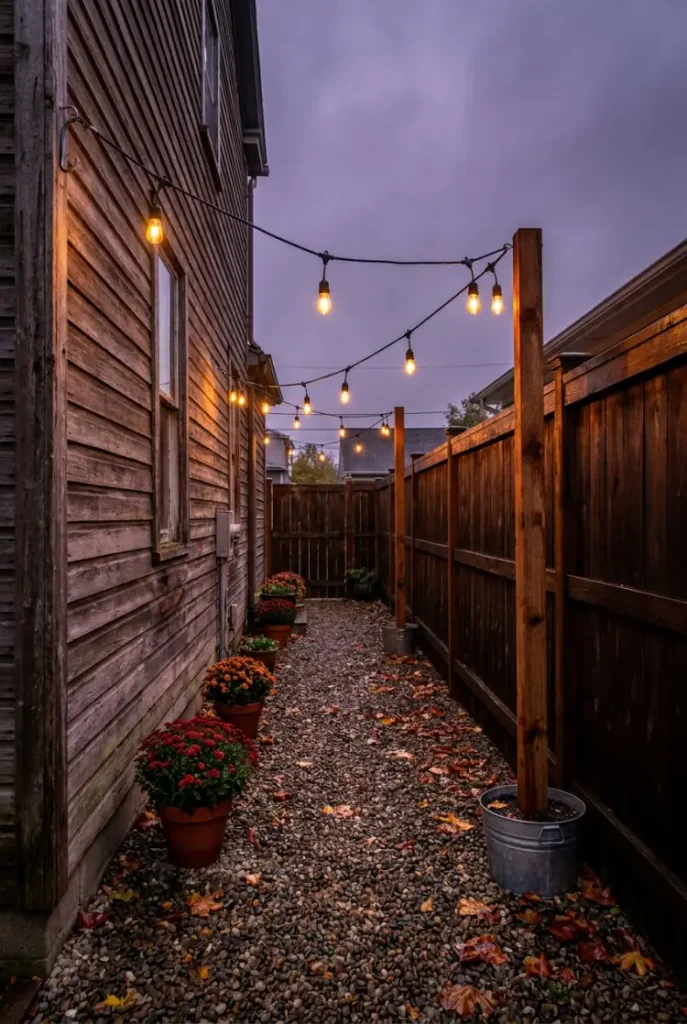
25. Cross a narrow side yard at an angle
Side yards are dead space eleven months of the year, and a single strand run diagonally across one is the cheapest way to make a useless corridor feel like a room. Angle matters: parallel to the fence reads as a utility run, diagonal reads as a ceiling.
No trees back there, which is usually the sticking point.
Anchor one end high on the house wall with an eye hook, at least 8 feet up.
Sink one 4×4 cedar post in a bucket of concrete at the far diagonal corner. No digging, and it moves with you.
Run the strand on a guide wire between the two, keeping the cord run off the ground and away from leaf litter.
The bucket-post trick scales to a full patio too, and the step by step for how to hang string lights without trees covers the versions that hold up in wind.
26. Skip the orange bulbs entirely
Orange party bulbs are the default fall move, and they are the wrong one. Here is the reasoning: orange light does not make a space feel autumnal, it makes it feel like a haunted house parking lot. It turns skin sallow, turns food grey-brown, and flattens every actual orange object in the yard into the same muddy tone as the light itself.
The version that works is warm white light falling on orange things. Your mums, your rust throw, your pumpkins, your copper lanterns. Let the objects carry the color and let the bulbs stay at 2700K.
| Orange bulbs | Warm white on orange objects |
|---|---|
| Everything turns one flat color. | Real contrast between orange, rust, and cream. |
| Reads as Halloween, not as fall. | Reads as fall through Thanksgiving and past it. |
| Comes down October 31st. | Stays up through February without looking wrong. |
Buy once, leave it up. That is the budget argument as much as the design one.
27. Do the three-light test from inside the house
Walk indoors before you call the yard finished. Look out the kitchen window with the interior lights off and count how many separate sources you can see. Fewer than three and the space will still feel flat from a chair.
More than about seven and you have overshot into runway territory, which is its own kind of uncozy. Three to five distinct warm points, at three different heights, is the whole target.
Lights off inside, look out the window, count the glowing points. Three to five at three heights and you are done. Everything else is just shopping.
Cozy Outdoor Lighting Ideas Frequently Asked Questions
What color light is best for outdoor fall lighting?
Warm white at 2700K. It sits close to candlelight, flatters skin tones, and makes rust, copper, and orange decor look richer instead of muddy. Anything at 4000K or above throws a blue cast that reads industrial outdoors, no matter how many pumpkins are in frame. Check the Kelvin number on the box before the lumens, because color temperature decides the mood and brightness only decides the reach.
What month should you start putting up fall outdoor lighting?
Early to mid September for most of the country. Sunset is already pulling back by then, so the lighting earns its keep weeks before any pumpkin goes out. Starting early also spreads the work: do the bulb swap and the timer in September, add lanterns and ground level pieces through October. Waiting until the first cold snap means installing in the dark and the wind.
Can you leave outdoor string lights up all fall and winter?
Yes, if the strand and the cord are both rated for outdoor use and the connections stay off the ground. Warm white bulbs read as fall in October and as winter in January with no change needed, which is the main argument for skipping seasonal orange. Check the guide wire tension after the first hard freeze, since cold shortens the line and can pull anchors loose.
How many string lights do I need for a patio?
Measure the crossing runs you actually plan, then add about 15 percent for sag and for the drop to the outlet. A 12 by 16 foot patio usually takes two diagonal runs, which lands near 45 to 55 feet of strand. Buying by patio square footage tends to oversell you. Buying by run length, with a zigzag layout rather than a perimeter loop, gets more glow from fewer feet.
Are solar lights bright enough in the fall?
Less bright, and for less time. Shorter days and a lower sun angle mean a solar stake that ran past midnight in July may quit by mid evening in November, especially once leaf drop starts shading the panels. They still work well as accent and path pieces if you choose warm white, put the panels where they catch afternoon sun, and wipe them monthly. For anything you rely on, run a cord.
How do you make a yard look autumnal without buying much?
Swap the bulbs first, which costs under $20 and changes everything else. Then light objects you already own: a wreath, a bucket, a potted mum, a fence. Dollar Tree glass plus flameless pillars covers the step and table layers for a few dollars. Almost all the difference comes from height and color, not from how many new pieces end up in the cart.
Light It Once, Enjoy It Until February
Fall is the season where outdoor lighting stops being decorative and starts being the reason you go outside at all. Get the bulb color right, get light at three heights, and a small patio in 45 degree weather turns into the best room in the house.
Start with one thing this weekend. The 2700K swap takes twenty minutes and makes every other idea on this list work harder.
If you want to come back to these cozy outdoor lighting ideas when the mums are out and the dark shows up early, save this to your fall backyard board so it is waiting for you in September.
One Comment