17 Cottage Fire Pit Ideas for Cozy Fall Nights

The best cottage fire pit ideas are not the ones that photograph well in June. They are the ones you still want to sit in on a damp Tuesday in late October, when it gets dark at 6:15 and the lawn stays wet all day.
That changes what matters. Drainage beats decoration. A place to set a mug beats a matched furniture set. Wind protection beats a bigger flame.
So this list is built around fall use, with real 2026 numbers attached. HomeGuide puts a DIY build at $200 to $650 in materials, and Lawn Love puts the national average for an installed pit at $830. You will see where those dollars actually go, which of these you can finish before Saturday dinner, and which ones are worth paying somebody else to do.
Seventeen ideas. Gravel, seating, light, plants, and the fall decor that will not catch fire.
The $300 / $830 / $2,200 Fire Pit Ladder
Everything below sits on one of three rungs, and knowing your rung first saves you from a half finished pile of blocks in November. Lawn Love’s 2026 figures put a pure DIY build at $150 to $300, the national average installed pit at $830, and the top of the typical range at $2,200. Entries 2 and 4 come back to this ladder by name. Check your city’s burn rules before you light anything, keep the clearance from structures and branches that your fire pit’s manual and local code call for, and never leave a fire unattended.
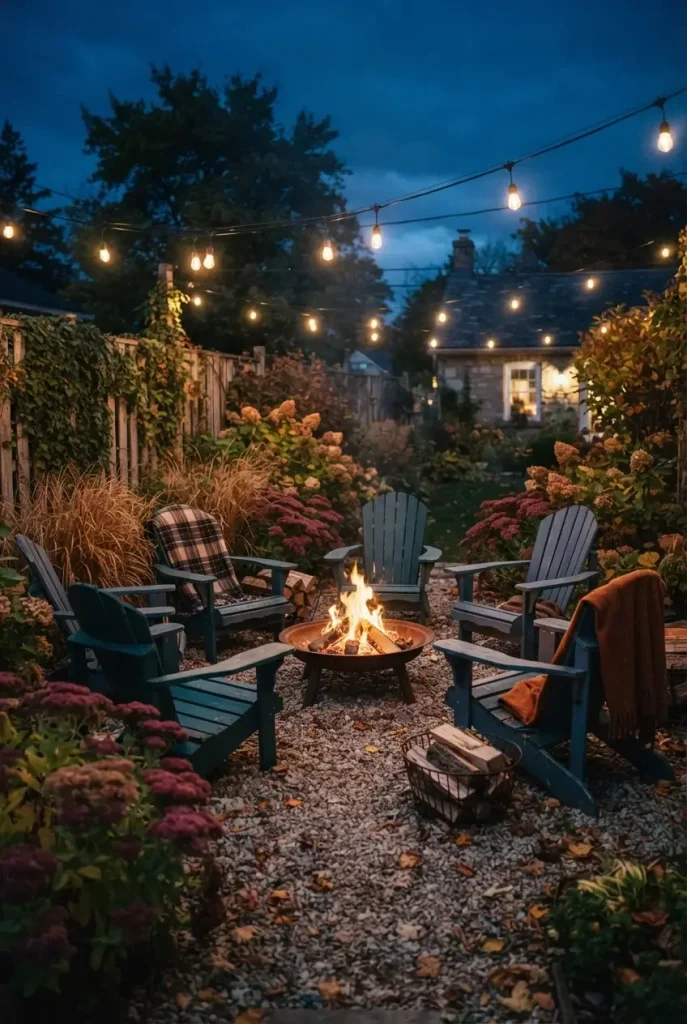
1. Cut a pea gravel circle so the fire never sits on wet grass
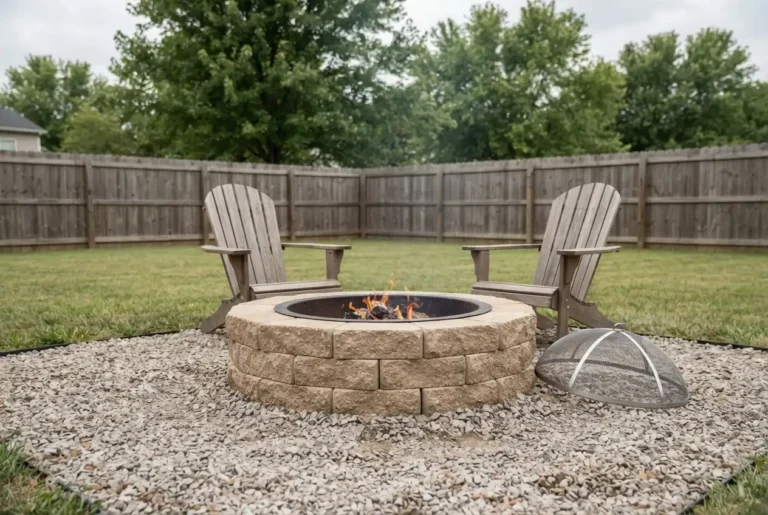
Cut the circle before you buy the pit. An 8 foot round of pea gravel is the single change that makes a backyard fire pit area usable from September through March, because grass under a pit turns to mud by the second rainy week and stays there.
Dig down 4 inches, drop landscape fabric, fill with pea gravel. HomeGuide prices pea gravel at $1 to $3 per cubic foot, so an 8 foot circle at 4 inches deep runs roughly 17 cubic feet, or $17 to $51 of stone.
Edge it with steel or cedar so the gravel does not wander into the lawn. The same base logic runs through most budget backyard patio ideas, and it is cheaper here than anywhere else in the yard.
Stake a screw in the center, tie a 4 foot string, spray paint the circle as you walk it.
Strip 4 inches of sod, tamp the subsoil, lay landscape fabric with 6 inches of overlap.
Set your edging, then fill with pea gravel and rake it level. Walk it barefoot to find high spots.
Top up once a year in spring. Gravel settles and migrates, and a bag or two fixes it.
2. Stack a block ring in an afternoon for the price of two dinners out
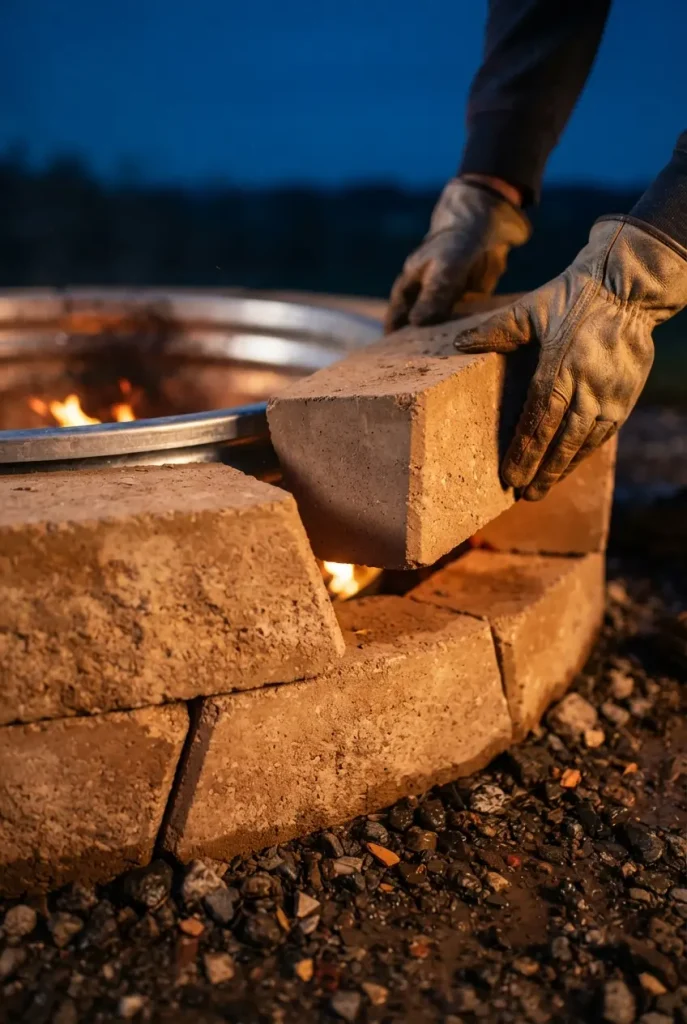
Sixteen retaining wall blocks and a bag of gravel. That is the whole build, and it sits squarely on rung one of the Fire Pit Ladder.
HomeGuide prices retaining wall blocks at $80 to $300 and a metal fire pit ring at $50 to $200, which lands most two course rings between $150 and $300 in materials. Trapezoid blocks lock into a curve without any cutting, so a 36 inch inside diameter takes roughly 8 blocks per course.
The insert ring is the part people skip and regret. Without it the inner faces spall, and by the third winter you are restacking.
3. Skip the built in stone pit, most cottage yards do better with a portable one
Here is the unpopular version. A permanent stone pit is the default advice, and for a small cottage yard it is usually the wrong call.
Built in means one spot forever. It means the pit sits cold and ugly for seven months, it blocks the lawn mower, and HomeGuide puts custom built ins at $325 to $2,000 against $75 to $300 for a portable steel pit. A Solo Stove or Sunnydaze bowl moves to the sheltered corner in November, comes indoors to the shed in January, and lets you test three locations before you commit to any.
Commit to gravel. Stay flexible on the fire.
📌 Good To Know
Build the base this year, buy the portable pit, and live with it for one full fall. If you still want stone next spring, the prepped gravel pad is exactly what a mason needs anyway. Nothing gets wasted.
4. Ring a sunken pit with a low seat wall if you are going permanent
Permanent costs more than people expect, so price it honestly before you dig.
A sunken pit with built in seating runs $3,000 to $8,800 installed per HomeGuide, and a stone or brick sitting wall alone is $40 to $120 per linear foot. A 10 foot arc of wall is therefore $400 to $1,200 before the pit itself. That is rung three of the Fire Pit Ladder, and it buys something a portable never will: seating for nine that never blows over, never needs cushions hauled in, and reads as part of the garden in every season.
Keep it low, 18 inches, so it doubles as a plant shelf. Follow the outdoor fire safety guidance from the U.S. Fire Administration, which puts fire pits at least 10 feet from your home or anything that can burn.
| Portable pit + gravel | Sunken pit + seat wall |
|---|---|
| $75 to $300 for the pit | $3,000 to $8,800 installed |
| Moves in a single trip | Fixed for the life of the yard |
| Seats as many as you own chairs | Seats 8 to 10 with nothing to store |
| Usually no permit | Often needs one, call the city first |
5. Curve a salvaged cedar bench around one third of the circle
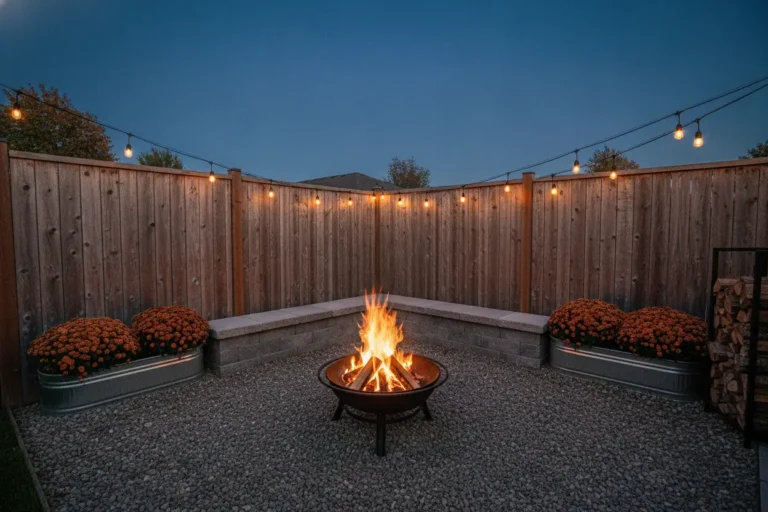
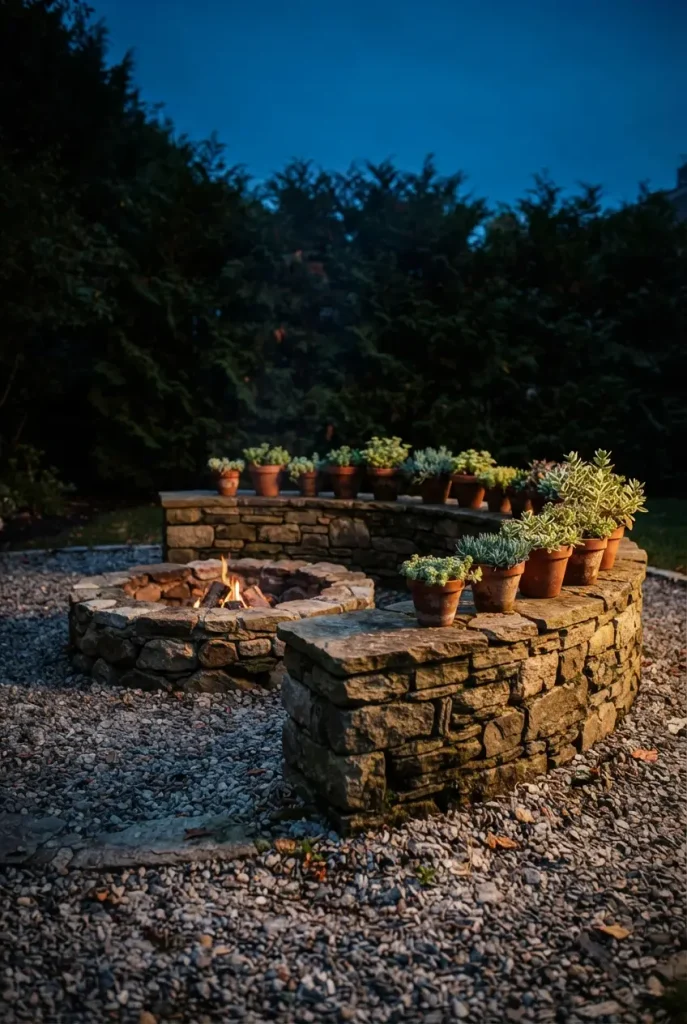
Salvaged cedar gives you the weathered cottage look on day one instead of year four. Two 8 foot 2×10 cedar boards on four cinder block piers, set in a shallow arc, seat four people for well under $150.
Arc it around roughly one third of the pit and leave the rest for chairs. A full ring of built in bench looks like a campground, and it traps smoke on the far side where nobody can move away from it.
Sand the sit surface only. Leave the edges rough.
Build the bench arc
6. Pull five Adirondack chairs around it, not six
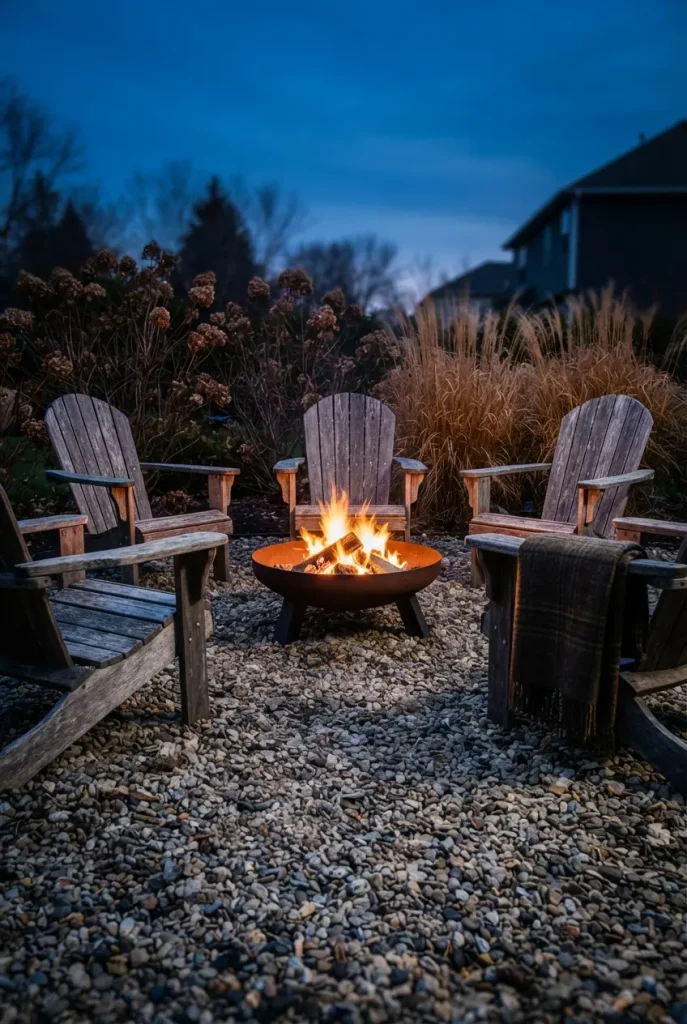
Odd numbers read as a gathering. Even numbers read as a waiting room, and the difference is real once you photograph the space.
Five chairs also leave a natural gap, which is where the smoke goes and where people walk in. Polywood recycled plastic holds color through a wet Zone 6 winter without a single coat of anything. Painted wood does not, and you will be sanding by year three.
Pull them close. Most people set chairs 6 or 7 feet back out of caution, then spend the evening shouting across a fire nobody can feel.
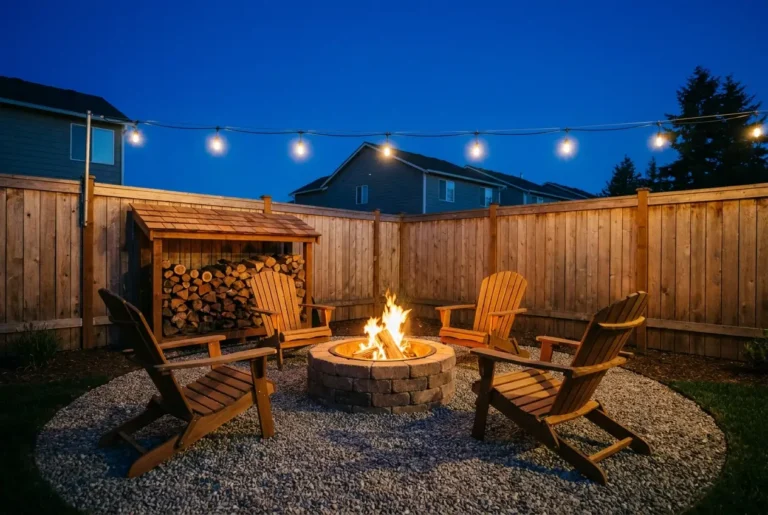
Five chairs, 3 to 4 feet back from the pit edge, with one gap left open.
Recycled plastic or teak, so nothing comes indoors in October.
A closed ring of six matching chairs with no way in.
Fabric slings and foam cushions that soak up every October fog.
7. Run café bulbs on a guide wire so the light sits above the smoke
Overhead light changes the room more than any other 40 dollars you will spend out here. Firelight alone only reaches knee height, so faces stay dark and people drift indoors by eight.
Run a stainless guide wire between the house eave and a 4×4 post or a mature trunk, then hang the strand from the wire with S hooks rather than stapling it to the fence. Brightech and Feit both sell shatterproof outdoor strands in 24 and 48 foot lengths. Ten feet of drop height is the sweet spot, high enough to clear the smoke column, low enough to feel like a ceiling.
⚠️ Watch Out
Use outdoor rated, UL listed lights and cords on a GFCI outlet. Anything beyond plugging into an existing outlet is a job for a licensed electrician.
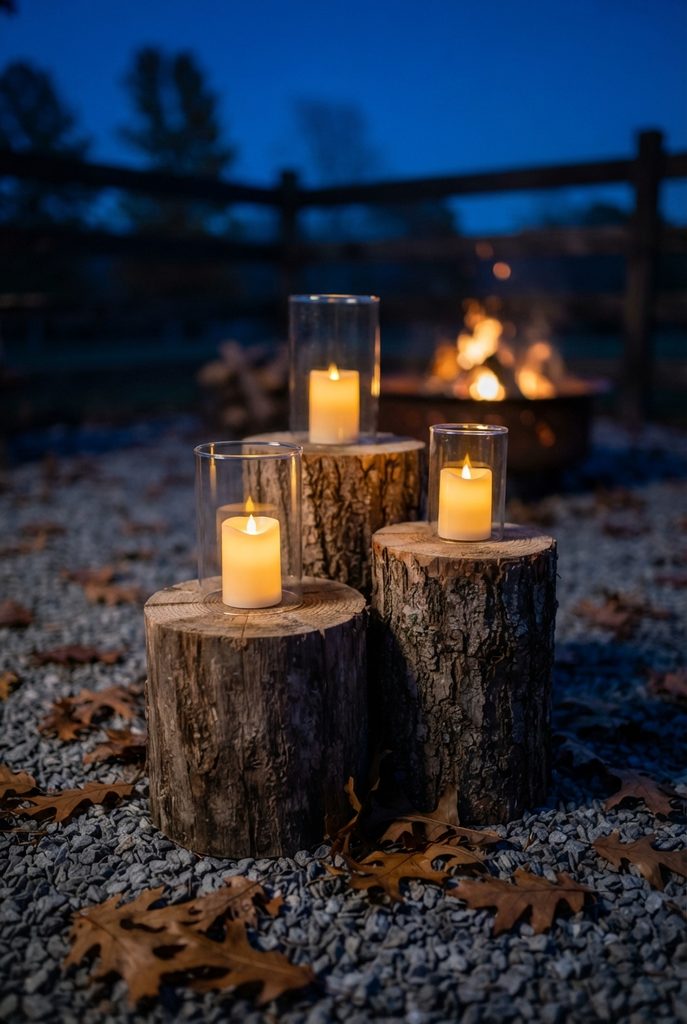
8. Set lanterns on stumps at knee height for the light firelight misses
Lanterns do a job string lights cannot. They fill the dead zone between the fire and the chairs, which is exactly where people set drinks down and miss.
Cut three rounds from a fallen limb at 10, 14, and 18 inches tall. Group them off center, never in a neat row. Top each with a glass hurricane or a battery pillar, and the whole group costs less than one store bought lantern. Plenty of the dollar store outdoor decor finds that look cheap on a table look genuinely good on raw wood at knee height.
Battery, not real flame, on anything within reach of a blanket.
Light at three heights, overhead, knee, and ground, is what separates a yard that people linger in from a yard they visit for twenty minutes.
9. Plant the ring in grasses and sedum that still look alive in November
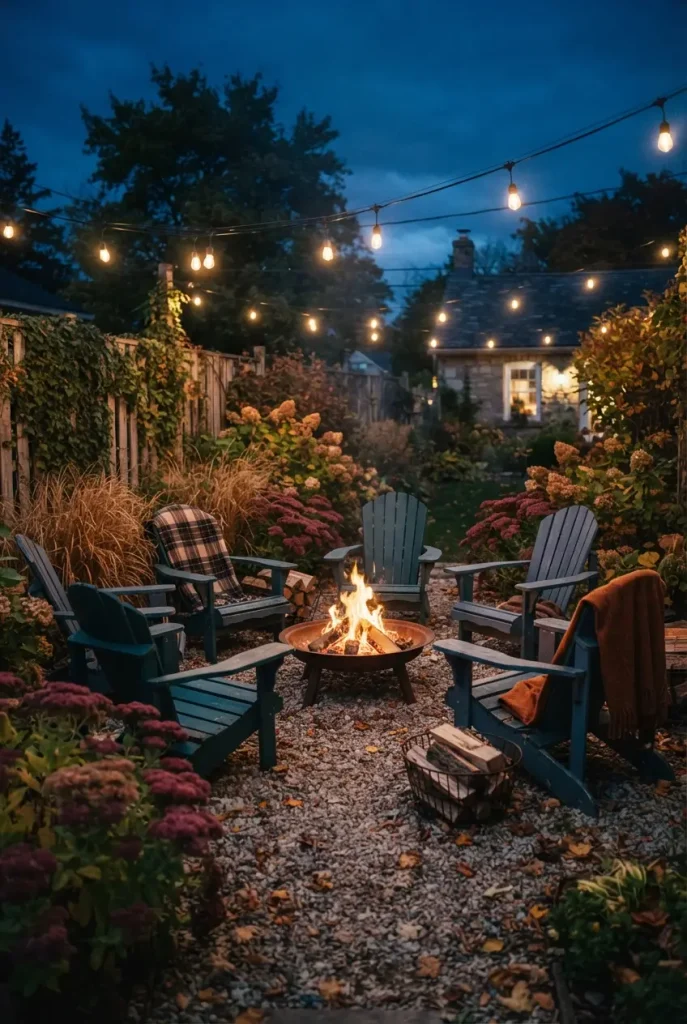
Grasses catch the last light and the firelight both, which is why they belong here more than anywhere else in the garden. Little bluestem turns copper in October and holds that color into January. Autumn Joy sedum goes rust brown and stands up through snow. Both are reliable across Zones 5 through 9, though it is worth confirming your USDA plant hardiness zone with a zip code search before you order anything.
Plant them 4 to 6 feet out from the pit edge, never closer. Sparks travel, and dry grass is dry grass.
Resist the urge to cut everything back in fall. The dead stems are the entire point.
Plant grasses and sedum in fall, at least 4 feet back from the pit edge.
Water deeply once a week until the ground freezes, then leave them alone.
Cut everything back in late March, not October. You keep the winter shape and the birds keep the seed.
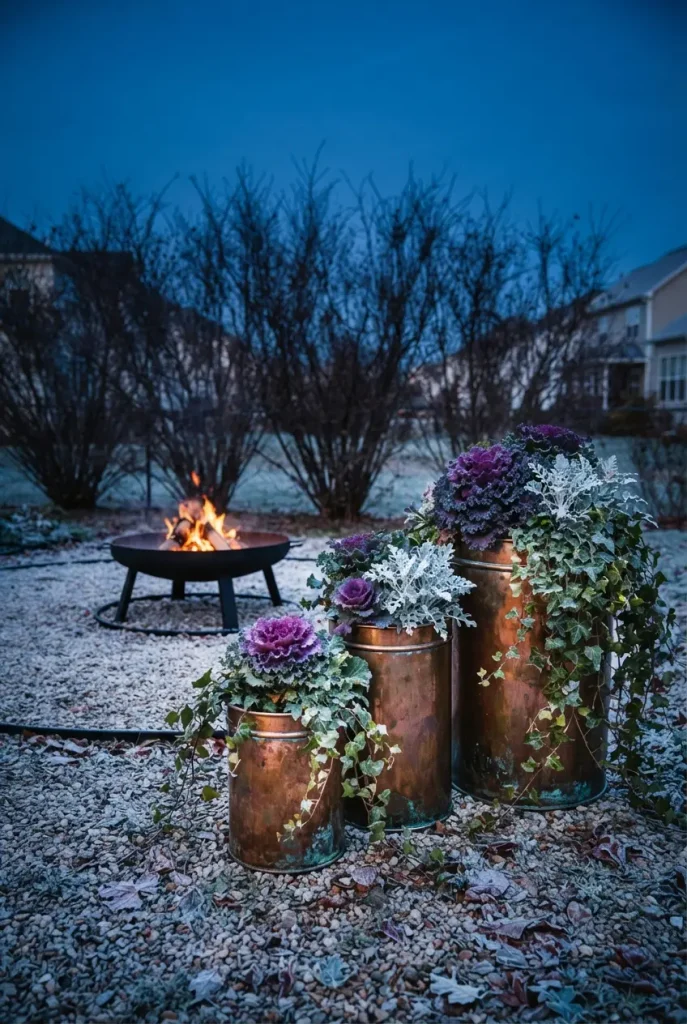
10. Swap the grocery store mums for copper pots of ornamental kale
Copper pots go the opposite direction from everything else in fall. As the garden browns out, the metal brightens, and by December a row of them reads as deliberate rather than leftover.
Ornamental kale, dusty miller, and a trailing ivy hold shape down to about 20°F, well past the week most mums give up. Bloem and terracotta both work, though unglazed clay will crack if you leave it full of wet soil through a hard freeze.
Three pots, three heights, one side of the fire circle only.
Six grocery store mums in their black nursery pots, bought in September, crisp and brown by Halloween.
Three copper planters of kale and ivy at staggered heights, still holding shape in December, catching firelight every night.
11. Stack the firewood on the windward side and let it work as a wall
Stack your wood where the wind comes from. A 4 foot tall row of split hardwood blocks the draft that makes October evenings miserable, and it puts the fuel two steps from the fire instead of across the yard.
Keep it off the ground on a rack or a pair of 4x4s, cover only the top, and leave the sides open so it keeps drying.
- ▸Seasoned hardwood only. Green wood smokes, pops, and throws more sparks.
- ▸Never softwood scraps or anything painted, treated, or pressure treated.
- ▸Buy local. Hauling firewood across counties moves pests with it.
- ▸Keep the stack at least 10 feet from the pit and from the house wall.
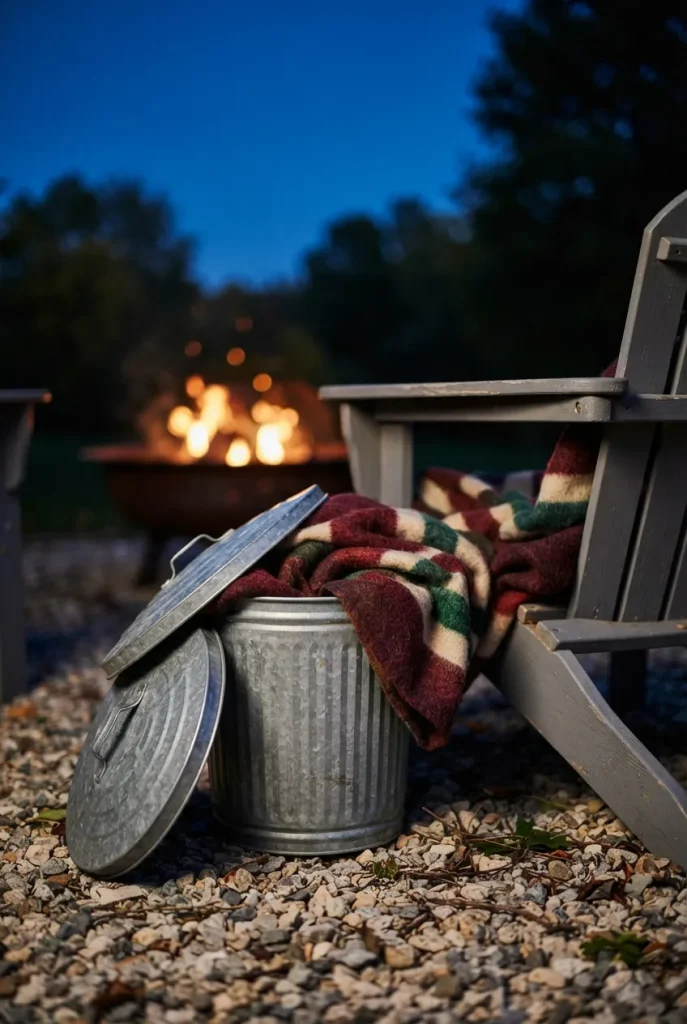
12. Park a lidded basket of wool blankets within arm’s reach
Nobody stays outside past the first shiver, and the walk indoors for a blanket is where the evening ends. A galvanized bin or a lidded seagrass basket set beside the chairs solves it for about $25.
Wool over fleece, every time. Fleece is synthetic, and a drifting ember will melt a hole straight through it while wool chars and self extinguishes. That is not a small distinction three feet from an open fire.
Lid matters as much as the basket. Damp blankets do not get used twice.
| Wool blanket | Fleece throw |
|---|---|
| Chars and self extinguishes when an ember lands | Melts through on contact |
| Still warm when slightly damp | Cold and clammy once damp |
| Costs more, lasts a decade outside | Cheap, pills and thins in two seasons |
13. Give every chair a surface at arm height
Mugs need somewhere to go, and gravel is not it. A cup set on stone tips over roughly once an evening, which is how cushions get soaked and how the good mugs die.
Tuck one small surface between every two chairs. A log round cut flat, a folding wooden tray table, an overturned terracotta pot with a paver on top. Height should land between 18 and 22 inches, just under the chair arm, so you can set a drink down without leaning forward.
Cheap, ugly, and functional beats matched and useless here.
14. Build a s’mores tray that lives in the house and comes out in one trip
Cast iron beats a cardboard box of supplies, because the tray is what makes the fire happen on a weeknight instead of only on Saturdays.
Load one enamel or wooden tray and keep it on a shelf by the back door. Everything for four people fits, and the whole setup goes out and comes back in a single trip, which is the actual barrier most evenings.
What lives on the tray
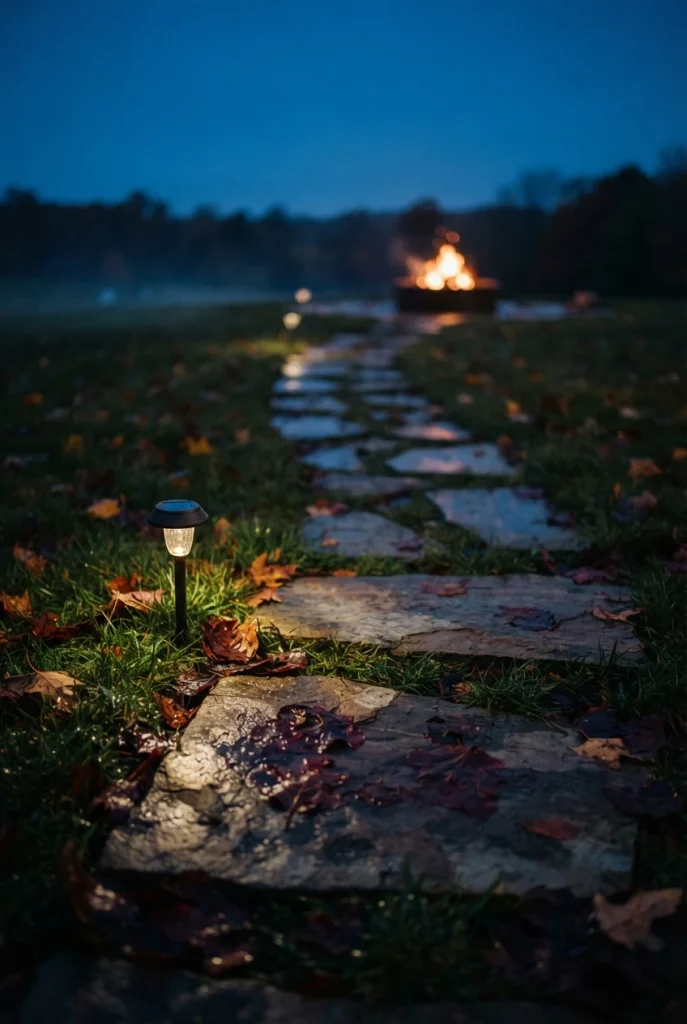
15. Lay stepping stones so nobody crosses wet grass in the dark
Wet grass in October is the quiet reason a fire pit goes unused. Twelve feet of soggy lawn between the back door and the gravel, in the dark, in slippers, and the evening simply does not happen.
Six to eight flagstones or 16 inch concrete pavers fix it for about $40. Space them 24 inches center to center, which is a natural stride, and set each one flush with the soil so the mower rides straight over.
Stake two low solar path lights at the first and last stone. Not the whole run, just the ends.
Set stones flush with the soil, 24 inches center to center.
Light only the first and last stone, so the path reads without glare.
Stones proud of the grass, which catch every mower blade and every toe.
A solar light at every stone, which turns a garden path into a runway.
16. Close one side with a woven panel instead of fencing the whole yard
Privacy matters more once you are sitting down, because a seated sightline is far lower than a standing one. You rarely need a full fence. You need one 6 foot panel in the right place.
Willow or reed screening on a simple cedar frame costs a fraction of fencing and reads as garden rather than barrier. Set it on the side where a window or a road looks in, and plant a clump of tall grass at each end so it stops looking like a panel. More of that logic sits in our roundup of cheap backyard privacy ideas.
Keep any screening well back from the fire, and never downwind of it.
- ▸Sit in the chair first, then look around. Screen only what you actually see.
- ▸One 6 foot panel usually beats 30 feet of fence, at a tenth of the cost.
- ▸Soften both ends with grasses so the screen stops reading as an edge.
- ▸Reed and willow are dry plant material. Keep them far from sparks.
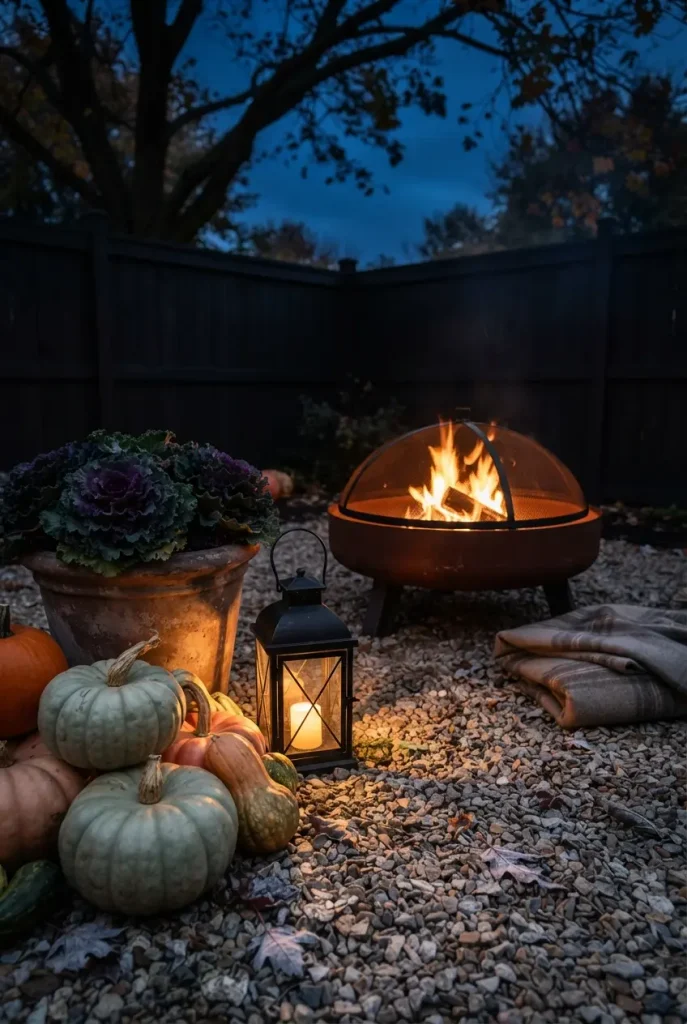
17. Decorate for fall with things that will not catch
Dried cornstalks, straw bales, and paper lanterns are the standard fall backyard kit, and around an open fire they are genuinely a bad idea. Every one of them is kindling.
Go with what holds up instead. Pumpkins and gourds are wet and dense. Potted kale, mums in heavy clay, iron lanterns, wool, and canvas all sit safely near heat. Keep the whole arrangement outside the 10 foot clearance the U.S. Fire Administration gives for fire pits, and use a metal spark screen over any wood burning fire.
Safe decor is still pretty decor. It just has to be the kind that shrugs off an ember.
The fall styling that lasts is the fall styling that is wet, dense, or made of metal. Anything dry enough to rustle is dry enough to light.
Frequently Asked Questions
How far should a fire pit be from the house?
The U.S. Fire Administration says to use fire pits, chimneys, and outdoor fireplaces at least 10 feet away from your home or anything that can burn. HomeGuide’s installers go further for wood burning pits, recommending 15 to 30 feet, and 10 to 15 feet for gas. Your local code may set its own minimum, so check with your city before you place anything permanent.
How much does a backyard fire pit cost?
Lawn Love puts the 2026 national average at $830, with a typical range of $250 to $2,200 including materials and labor. A pure DIY build runs $150 to $300. HomeGuide prices portable metal pits at $75 to $300, prefab kits at $200 to $700, and custom built ins at $325 to $2,000. A sunken pit with built in seating jumps to $3,000 to $8,800.
What do you put under a fire pit on grass?
Never set a pit directly on lawn. Build a base of pea gravel, pavers, or decomposed granite at least 6 inches wider than the pit on every side. Dig down about 4 inches, lay landscape fabric, then fill. Pea gravel runs $1 to $3 per cubic foot, so an 8 foot circle costs roughly $17 to $51 in stone.
Do you need a permit for a backyard fire pit?
It depends entirely on your city and on what you are building. Portable pits usually need no permit, while permanent structures, gas lines, and anything attached to the house typically do. Many municipalities also run seasonal burn bans. Call your local building department or fire department before you dig footings, and ask about size limits and setback rules at the same time.
Are smokeless fire pits worth it?
For a small cottage yard, usually yes. The double wall design burns the smoke rather than sending it at whoever is downwind, which matters a lot when chairs sit 3 or 4 feet away in a fenced space. They also move indoors for winter storage. The tradeoff is fuel: they want dry, seasoned, fairly small split wood to work properly.
What wood burns best in a backyard fire pit?
Seasoned hardwood, meaning oak, hickory, ash, or maple dried for at least six months. It burns hotter, longer, and throws far fewer sparks than green or softwood. Never burn pressure treated lumber, painted wood, pallets, or trash, since all of them release toxic smoke. Buy firewood locally rather than hauling it in, because moving wood spreads pests.
Can you use a fire pit in fall and winter?
Yes, and that is when it earns its keep. Cold air makes the heat feel better, and the bugs are gone. What you need is a dry base so the ground does not turn to mud, a windbreak on the prevailing side, wool blankets within reach, and a lit path from the door. Check for a local burn ban first, since dry windy spells often trigger one.
Your fall fire pit, in one weekend
Start with the gravel. Everything else on this list, the seating, the lights, the pots, the path, gets easier once the base is right, and it is the one step that turns a nice summer idea into something you will actually sit in through November.
Pick three ideas, not seventeen. A gravel circle, five chairs, and a strand of café bulbs will carry you all season.
Save this one to your fall backyard board so it is there when the first cold evening hits and you are trying to remember how deep to dig.