

Your backyard has that one sad strip of patchy grass. Maybe it’s the side of the house where nothing grows, or the corner where the kids’ soccer goal used to live. You want tomatoes, basil, zinnias, something alive and pretty, but the soil is clay or rocks or mystery construction fill. A DIY raised garden bed fixes all of that in a single Saturday.
This guide gives you actual plans. Real cut lists. Real dollar amounts. Real screw counts. We’ve built four of these at our place over the last three springs, and I’ll tell you exactly what worked, what wasted money, and what you can skip.
By the end of this post you’ll have a 4×8 cedar bed (or a smaller version, your call) built, filled, and ready for transplants. We’re organizing this guide by build stage, from planning to planting, so you can scroll to the step you’re actually on.

Who This Post Is For
This is for you if you fit any of these:
- Renters and HOA dwellers who need a build that doesn’t disturb the ground (we cover a moveable version below).
- First-time gardeners who want one solid bed instead of ten Pinterest tabs of overwhelm.
- Budget-conscious DIYers working with under $150 total.
- Small-space gardeners with patios, side yards, or balconies as narrow as 36 inches.
- Homeowners ready to invest in a 10-year cedar build.
If you want pure inspiration without the saw, our cheap raised garden bed ideas post is a softer starting point.
Why a Raised Bed Beats In-Ground Gardening for Most People
Raised beds drain better, warm up earlier in spring, and let you bypass whatever weird soil you inherited. You bend less. You weed less. The yield per square foot is usually higher because you control the soil mix from day one.
A 4×8 cedar bed at 12 inches deep gives you 32 square feet of growing space, which is enough for one family’s worth of summer tomatoes, peppers, herbs, and a row of lettuce. Two beds doubles that and still fits a small backyard.
According to the University of Maryland Extension, raised beds also reduce soil compaction because you never step on the growing area, which keeps roots happy all season.
The Plan: 4×8 Cedar Raised Garden Bed (12 Inches Deep)
Here’s the bed we’re building. You can scale this down to 4×4 or 3×6 by trimming the long boards, the rest of the cut list stays the same.
Final dimensions: 48 inches wide, 96 inches long, 12 inches tall. Lifetime: 8 to 12 years with untreated cedar, longer if you oil it annually. Skill level: Beginner. If you can drive a screw, you can build this. Time: About 3 hours start to finish, plus filling.
Why These Dimensions
Four feet wide means you can reach the middle from either side without stepping in. Eight feet long is the standard cedar board length at Home Depot and Lowe’s, so zero waste on rip cuts. Twelve inches deep handles 90% of home garden crops (more on depth in a minute).
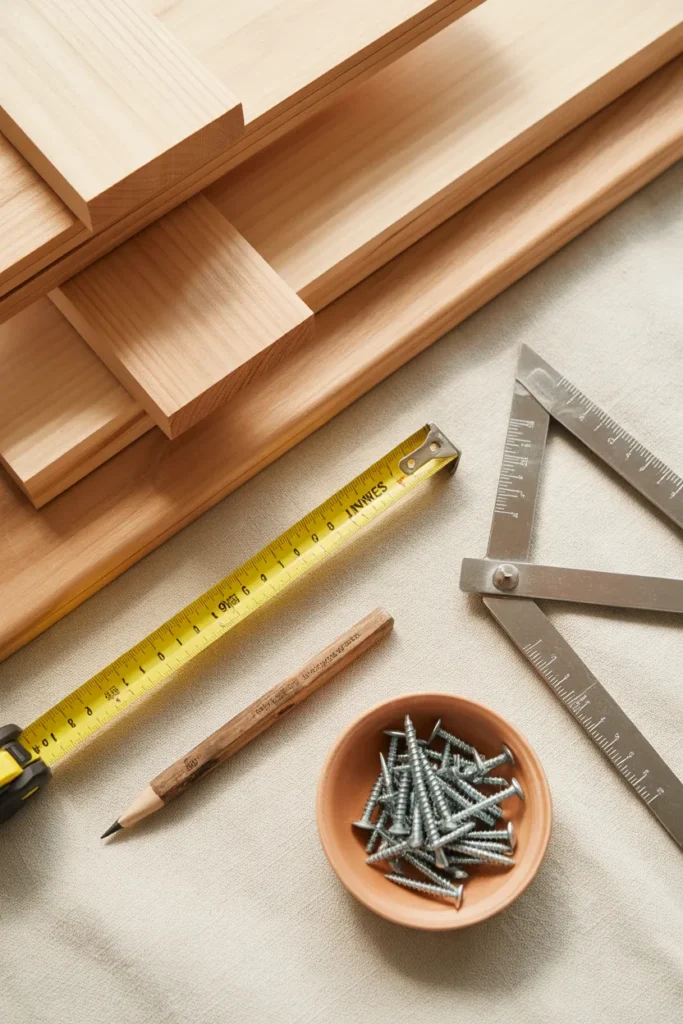
Supply List (Screenshot This)
This is your full shopping list for the 4×8 build. Prices reflect spring 2026 averages at Home Depot and Lowe’s in the US.
Lumber
- 4 cedar boards, 2 inch by 6 inch by 8 feet ($22 each = $88)
- 2 cedar boards, 2 inch by 6 inch by 4 feet (or 1 eight-footer cut in half)
- 1 cedar 4×4 post, 8 feet long, cut into four 12-inch corner posts ($28)
Hardware
- 1 box of 3-inch exterior deck screws, galvanized or stainless ($9)
- 1 roll of 1/2-inch hardware cloth, 4 feet by 10 feet ($24, optional but recommended for gopher zones)
- 1 staple gun and 3/8-inch staples ($15 if you don’t own one)
Tools you probably already have
- Drill with bit set
- Tape measure
- Pencil
- Carpenter’s square
- Safety glasses
- Work gloves
Total cost for the bed itself: about $125 to $150 depending on cedar prices in your region.
Soil and fill is a separate budget conversation. We’ll cover that next.
Step-by-Step: How to Build the Bed
Step 1: Cut Your Lumber (or Have the Store Cut It)
Most Home Depot and Lowe’s locations will make straight cuts for free or for under a dollar per cut. Take this list to the lumber counter:
- 2 boards at 96 inches (long sides, no cut needed if you bought 8-footers)
- 2 boards at 45 inches (short sides, cut from one 8-foot board)
- 4 corner posts at 12 inches each (cut from one 4×4 post)
Why this works: the short sides are 45 inches, not 48, because the long sides cap the corners. This gives you a clean 48-inch outside width.
How to execute: double-check every measurement before the saw bites. Cedar is forgiving but not free.
Step 2: Pre-Drill Pilot Holes
Cedar splits if you drive screws cold. Pre-drill a 1/8-inch pilot hole at every screw location. Plan on 3 screws per board into each corner post, so 12 pilot holes per corner, 48 total.
Why this works: pilot holes prevent the kind of split that ruins a $22 board on the last screw.
How to execute: mark each hole with a pencil, 3/4 inch in from the edge, evenly spaced.
Step 3: Build the Long Sides First
Lay one 96-inch board on the ground. Stand a 12-inch corner post at each end, flush with the top edge. Drive 3 screws through the board into the post. Repeat for the second long side.
Why this works: building the long sides as flat panels first is way easier than wrestling all four sides standing up.
How to execute: keep the post flush with the top of the board, not the bottom. The bottom of the post will sit slightly proud, which is fine and actually helps anchor the bed.
Step 4: Attach the Short Sides
Stand both long-side panels up, parallel to each other, 45 inches apart. Slide a 45-inch board between them, screw it to the corner posts on both ends. Repeat at the other end.
You now have a rectangle.

Step 5: Add Hardware Cloth Bottom (Optional but Smart)
If you have gophers, voles, or moles in your area, this step saves your harvest. Flip the bed upside down. Roll out 1/2-inch hardware cloth across the bottom. Staple it to the inside of the frame every 4 inches.
Why this works: rodents will tunnel up into raised beds and eat root crops from below. Hardware cloth blocks them while letting earthworms and water through.
How to execute: use heavy-duty staples and don’t skimp. Re-flip the bed when done.
Step 6: Place and Level the Bed
Carry the empty bed to its final spot. The bed must be in at least 6 hours of direct sun for tomatoes, peppers, and most vegetables. Lettuce and herbs tolerate less.
Check level on all four sides. Slide flat rocks or scraps of cedar under low corners. A bed that sits crooked drains crooked.
Step 7: Line It (Optional)
If you used hardware cloth, you don’t need a liner. If you skipped the cloth, you can staple landscape fabric inside the bottom edge to slow soil washout. Don’t line the entire interior, you want roots to reach the soil below.
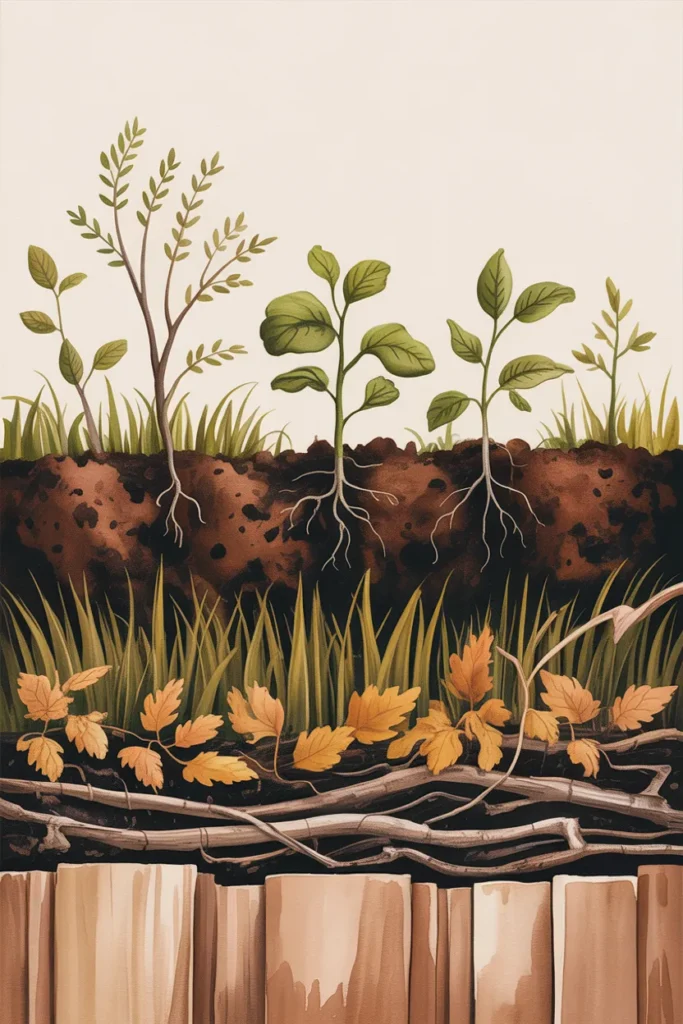
How to Fill Your Raised Bed Without Going Broke
This is the step competitors skip, and it’s where most beginners overspend by $200.
A 4x8x12-inch bed needs 32 cubic feet of fill. If you buy 32 cubic feet of bagged garden soil at $8 per 1.5-cubic-foot bag, you’re looking at about $170 just in soil. There’s a better way.
The Lasagna Fill Method (My Pick)
Layer from the bottom up:
- Bottom 4 inches: cardboard, then small branches, twigs, untreated wood chips. Free.
- Middle 4 inches: grass clippings, fall leaves, kitchen scraps, aged compost. Free or cheap.
- Top 4 inches: quality bagged garden soil mixed 50/50 with compost. About $50 to $60.
Total fill cost: $50 to $70 instead of $170. The bottom layers break down into rich compost over the first season, feeding your plants for free.
Budget vs Splurge Fill Comparison
| Approach | Cost for 4x8x12 Bed | Best For |
|---|---|---|
| Budget: lasagna method | $50 to $70 | Patient gardeners, year-1 leafy greens |
| Mid-range: 50/50 topsoil and compost from a local landscape supplier | $90 to $110 | Most home gardeners |
| Splurge: all bagged premium raised bed mix from Home Depot | $160 to $200 | Renters who can’t source bulk, or true plug-and-play |
Crop-to-Depth Matching Chart (Save This)
Twelve inches handles most crops, but not all. Here’s what fits in what depth.
| Crop | Minimum Soil Depth |
|---|---|
| Lettuce, spinach, herbs, radishes | 6 inches |
| Bush beans, kale, chard, garlic, onions | 8 to 10 inches |
| Tomatoes, peppers, cucumbers, zucchini | 12 inches |
| Carrots (long varieties), parsnips, potatoes | 14 to 18 inches |
| Asparagus, deep-rooted perennials | 18 to 24 inches |
If you want long carrots or potatoes, stack two 2×6 boards for a 12-inch tall bed plus a second course for 24 inches total. The cut list doubles, the build steps stay the same.
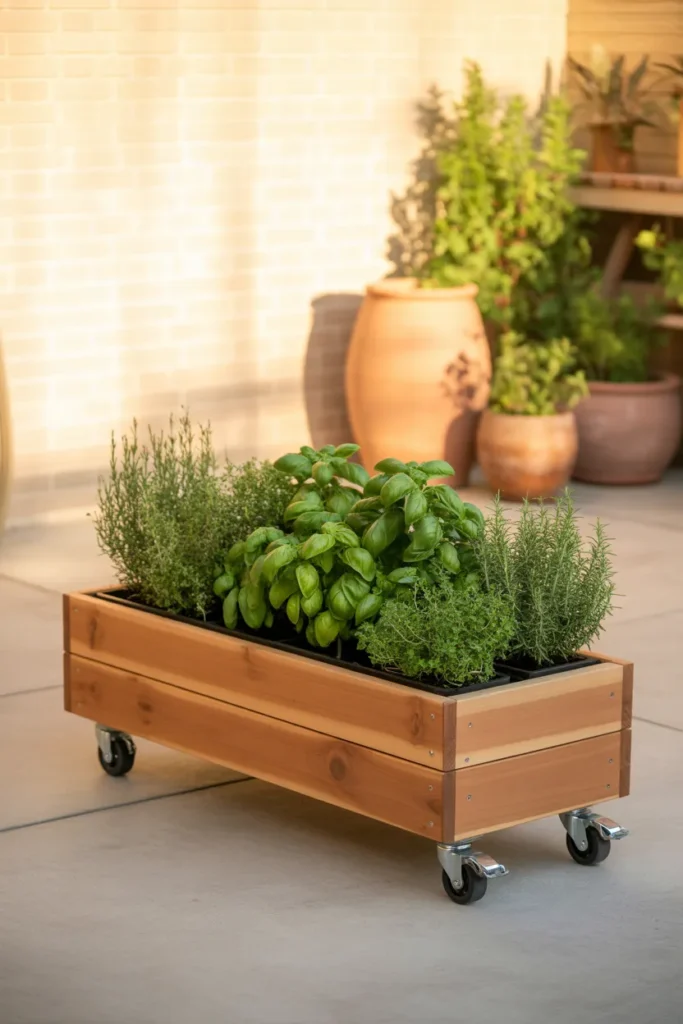
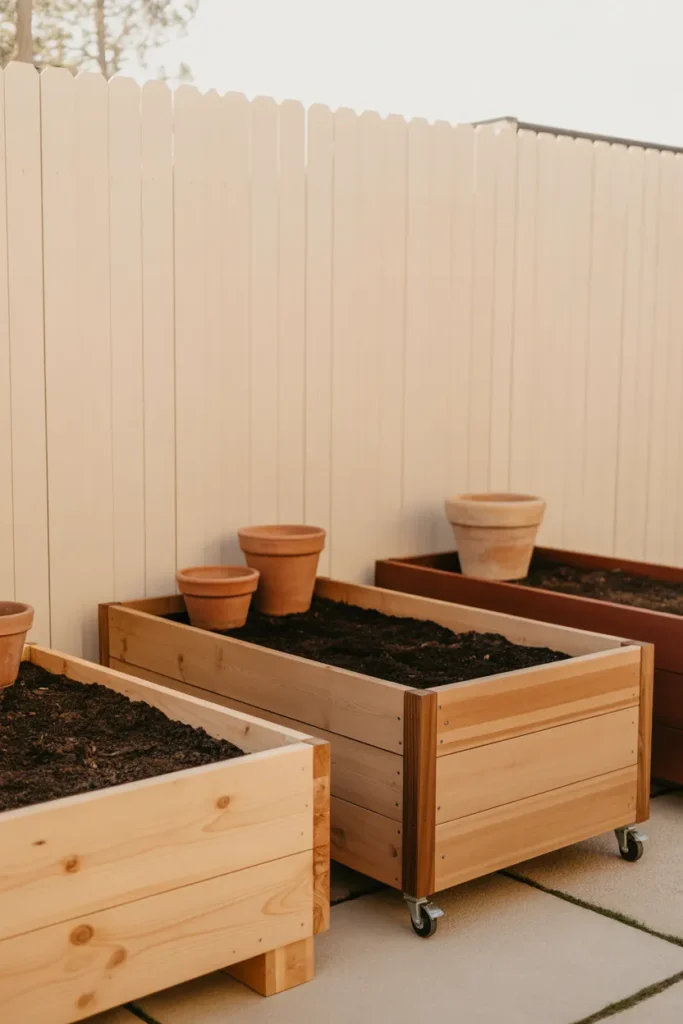
The Rental-Friendly Moveable Version
If you rent or your HOA frowns on permanent garden structures, build the same bed but add 4 heavy-duty locking caster wheels under the corner posts. Use a 3×6 footprint instead of 4×8 to keep the loaded weight manageable.
Why this works: you can roll the bed off a patio, off a balcony, or away from a deck stain job. When you move out, the bed comes with you.
How to execute: pick casters rated for 300 pounds each minimum. A loaded 3×6 bed at 12 inches deep weighs about 900 pounds wet, so 4 casters at 300 pounds gives you a safe margin. No drilling into your patio, no holes in the lawn, no HOA letters.
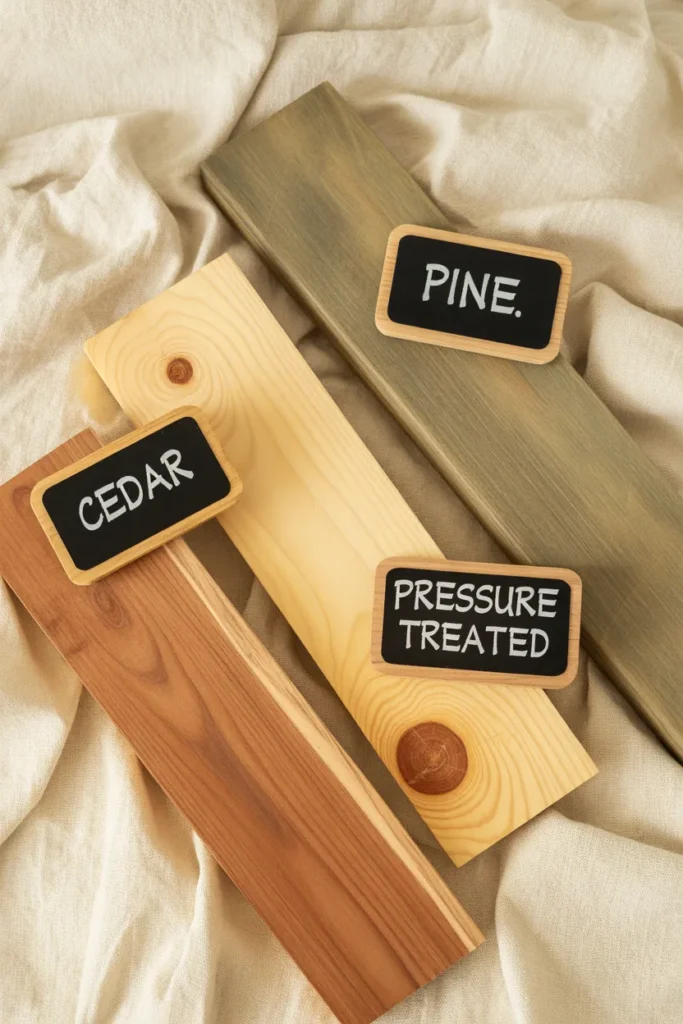
What Wood to Use (and What to Avoid)
Best: untreated cedar, redwood, or black locust. Naturally rot-resistant, food-safe, last 8 to 15 years.
Good budget pick: untreated Douglas fir or pine. Lasts 4 to 6 years. Costs about half what cedar costs.
Avoid: old pressure-treated lumber from before 2003 (CCA-treated, contains arsenic). Modern pressure-treated wood (ACQ or copper azole) is considered safer by the EPA but still triggers debate among organic growers. If you’re growing food and want to skip the debate, stay untreated.
Also avoid: railroad ties (creosote), painted pallets (unknown chemicals), and any reclaimed wood you can’t trace.
Common Mistakes to Avoid
I’ve made every one of these. Don’t repeat them.
- Skipping the level check. A crooked bed drains unevenly, and your far end either drowns or stays bone dry.
- Building too wide. Anything wider than 4 feet means you’ll step inside to weed, which compacts the soil.
- Filling with pure topsoil. Topsoil alone compacts hard and starves plants. Always mix with compost.
- Placing it in part shade. “Six hours of sun” is the floor for vegetables, not the goal. Aim for 8 hours.
- Using treated wood without checking the year. Pre-2003 treated wood is a hard no for food crops.
- Forgetting drainage. Your bed needs an open bottom or generous holes. Sealed-bottom builds rot.
- Building one giant bed instead of two small ones. Two 4×4 beds give you a path between them and twice the edge access.
Maintenance: Keeping Your Bed Going for a Decade
Once a year, in early spring, top the bed with 2 inches of fresh compost. Every 3 years, rub the exterior with raw linseed oil or a food-safe wood sealer to slow weathering.
Watch for the corner posts first. They rot before the side boards because they sit in damp soil contact. If a post fails in year 7, replace just that post, not the whole bed.
For more starter-friendly tips, our raised garden beds for beginners post covers the first-season basics in detail.

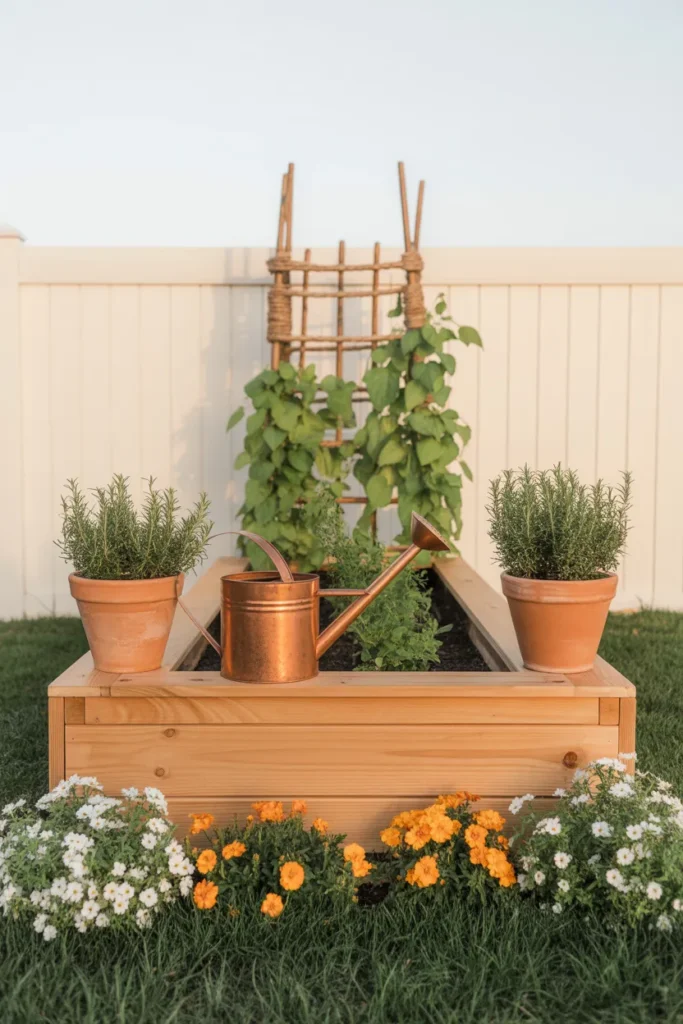
Styling Your Raised Bed Like a Pinterest Garden
A bed is a bed. A styled bed is a focal point. Pull these elements:
- A pair of matching terracotta pots at the corners with trailing herbs.
- A copper or galvanized watering can left intentionally on the edge.
- A small chalkboard plant marker for each row.
- A natural jute trellis on the north side for climbing beans or cucumbers.
- A border of low cottagecore flowers (alyssum, marigolds) in front of the bed.
This pulls a Modern Farmhouse and Cottagecore crossover that photographs beautifully in warm afternoon light.
Budget vs Splurge: The Whole Bed
| Build Tier | Materials | Total Cost (Bed Only) |
|---|---|---|
| Budget: pine 2×6 boards, no hardware cloth, no caster wheels | Pine, basic deck screws, cardboard liner | $55 to $70 |
| Mid-range: cedar 2×6 boards, hardware cloth bottom | Cedar, galvanized screws, hardware cloth | $125 to $150 |
| Splurge: cedar with thicker 2×8 boards, decorative cap rail, hardware cloth, casters | Premium cedar, stainless screws, cap rail, locking casters | $280 to $350 |
A West Elm or Crate & Barrel raised bed in metal or composite runs $400 to $700, for reference. Your DIY mid-range build looks just as good and lasts longer.
FAQ
Is it cheaper to make your own raised garden bed?
Yes, almost always. A DIY 4×8 cedar bed costs about $125 to $150 in materials. Comparable pre-made cedar kits run $200 to $400, and metal kits from Vego or Birdies run $250 to $450. The DIY savings widen the larger you build.
What is the ideal depth for a raised garden bed?
Twelve inches is the sweet spot for most vegetables, including tomatoes, peppers, cucumbers, and zucchini. For long carrots, potatoes, or asparagus, go 18 to 24 inches. For lettuce and herbs only, 6 to 8 inches is enough.
Is 12 inches tall enough for a raised bed?
For 90% of home garden crops, yes. The exception is deep-rooted vegetables (long carrots, parsnips, potatoes, asparagus) which want 14 inches or more. If your bed sits on grass or open soil, the roots can reach down past the bed walls into the ground below, which gives you bonus depth for free.
What do I put on the bottom of a raised garden bed?
If your bed sits on dirt, leave the bottom open and add a layer of cardboard to suppress weeds. Add 1/2-inch hardware cloth between the cardboard and the frame if you have gophers or voles. If your bed sits on a hard surface like concrete, line the bottom with landscape fabric and drill 1/2-inch drainage holes every 6 inches in any solid bottom panel.
What wood should not be used in a raised garden bed?
Skip pre-2003 pressure-treated lumber (contains arsenic), railroad ties (creosote), painted or stained pallets, and any reclaimed wood with unknown history. Modern ACQ-treated lumber is EPA-approved but debated for food gardens. When in doubt, go untreated cedar, redwood, or pine.
How do I build a raised bed in a small space or rental?
Build a 3×6 or 4×4 version on locking caster wheels. No ground disturbance, no permanent install, fully moveable. Pick casters rated for 300 pounds each minimum since wet soil is heavy.
What is the budget version of this build?
Use untreated pine 2×6 boards instead of cedar, skip the hardware cloth, and fill with the lasagna method. Total cost drops to $55 to $70 for the bed plus $30 to $40 for soil. Pine lasts 4 to 6 years instead of cedar’s 10 plus.
What if I don’t have power tools?
Have Home Depot or Lowe’s cut every board for you at the lumber counter (free or under a dollar per cut). All you need at home is a basic cordless drill, which runs $40 to $60 at Walmart or Target. No saw required.
How long does this project take?
About 3 hours of active build time once your lumber is cut, plus 1 to 2 hours to fill and level. A motivated weekend morning gets you planting by lunch.
What is the most common mistake first-time gardeners make?
Planting too much, too early, in too little sun. Start with one bed, plant 4 to 6 crops you actually eat, and confirm 6 plus hours of direct sun before you build. Ambition is the enemy of harvests in year one.
Save This Post for Your Build Weekend
Pin the cut list and the supply list so you have them at the lumber counter. When your bed is done, send a photo, those before-and-afters never get old. If you want softer inspiration before you build, go read our cheap raised garden bed ideas post next, or if this is your first season gardening at all, our raised garden beds for beginners walk-through is the gentlest place to start.
Now go get the cedar. The tomatoes are waiting.
General gardening information only. For region-specific soil, water, or building code questions, check with your local US cooperative extension office or a licensed contractor.


