
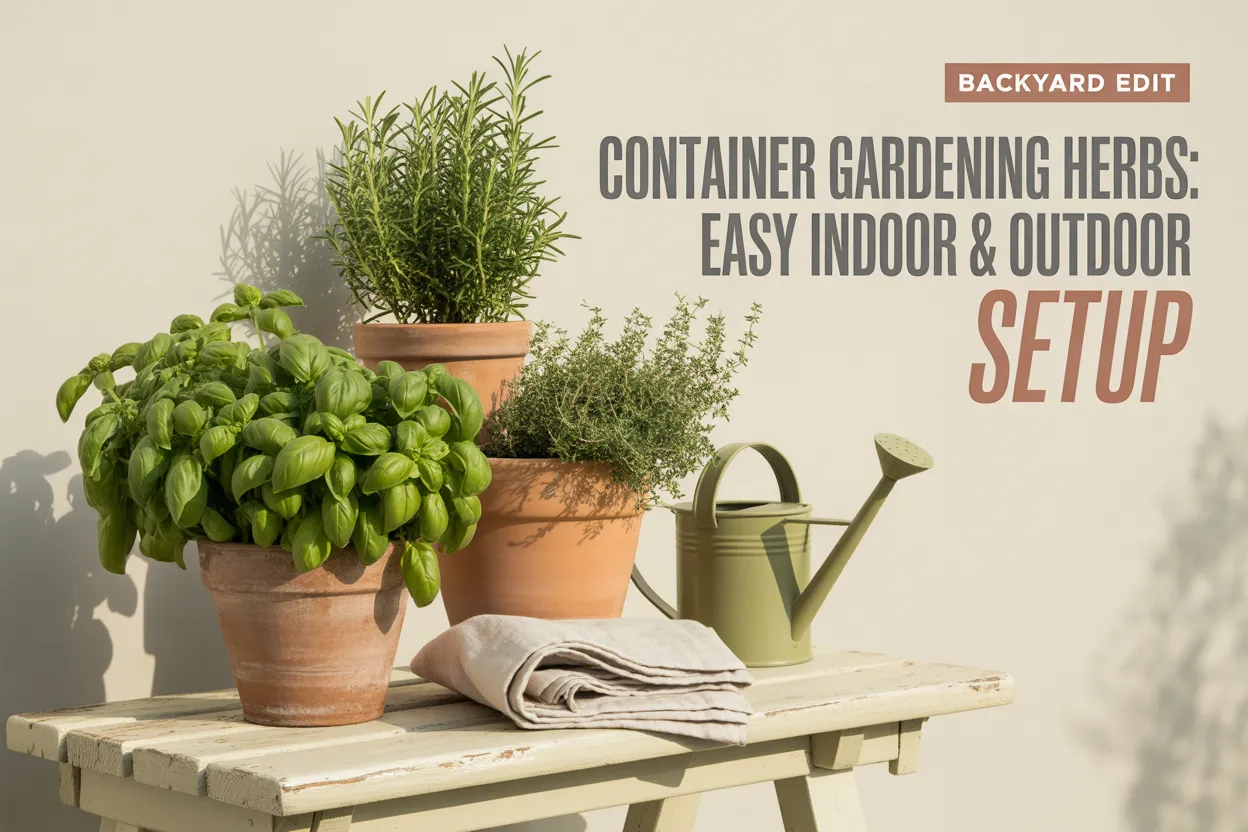
Your patio looks tired. A cracked plastic pot leans against the railing with last summer’s basil stems still hanging on, the concrete has that sad gray look, and every time you cook pasta you’re spending $4 on a sleeve of supermarket basil that wilts in three days. We’ve all stood there. The fix is smaller, cheaper, and prettier than you think.
Container gardening herbs is the easiest way to turn a balcony, patio, kitchen windowsill, or fire-escape ledge into a working herb garden you can actually harvest from. No tilling. No yard required. No landlord drama. Just a few smart pots, the right soil, and a handful of plants chosen so they don’t fight each other.
I’ve grown herbs in everything from a $4 Dollar Tree bucket to a glazed ceramic pot from West Elm, and after a decade of small-space gardening (a Brooklyn fire escape, then a Pennsylvania duplex, now a 90 square foot patio in zone 7a), I’ve narrowed the whole thing down to a system. This post organizes everything by price tier and skill level, so whether you’re working with $25 and a sunny windowsill or $200 and a full balcony, you’ll find the exact setup that fits.
Who This Guide Is For
This is for you if you fit any of these:
- Renters and apartment dwellers who can’t dig up a yard. Every idea here is no-drill, removable, and lease-friendly.
- Small-space gardeners working with a balcony, fire escape, kitchen window, or strip of patio under 100 square feet.
- Beginners who’ve killed a pothos and aren’t sure they can keep anything green. The herbs we’re starting with are forgiving.
- Budget-conscious cooks tired of throwing out $4 grocery store herb bunches.
- Cottagecore and modern farmhouse fans who want the look as much as the harvest.
If you’ve got a quarter acre and you’re planning a formal kitchen garden, this isn’t quite your post. (Though our guide on container gardening for beginners covers a lot of the same fundamentals if you want a starter primer.)
How This Guide Is Organized
We’re going by price tier first, then by herb behavior (sun lovers vs moisture lovers, annuals vs perennials). That order matters because most beginner advice skips the budget question and lands you with a $60 pot for a $3 plant. We’ll fix that.
Here’s the path:
- The 10 easiest herbs to grow in containers (with pot size in inches)
- Pot, soil, and drainage basics that 80% of beginners get wrong
- Herb pairings that actually thrive together
- Indoor vs outdoor setups
- Budget vs splurge container comparison
- Common mistakes (and how to skip them)
- FAQ + your Pinterest pin to save
Let’s plant.
The 10 Best Herbs for Container Gardening (Ranked by Easy and Useful)
Front-loading the highest-value list first because Pinterest readers bounce fast, and these are the herbs you’ll genuinely use in cooking. Each one includes what it is, why it works in a container, and how to grow it.
1. Basil (The Summer Workhorse)
What it is: A tender annual in the mint family, basil is the herb you’ll harvest most. Genovese is the classic Italian variety. Thai basil and lemon basil are fun upgrades once you’ve got the basics down.
Why it works in containers: Basil has shallow roots (6 to 8 inches deep is plenty) and grows fast. It loves heat, which means a sun-baked patio or south-facing window is its favorite place on earth.
How to grow it: Use a pot at least 8 inches wide and 8 inches deep per plant. Full sun, 6 to 8 hours minimum. Water when the top inch of soil feels dry. Pinch the top set of leaves once a week to keep it bushy. The second you see flower buds, snip them off, basil turns bitter the moment it bolts.
Pinterest tip: A single 12-inch terracotta pot with three basil plants makes one of the most-pinned herb shots online. Cluster them tight and they’ll fill in like a green pillow.

2. Rosemary (The Forever Herb)
What it is: A woody Mediterranean perennial with needle-like leaves and a piney aroma. Once it’s happy, it’s happy for years.
Why it works in containers: Rosemary actually prefers being slightly root-bound, and it tolerates drought beautifully, which makes it the most forgiving herb for anyone who forgets to water.
How to grow it: Use a pot 10 to 12 inches deep with excellent drainage. Terracotta is ideal because it wicks moisture away. Full sun, water only when the top 2 inches feel dry, and let it dry out fully between drinks. In zones 7 and colder, bring it indoors before the first frost.
3. Thyme (The Spiller)
What it is: A low-growing perennial with tiny aromatic leaves. English thyme and lemon thyme are the two to start with.
Why it works in containers: Thyme spills beautifully over the rim of a pot, which solves the “my container looks awkward” problem. It’s also drought-tolerant and pairs with rosemary and sage in the same pot.
How to grow it: Pot 6 to 8 inches deep, full sun, infrequent watering. Trim it back hard once a year in early spring and it’ll come back fuller.
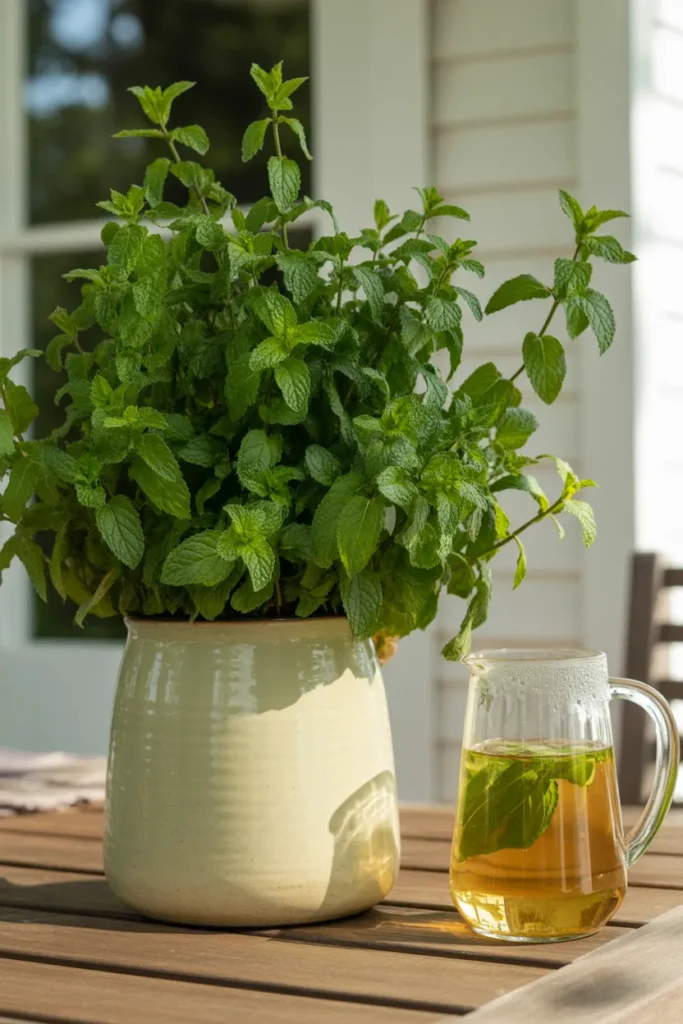
4. Mint (The One That Needs Its Own Pot)
What it is: A spreading perennial in too many varieties to count. Spearmint and peppermint are the workhorses. Chocolate mint and apple mint are fun if you’ve got room.
Why it works in containers: Containers are the only place you should grow mint, period. In the ground it’ll take over a yard in two seasons. In a pot it’s contained and gorgeous.
How to grow it: Always solo, never in a shared pot. Use an 8 to 10 inch pot, partial to full sun, keep the soil consistently damp. Mint is the one herb that likes wet feet.
5. Parsley (The Quietly Useful One)
What it is: A biennial (technically two-year cycle, but most growers treat it as annual) with flat-leaf Italian or curly varieties. Flat-leaf has more flavor.
Why it works in containers: Tolerates partial shade, which makes it perfect for the spot on your balcony that doesn’t get full sun. Looks lush and full all summer.
How to grow it: Pot 8 to 10 inches deep because parsley has a longer taproot than most herbs. 4 to 6 hours of sun, consistent moisture, harvest from the outside leaves first.
6. Chives (The Low-Maintenance MVP)
What it is: A perennial onion relative with hollow grass-like stalks and edible purple flowers in late spring.
Why it works in containers: Comes back year after year, multiplies on its own, and tolerates cold. The flowers are gorgeous in a pin shot.
How to grow it: Pot at least 6 inches deep, full to partial sun, average watering. Snip from the outside, leaving 2 inches of stalk so it regrows.
7. Oregano (The Pizza Herb)
What it is: A spreading perennial. Greek oregano is the variety with the strongest flavor.
Why it works in containers: Loves dry, well-drained soil. Spreads but stays controlled in a pot. Pairs with thyme and sage.
How to grow it: Pot 8 inches deep, full sun, sparse watering. Pinch the tips often to keep it compact.
8. Sage (The Pretty One)
What it is: A silvery-leafed Mediterranean perennial. Common garden sage and tricolor sage are the most container-friendly.
Why it works in containers: The silver-green leaves photograph like a dream. Sturdy, drought-tolerant, and pairs with rosemary and thyme.
How to grow it: Pot 10 inches deep with full sun and lean watering. Trim woody stems back in early spring.
9. Cilantro (The Fast One)
What it is: A cool-season annual. Bolts to coriander seed in summer heat, so plan around that.
Why it works in containers: Quick from seed, perfect for a kitchen window in fall and spring.
How to grow it: Pot 8 inches deep, partial sun in summer, sow new seeds every 3 weeks for a continuous harvest. Once it flowers, let it go to seed and you’ve got fresh coriander.
10. Dill (The Underrated Pickle Hero)
What it is: A tall feathery annual. Bouquet and Fernleaf are the two best container varieties (Fernleaf stays under 18 inches).
Why it works in containers: Adds vertical drama to a pot grouping. One plant gives you enough dill for a whole season of pickling.
How to grow it: Pot 10 to 12 inches deep because of the taproot, full sun, average water.

The Container Setup: Pot, Soil, and Drainage
This is the section most beginners skip and it’s the reason most herb gardens fail by week six. Get these three things right and you’re 80% home.
Pot Size by Herb (Save This Chart)
| Herb | Minimum pot depth | Minimum width | Solo or shareable |
|---|---|---|---|
| Basil | 8 inches | 8 inches | Shareable with parsley, chives |
| Rosemary | 10-12 inches | 10 inches | Shareable with thyme, sage |
| Thyme | 6-8 inches | 8 inches | Shareable with rosemary, oregano |
| Mint | 8-10 inches | 10 inches | Solo only |
| Parsley | 8-10 inches | 8 inches | Shareable with basil, chives |
| Chives | 6 inches | 6 inches | Shareable with parsley, basil |
| Oregano | 8 inches | 8 inches | Shareable with thyme, sage |
| Sage | 10 inches | 10 inches | Shareable with rosemary, thyme |
| Cilantro | 8 inches | 8 inches | Solo (bolts fast) |
| Dill | 10-12 inches | 8 inches | Solo (gets tall) |
Screenshot that. Pin it. It’s the chart I wish I’d had when I started.
Soil: Why Garden Dirt Will Kill Your Herbs
Use a quality potting mix, never garden soil. Garden soil compacts in pots, suffocates roots, and holds too much water. A good potting mix is light, drains fast, and has the air pockets roots need.
Brands I’ve personally used and liked: Miracle-Gro Potting Mix (about $12 for 16 quarts at Home Depot), FoxFarm Ocean Forest (about $25 at most garden centers, splurge-tier), and Espoma Organic Potting Mix (about $14 at Lowe’s, my middle-tier favorite).
For Mediterranean herbs (rosemary, thyme, sage, oregano), mix in a handful of coarse sand or perlite to improve drainage further. They hate wet feet.
Drainage: Non-Negotiable
Every pot needs drainage holes. Period. If you’re using a pretty cachepot without holes (a thrift store ceramic, an old bucket), drill at least three holes in the bottom or use it as a decorative outer sleeve with the actual planted pot inside.
A 1-inch layer of gravel at the bottom is a myth that won’t hurt you, but doesn’t actually help drainage. The pot’s drainage holes do the work.

Herb Pairings That Actually Grow Well Together
This is the framework no competitor lays out clearly. The rule is simple: pair herbs that want the same amount of water and sun. Here are the four combos I keep coming back to.
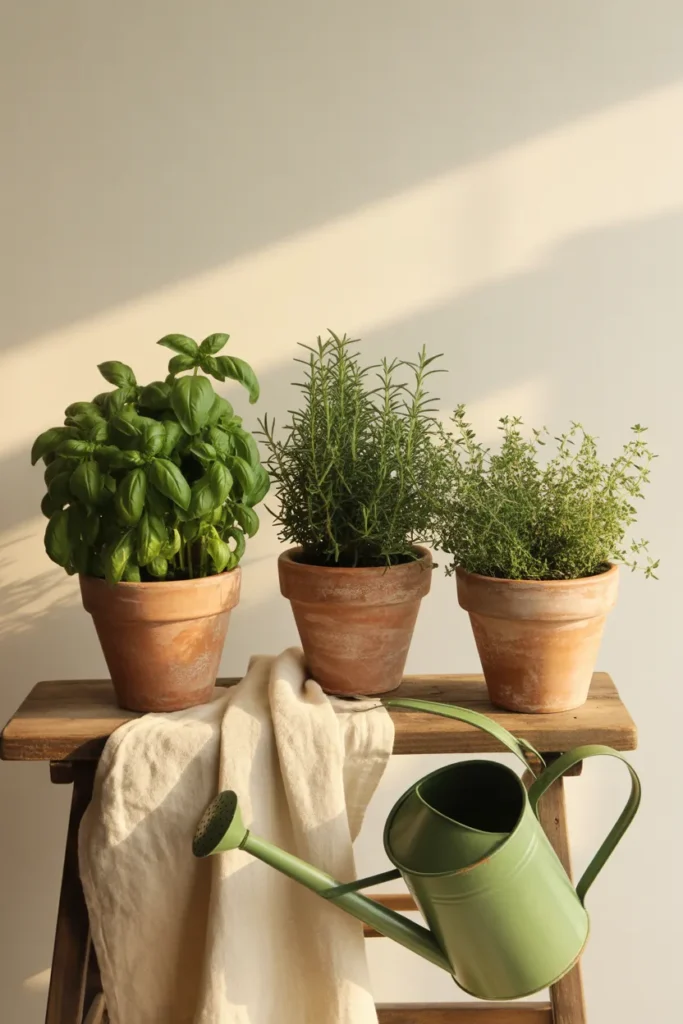
Combo 1: The Mediterranean Trio (Sun + Dry)
Rosemary, thyme, sage. Plant rosemary as the tall center, sage on one side, thyme spilling over the front edge. Use a 14 to 16 inch pot. Full sun, water only when bone dry. This is the most low-maintenance pairing on the list.
Combo 2: The Italian Cook’s Pot (Sun + Moderate Water)
Basil, parsley, chives. 14-inch pot, full sun, water when the top inch is dry. Basil in the back, parsley middle, chives in front. You’ll harvest from this every single dinner.
Combo 3: The Lemon Tea Pot (Sun + Moderate Water)
Lemon thyme, lemon balm, lemon verbena. 12-inch pot. Lemon verbena center for height, lemon balm filling, lemon thyme trailing. Genuinely magical for iced tea.
Combo 4: The Solo Mint
Mint by itself, always. 10-inch pot. Don’t fight it.
What NOT to Pair
- Mint with anything (it bullies everyone)
- Rosemary with basil (rosemary wants dry, basil wants moist)
- Cilantro with anything long-lived (cilantro bolts and dies before partners hit their stride)

Indoor Herb Container Gardening: The Kitchen Window Setup
If you don’t have outdoor space (or it’s January), an indoor herb garden works. Just be honest about light.
Light Requirements
Most herbs need 6 hours of direct sun, and a typical kitchen window only gives you 2 to 4 hours. The fix is a small clip-on grow light. The Soltech Aspect or a basic Amazon LED grow bar (around $35 to $80) gives you enough light to grow basil, parsley, chives, and mint year-round on a windowsill.
Rosemary, sage, oregano, and thyme are tougher indoors because they want intense Mediterranean light. Possible, but you’ll need a stronger setup.
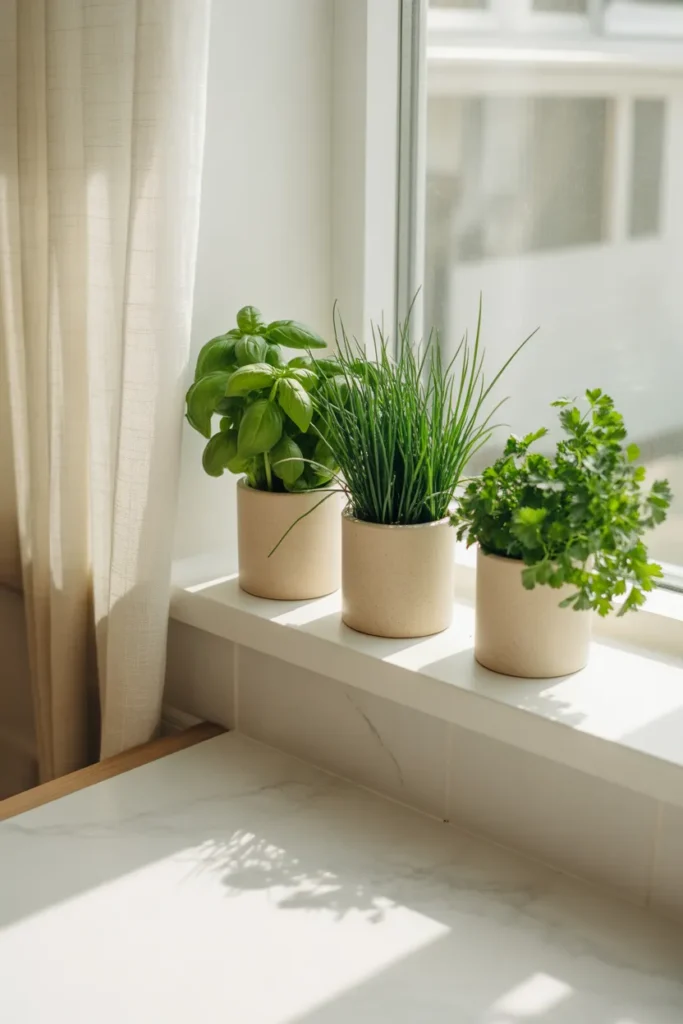
Best Indoor Herbs
In order of forgivingness: chives, parsley, mint, basil. Skip rosemary indoors unless you’ve got a south-facing window plus a grow light.
Indoor Containers
- 6-inch ceramic pots with saucers (so you don’t ruin your countertop)
- A magnetic herb planter strip on the side of the fridge (rental-friendly, no drilling)
- A wooden 3-tier plant stand by the brightest window (around $40 at IKEA, the SATSUMAS shelf works)
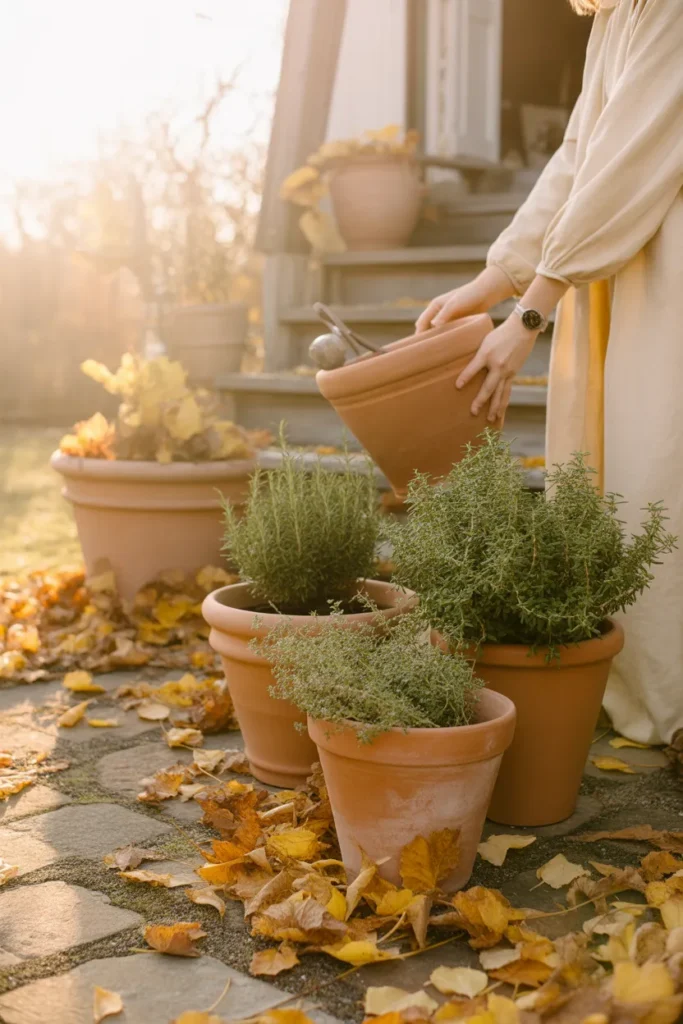
Outdoor Herb Container Gardening: Patio and Balcony Setups
For outdoor setups, focus on sun mapping first. Watch your space for one full day and note where you get 6+ hours of direct sun. That’s where the herbs go. Anything less and you’re fighting physics.
Patio (50 to 200 sq ft)
A grouping of three pots in different sizes (12 inch, 14 inch, 16 inch) clustered in the sunniest corner is the cleanest look. Add a wooden tiered shelf if you want to grow more without using floor space.
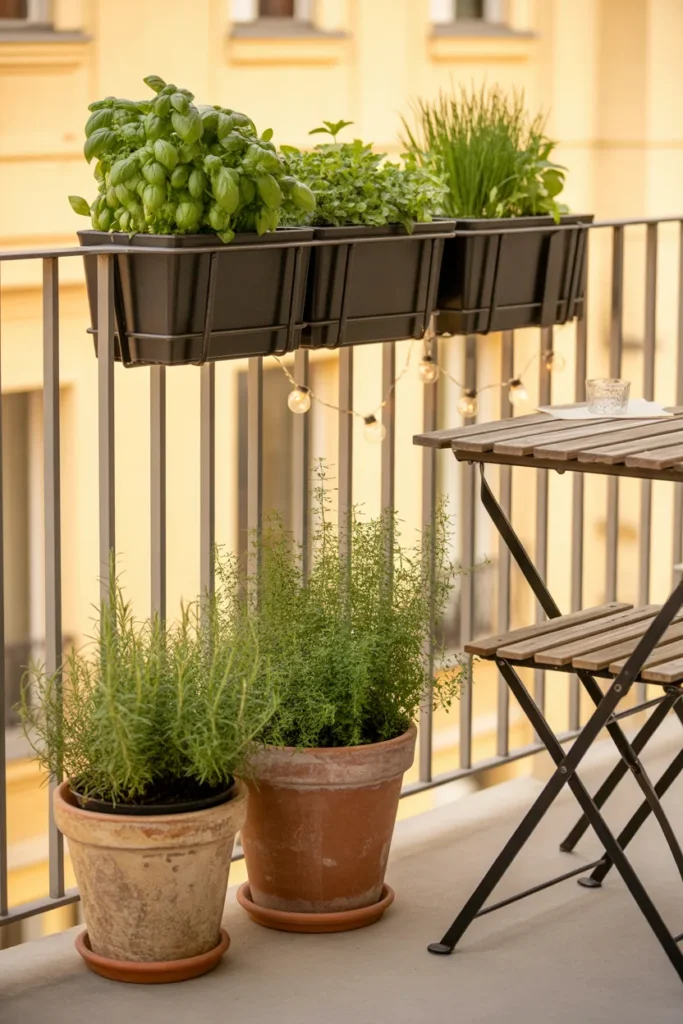
Balcony (Under 50 sq ft, often rental)
- Railing planters that hook over the railing (no drilling, look for ones rated for the weight of wet soil, around $25 to $40 at Target).
- Vertical wall pockets that hang from a hook, lightweight when full.
- A single big pot packed with the Italian Cook’s Pot combo (basil, parsley, chives) if your weight allowance is tight.
If your balcony is north-facing, your herb garden is going to be limited to parsley, chives, and mint. Be realistic, not heartbroken.
Fire Escape (NYC and old urban buildings)
Lightweight plastic pots only (terracotta is heavy when wet and most fire escapes are weight-rated for less than people think). The Bloem 12-inch plastic pots in terracotta-look run about $8 each at Walmart and they’re indistinguishable from real clay in photos.
For more on edible patio setups, our container gardening vegetables guide pairs well with this one if you want to add cherry tomatoes or peppers to the mix.
Budget vs Splurge: The Container Showdown
Same herbs, very different price points. Here’s the honest breakdown.
Budget-Friendly (Under $25 per setup)
- Pots: Dollar Tree 6-inch plastic terracotta-look pots ($1.25 each), or Walmart Bloem 12-inch resin pots ($8 each).
- Soil: Miracle-Gro Potting Mix, 8-quart bag ($6 at Home Depot).
- Plants: Start from seed packets ($2 each at any garden center) or grab 4-inch starter pots from Home Depot ($3 to $5 each).
- Total for a 3-pot starter setup: about $22.
Mid-Range ($25 to $100)
- Pots: Target Threshold glazed ceramic 12-inch ($25 each), or IKEA SOCKER galvanized planters ($10 to $20).
- Soil: Espoma Organic Potting Mix ($14 a bag).
- Plants: Bonnie Plants 4-inch live herbs from Lowe’s or Home Depot ($4 to $7 each).
- Total for a 5-pot setup: about $85.
Splurge ($100+)
- Pots: West Elm hand-thrown ceramic planters ($59 to $129 each), Crate & Barrel terracotta with brass details, or CB2 modern matte planters.
- Soil: FoxFarm Ocean Forest ($25 a bag) plus a top dressing of compost.
- Plants: Specialty herb varieties from a local nursery ($8 to $15 each), things like pineapple sage or lemon verbena.
- Total for a curated 5-pot setup: $250+.
The honest truth: my Dollar Tree plastic pots and my West Elm ceramics grow basil at the exact same rate. Spend on the pot for how it looks, not how it grows.

Common Container Gardening Mistakes (And How to Skip Them)
Pulled directly from the question Google’s People Also Ask flags as the most-searched concern. After years of watching friends start herb gardens that die, these are the five mistakes I see repeated.
1. Overwatering. This kills more container herbs than any pest, weather event, or bad luck combined. Stick a finger an inch into the soil. If it’s damp, walk away. Most herbs would rather be slightly dry than slightly soggy.
2. Using garden soil instead of potting mix. Garden soil compacts in a pot and turns into a brick. Use potting mix. Always.
3. Pots that are too small. A 4-inch pot is for a starter plant, not a mature herb. Size up to the dimensions in the chart above within a month of planting.
4. Wrong sun exposure. “Bright shade” isn’t a thing for most herbs. They want sun. If you only have 2 hours of direct light, stick to parsley, chives, and mint.
5. Skipping drainage. A pot without drainage holes is a slow-motion plant funeral. Drill, drain, or skip the pot.
6. Letting basil flower. The second basil flowers, the leaves go bitter. Pinch the buds off the moment you see them. This single habit doubled my basil yield the first year I caught on.
7. Forgetting to feed. Potting mix nutrients last about 6 weeks. After that, your herbs need a half-strength liquid fertilizer (like Espoma organic, every 2 weeks) or they’ll yellow and stall.
For the science on USDA growing zones and when to start outdoor herbs, check the USDA Plant Hardiness Zone Map and cross-reference your last frost date with the Old Farmer’s Almanac planting calendar. Those two free tools answer 90% of beginner timing questions.
Seasonal Care Calendar for US Growers
A quick year-at-a-glance for zones 5 through 9 (covers most of the continental US):
- Spring (March to May): Start seeds indoors 6 weeks before last frost. Move pots outside after frost is fully done. Refresh soil in returning perennial pots.
- Summer (June to August): Harvest constantly (more harvesting = more growth). Water early morning. Pinch basil flowers.
- Fall (September to November): Bring tender perennials (rosemary, lemon verbena) indoors before first frost. Let parsley keep going outdoors, it loves cool weather.
- Winter (December to February): Indoor herbs only for most zones. Cut back and let perennials rest. Plan next year’s pairings.
Frequently Asked Questions
What are the easiest herbs to grow in pots?
Chives, basil, mint, and parsley. All four tolerate beginner mistakes (a missed watering, a less-than-perfect pot, a partly shady window) and bounce back. Start there before you tackle Mediterranean herbs like rosemary and sage.
What is the mother of all herbs?
Sage. The Latin name Salvia officinalis comes from salvere, meaning “to save” or “to heal,” and sage was the cornerstone medicinal and culinary herb in monastery gardens for centuries. Some traditions also call basil the “king of herbs,” but sage holds the “mother” title in most herbal references.
What herbs grow well together in a container?
Group by water needs. The Mediterranean trio (rosemary, thyme, sage) wants dry conditions. The Italian cook’s pot (basil, parsley, chives) wants moderate moisture. Mint always grows alone. See the pairings chart above for the exact pot sizes.
What is the most common mistake made with container plants?
Overwatering, by a wide margin. Container plant roots need air pockets in the soil, and constantly wet soil drowns those out. Stick a finger an inch into the dirt before reaching for the watering can. Most herbs prefer slightly dry to slightly soggy.
How do I grow container gardening herbs in a small space or rental?
Stick to railing planters that hook over without drilling, vertical wall pockets, and a single 12-inch pot packed with a pairing combo. The Italian cook’s pot (basil, parsley, chives) gives you the highest harvest in the smallest footprint. Use lightweight resin pots that look like terracotta to keep weight under fire escape and balcony limits.
What is the budget version of a container herb garden?
Three Dollar Tree plastic pots ($3.75 total), one bag of Miracle-Gro Potting Mix ($6), and three seed packets ($6). Grand total: under $16 for a working three-herb starter. Add a couple of Bonnie Plants 4-inch starters ($4 each) if you want a head start over seeds.
What if I do not have outdoor space at all?
Pick a window with at least 4 hours of direct sun (south or southwest facing is best in the US) and add a clip-on grow light for $35 to $80. Start with chives, parsley, basil, and mint. Skip rosemary indoors unless you’re committed to a serious lighting setup.
How long does it take to set up a container herb garden?
A 3-pot starter setup takes about 30 minutes from “everything still in the bag” to fully planted, including pot selection, drilling drainage holes if needed, soil filling, and transplanting. Add 5 minutes if you’re starting from seed packets versus 4-inch starter plants.
Save This For Your Next Trip to the Garden Center
Container gardening herbs is the cheapest, easiest, prettiest way to upgrade a balcony, patio, or kitchen window into something you actually use. Pick your three favorite herbs from the list, match them to a pot size from the chart, group them by water needs, and you’ve got a working herb garden in under an hour.
If this helped, save the post to your gardening Pinterest board (the pairings chart is the most-pinned section), and head over to our container gardening flowers guide next if you want to fill out the rest of your patio with bloom-friendly companions.
What’s the first herb you’re planting this season? Tell me you’re picking basil. Everyone picks basil. (And honestly, you should.)


