
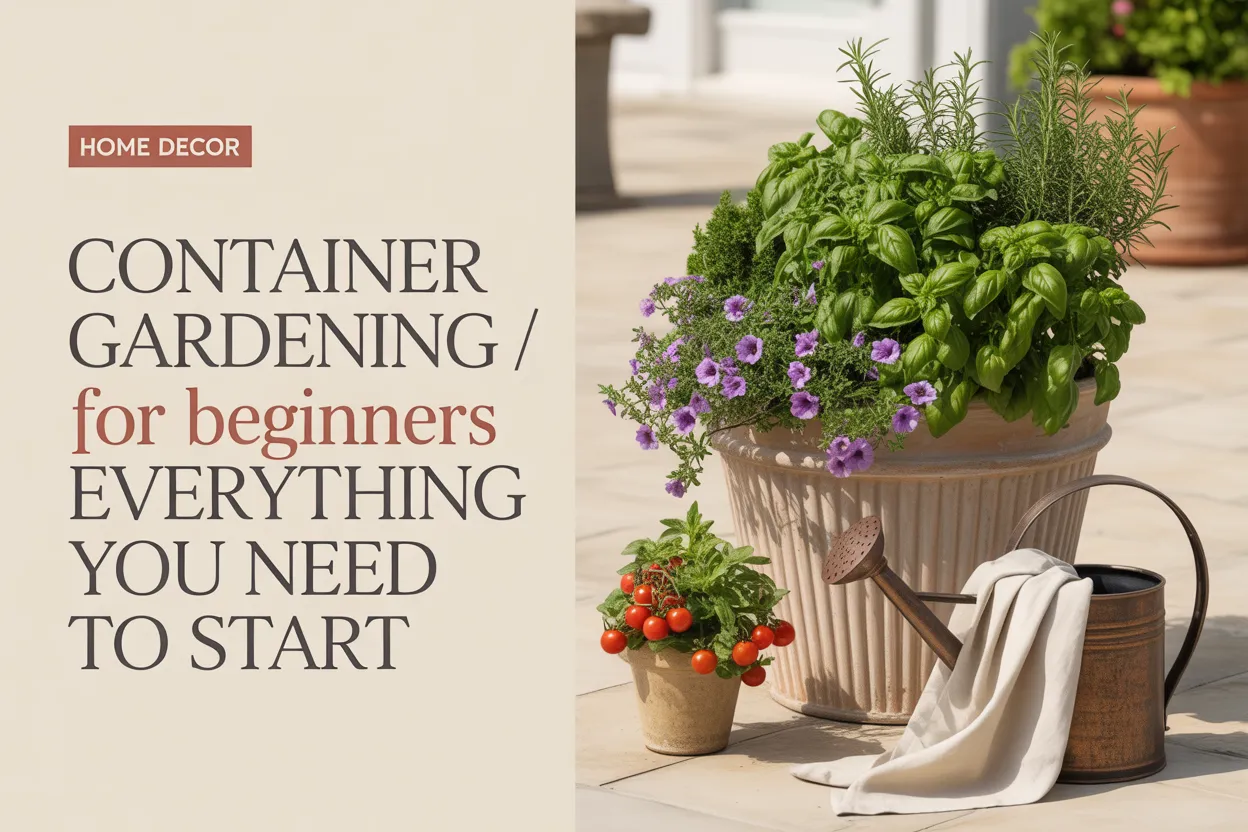
You walk out onto the patio with your morning coffee and see the same sad concrete slab you saw yesterday. Maybe a wobbly plastic chair. Definitely no greenery. You’ve wanted to start a little garden for two summers running, but the thought of digging up the yard (or dealing with your landlord) shut it down both times.
Here’s the good news. Container gardening hands you a real garden without a single shovel, lease violation, or back injury.
Who this is for: renters with a 4 by 6 foot balcony, homeowners who want to soften a hardscape patio, small-space dwellers, total beginners who have killed every houseplant they’ve owned, and anyone who wants a garden that doubles as outdoor decor. Below, I’m walking you through container gardening as both a growing method AND a styling tool, organized step by step from “I own nothing” to “my patio looks like a Pinterest board.” We’ll go in this order: what container gardening actually is, the gear you need, picking your first plants, planting day, ongoing care, styling for a designer-looking patio, common beginner mistakes, and a beginner FAQ.
Grab the coffee. Let’s set up your first container garden.
What Is Container Gardening (and Why It Works So Well for Beginners)
Container gardening means growing plants in pots, planters, fabric bags, troughs, or any vessel with drainage, instead of planting directly in the ground. That’s it. The container is the garden.
Why this matters for beginners: you control everything. The soil is fresh and clean (no weed seeds, no mystery pests). The drainage is dialed in. You can move the pot if a plant is getting fried in afternoon sun. And if a plant fails, you compost it and try again next month, no big loss.
For the home decor crowd, containers are also the easiest way to add layered greenery to a patio, balcony, front porch, or deck without committing to landscaping. Group three pots of varying heights near a door and the entire entry feels finished.
Who Container Gardening Is Best For
- Renters: No drilling, no dug beds, fully portable when you move.
- Small-space dwellers: Works on balconies as narrow as 36 inches.
- Style-driven gardeners: You can match pots to your patio palette.
- Beginner container gardeners: Lower failure rate than in-ground gardening because you control the variables.
- Anyone with bad soil: Clay, sand, rocky yard? Skip it entirely.
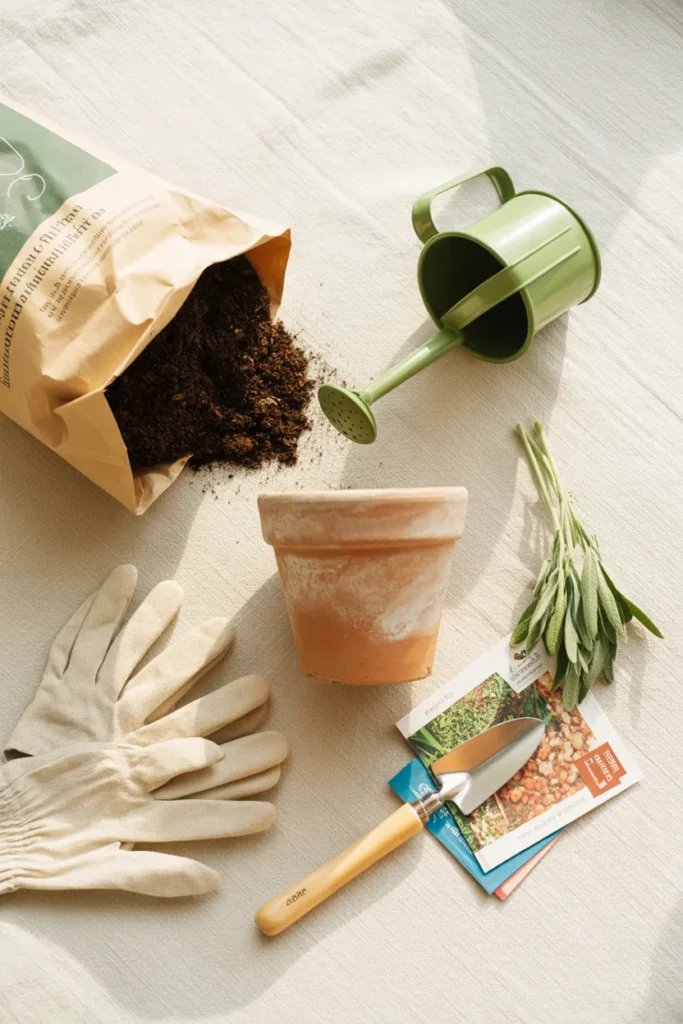
The Beginner Gear List: What You Actually Need
You don’t need much to start. Here’s the honest short list.
The five essentials:
- A container with drainage holes
- Quality potting mix (not garden soil)
- Plants or seeds suited to your climate
- A watering can or hose with a gentle spray nozzle
- A sunny spot (most edibles want 6 to 8 hours of direct sun)
That’s the whole list. Skip the fancy gadgets for now.
Picking the Right Container (This Matters More Than You Think)
The pot is half the battle. Get this wrong and your plants struggle no matter what else you do.
What to look for:
- Drainage holes. Non-negotiable. If a pretty pot has none, drill a few or use it as a cachepot with a smaller plastic nursery pot inside.
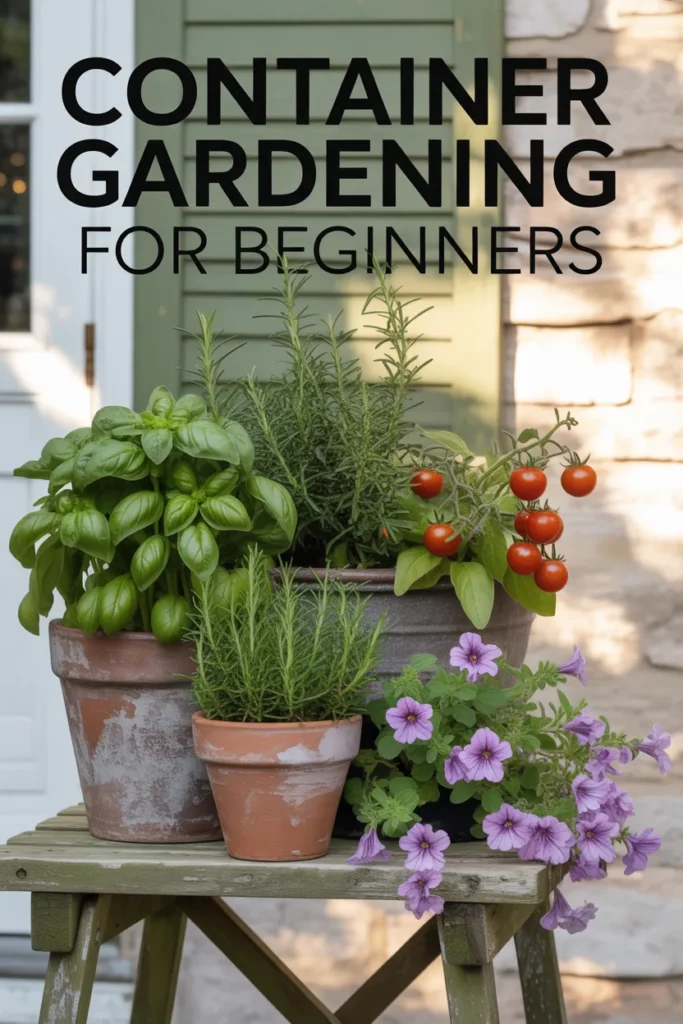
- Size. Bigger is forgiving. Small pots dry out in hours during summer heat. As a rule, herbs need at least a 6 inch pot, leafy greens need 8 to 10 inches, peppers and bush tomatoes need 14 to 18 inches, and full-size tomatoes want a 5 gallon container minimum.
- Material. Each material has trade-offs (more on that below).
Container materials at a glance:
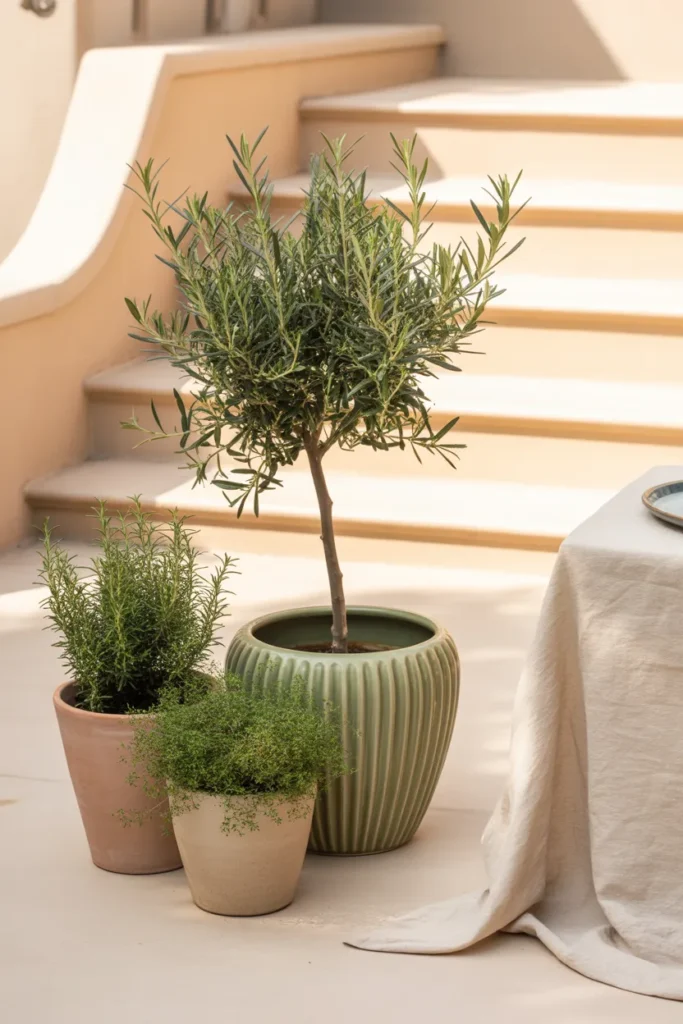
- Terracotta: Classic cottagecore look, breathable walls, but dries out fast and cracks in freezing temps. Best for herbs and Mediterranean plants.
- Glazed ceramic: Holds moisture better than terracotta and comes in every color. Heavy when filled.
- Plastic: Lightweight, holds moisture, comes in great modern shapes. Look for UV-stable plastic so it doesn’t get brittle in sun.
- Fabric grow bags: Cheap, breathable, foldable for storage. Less pretty, so tuck them behind a decorative screen or use them on a back deck.
- Self-watering planters: A reservoir at the bottom wicks moisture up. Forgiving for beginners who forget to water.
If you’re working with a raised bed alongside containers, the depth question matters a lot. For a deeper look at how deep your bed should actually be for the plants you want to grow, this guide on raised garden bed depth walks through it root system by root system.
Budget vs Splurge: Real Container Picks at Real Price Points
Here’s where you can stretch a $20 budget or spend $200 and have it look intentional either way.
Budget-friendly (under $25 each):
- 4 inch terracotta pots from Home Depot, around $4 each
- Plastic nursery pots upcycled with a coat of matte paint
- 5 gallon buckets from Home Depot ($4.50) drilled with drainage holes, perfect for tomatoes
- Dollar Tree resin planters in cream or black, $1.25
- IKEA SOCKER galvanized planters, around $15
Mid-range ($25 to $100 each):
- Target Threshold ceramic planters, $30 to $60 depending on size
- HomeGoods glazed pots, usually $20 to $40, rotating selection
- Bloem self-watering planters from Amazon, $25 to $45
- IKEA larger ceramic and rattan planters, $40 to $70
Splurge ($100+ each):
- West Elm fluted ceramic planters, $99 to $300
- CB2 architectural concrete planters, $150 to $400
- Crate & Barrel hand-glazed stoneware, $80 to $250
- Anthropologie Home decorative ceramics, $80 to $400
A pro move: buy ONE splurge pot to anchor the arrangement and surround it with budget pots painted to match. The eye lands on the splurge piece and reads the whole grouping as elevated.
The Best Soil for Container Gardening
Skip the bag labeled “garden soil” or “topsoil.” Both are too dense for pots and will drown your roots.
What you want: a bag clearly labeled potting mix or container mix. The good ones contain peat or coco coir, perlite or vermiculite for drainage, and often a starter charge of fertilizer.
Brands that work for beginners:
- Espoma Organic Potting Mix
- FoxFarm Ocean Forest (premium, great for vegetables)
- Miracle-Gro Performance Organics
- Burpee Natural & Organic Premium
A 1.5 cubic foot bag runs $12 to $25 and fills roughly two 14 inch pots. If you’re filling several large pots or a raised bed alongside your containers, the math gets expensive fast. A breakdown of cost-saving fill strategies (lasagna layering, rocks, logs at the bottom) lives in this post on what to fill a raised garden bed with, and the same logic applies to deep planters.
Quick mistake to dodge: do not put gravel or rocks at the bottom of a container “for drainage.” This was passed around for decades and was finally debunked by horticulture researchers. It actually raises the saturated zone closer to the roots. Use a single piece of broken pottery or a coffee filter over the drain hole to keep soil in, and that’s it.
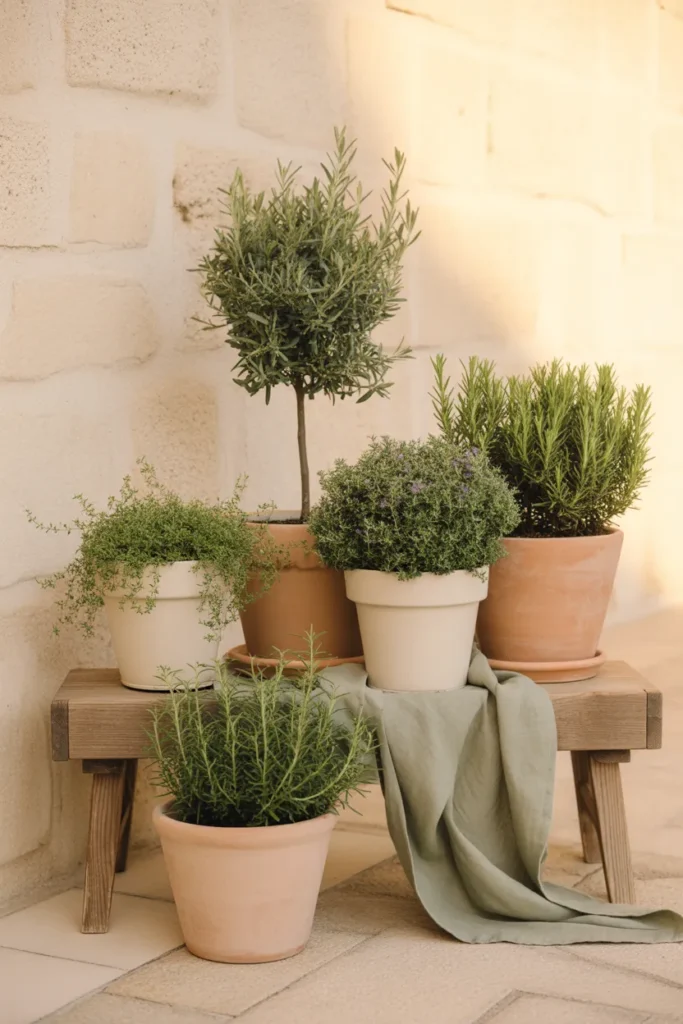
Best Beginner Container Plants (Picks That Are Hard to Kill)
Set yourself up for a win on the first round. These are the beginner container plants with the highest success rate.
Easiest Vegetables and Herbs
- Cherry tomatoes (Sungold, Sweet 100). Pick a determinate or patio variety for a 5 gallon pot.
- Lettuce and salad greens. Cool-season, fast harvest, ready in 30 to 45 days.
- Bush beans. Fast, productive, no trellis needed.
- Peppers (sweet and chili). Love heat and pots.
- Basil. Pairs with tomato in the same pot.
- Mint. Always plant in its own pot. It will take over anything it shares.
- Rosemary, thyme, oregano. Mediterranean herbs love being slightly dry.
- Chives. Comes back year after year in zones 3 to 9.
- Radishes. Ready in 25 days.
- Strawberries. Stunning in a tall planter or hanging basket.
Easiest Flowers for Container Gardens
- Petunias. Trail beautifully over the edge, bloom all summer.
- Marigolds. Repel some pests, bloom relentlessly, dirt cheap.
- Geraniums. Classic patio flower, drought-tolerant.
- Calibrachoa. Tiny petunia-like blooms, full sun, very forgiving.
- Coleus. Foliage interest in shadier spots, comes in burgundy, lime, and chartreuse.
- Sweet potato vine. Trailing chartreuse or deep purple foliage that fills a pot fast.
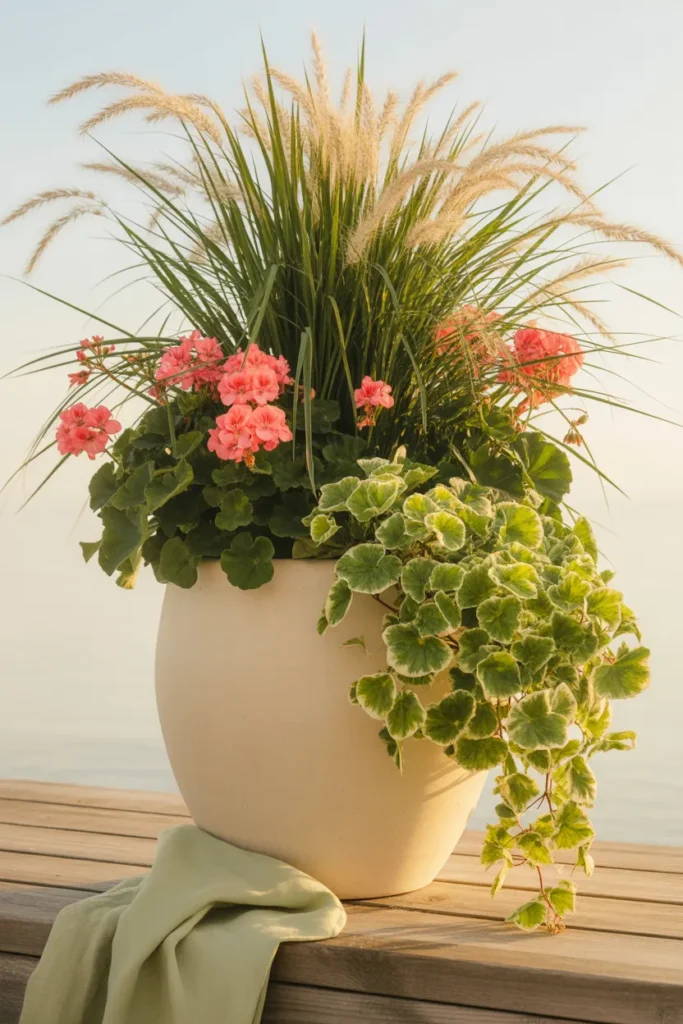
The Thriller, Filler, Spiller Formula (Designer’s Trick)
Designers use a simple formula for mixed flower containers that looks intentional every single time.
- Thriller: the tall vertical centerpiece (a spike plant, a small grass, a dwarf canna)
- Filler: mounding plants around the middle (geraniums, calibrachoa, coleus)
- Spiller: trailing plants that drape over the edge (sweet potato vine, ivy, trailing petunias)
Three plants, one pot. It works at any size from a 10 inch pot on a side table to a 24 inch planter at a front door.
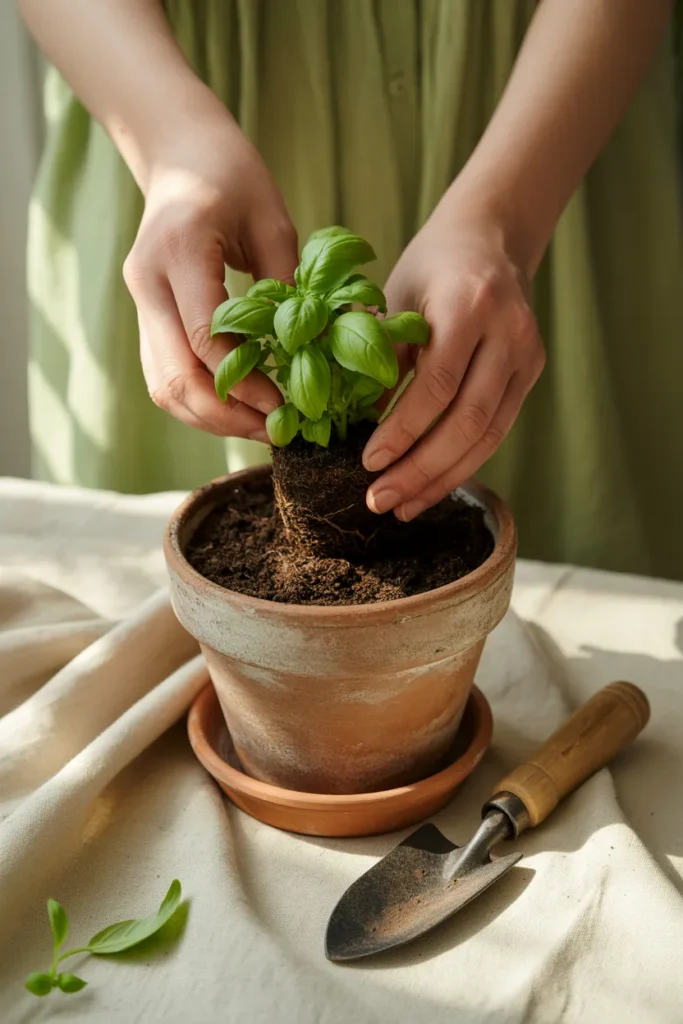
Planting Day: Step by Step
You have your pots, your potting mix, and your plants. Here’s the actual sequence.
- Move the pot to its final spot before filling it. Filled pots are heavy. A 14 inch pot full of moist soil weighs around 30 pounds.
- Cover the drainage hole with a coffee filter, mesh screen, or piece of broken pottery so soil doesn’t wash out.
- Fill the pot two-thirds with potting mix. Don’t pack it down hard, just settle it in.
- Set the plant on the soil. The top of the root ball should sit about 1 inch below the rim of the pot. Add or remove soil to adjust.
- Loosen the roots gently if they’re circling the bottom of the nursery pot.
- Backfill around the plant with more potting mix, pressing lightly to remove air pockets.
- Water deeply until water runs out the drainage hole. Watch the soil level drop as it settles, and top off with more mix if needed.
- Mulch the surface with a thin layer of bark, pebbles, or sheet moss. Locks in moisture and looks finished.
That’s planting day. The whole thing for one pot takes about 10 minutes once you have a rhythm.
Ongoing Care: Watering, Feeding, and Sun
This is the section beginners read once and reference all summer. Bookmark it.
How Often to Water Container Plants
The honest answer: it depends. Pot size, material, plant type, and weather all affect it.
Reliable rule of thumb: stick your finger 1 inch into the soil. If it’s dry, water. If it’s still moist, wait.
In a Northern Hemisphere summer, expect to water:
- Small pots (under 8 inches): once or twice a day in heat
- Medium pots (10 to 14 inches): once a day
- Large pots (16 inches and up): every 2 to 3 days
- Self-watering planters: refill the reservoir every 5 to 10 days
Water in the morning so leaves dry before evening (wet foliage at night invites fungus). Water at the soil line, not over the leaves. Water deeply until it runs out the bottom, then stop. Shallow watering builds shallow roots.
Fertilizing Container Plants
Potting mix runs out of nutrients in 4 to 6 weeks because every watering flushes some away. Two easy approaches:
- Slow-release granular (Osmocote, Espoma) mixed into the soil at planting. Lasts 3 to 4 months. Set it and forget it.
- Liquid feed every 2 weeks during peak growing season. Diluted fish emulsion, kelp, or a balanced 10-10-10 liquid works great.
Heavy feeders like tomatoes and peppers benefit from both: granular at planting, liquid every two weeks once they start fruiting.
Sun Exposure
- Full sun: 6 to 8+ hours direct sun. Tomatoes, peppers, herbs, most flowers.
- Part sun: 4 to 6 hours. Lettuce, leafy greens, coleus.
- Shade: under 4 hours. Ferns, hostas, impatiens, begonias.
Track the sun on your patio for one full day before you commit to plant choices. The east-facing balcony you thought was sunny might only get 3 hours.

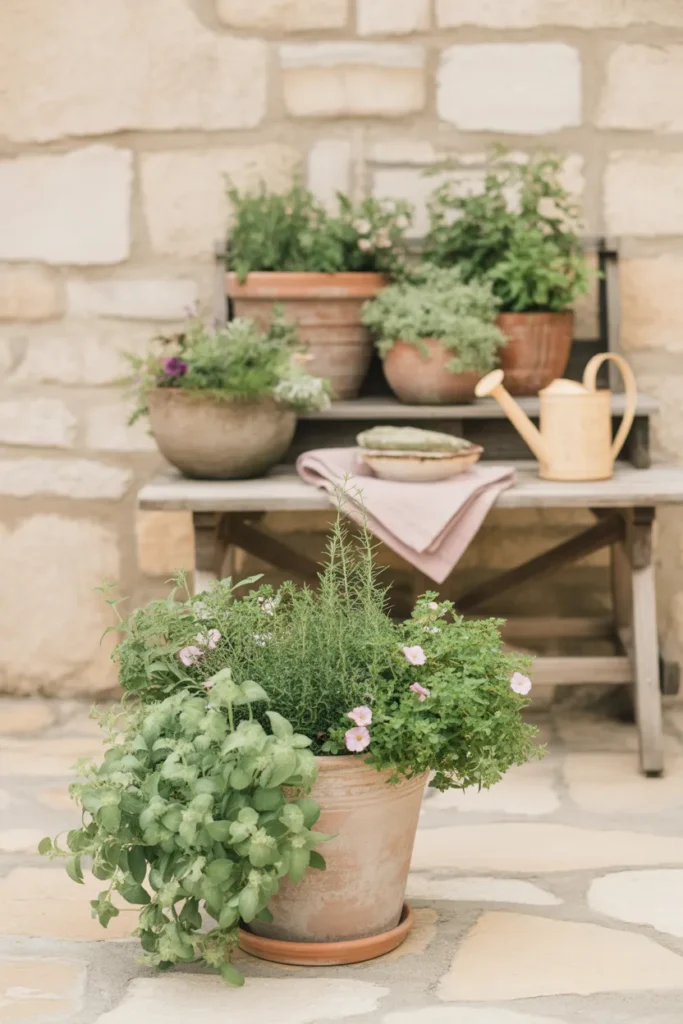
Styling Your Container Garden Like a Designer
Here’s where container gardening crosses over into home decor. A few small choices turn a row of pots into an arranged outdoor room.
The Rule of Three (and Five)
Odd-numbered groupings read as natural to the eye. Group pots in clusters of three or five, never two or four. Vary the heights: one tall, one medium, one short. If your pots are all the same height, stand one on a small wooden crate or stack of pavers to add elevation.
Repeat One Color, One Material
Pick one accent color (sage green, terracotta, soft white, deep navy) and repeat it across pots, plants, and styling props. Mix two materials at most: terracotta and ceramic, or wood and metal. More than two and the patio reads cluttered.
Layered Heights for Vertical Interest
Use a small plant stand, a wall-mounted shelf, a tiered etagere, or a vintage ladder leaned against a wall to stack containers vertically. A 4 by 4 foot patio can hold 12 plants this way without feeling crowded.
If you’re styling your patio next to a metal raised bed, the visual goal is to echo the bed’s lines in your container choices. These metal raised garden bed ideas show how the corrugated and powder-coated finishes pair with terracotta and ceramic containers for a layered, lived-in look.
Style by Aesthetic
- Cottagecore container garden: terracotta, weathered wood, herbs and old-fashioned flowers (snapdragons, cosmos, nasturtiums), linen and burlap details.
- Modern Organic: matte black or cream ceramic, ornamental grasses, olive trees, single-color plantings, clean concrete.
- Coastal: white-washed pots, lavender and rosemary, jute rope details, weathered teak.
- Boho: mixed terracotta in different sizes, trailing pothos and string of pearls, woven baskets as cachepots, a small vintage rug underfoot.
Rental and Small-Space Container Gardening
If you’re working with a balcony, a fire escape (where legal), or a tiny patio, a few rules change.
- Check weight limits. Most balconies handle 50 to 100 pounds per square foot. A 14 inch ceramic pot full of wet soil can hit 35 pounds. Use plastic or fabric grow bags on upper-floor balconies.
- No-drill solutions. Over-the-rail planter hooks (no drilling required) hold up to 10 pounds and work on most standard rail widths from 2 to 6 inches. Command-strip hooks work for hanging lightweight plastic pots indoors or on covered porches.
- Vertical thinking. A wall-mounted plant pocket, a tension-rod plant rack between two walls, or a tiered bar cart on wheels turns 4 square feet into a 12-plant garden.
- Mobility matters. Plant caddies with wheels (around $12 from Home Depot) let you slide heavy pots inside before storms or out for sunlight.
Best Plants for Balconies and Tiny Patios
- Cherry tomatoes in 5 gallon fabric grow bags
- Strawberries in tiered or stacking planters
- Herbs in a single 18 inch trough planter (fits 5 to 6 herbs)
- Trailing flowers in over-the-rail boxes
- One single statement plant (a small lemon tree, a fig, a Japanese maple) as the patio hero

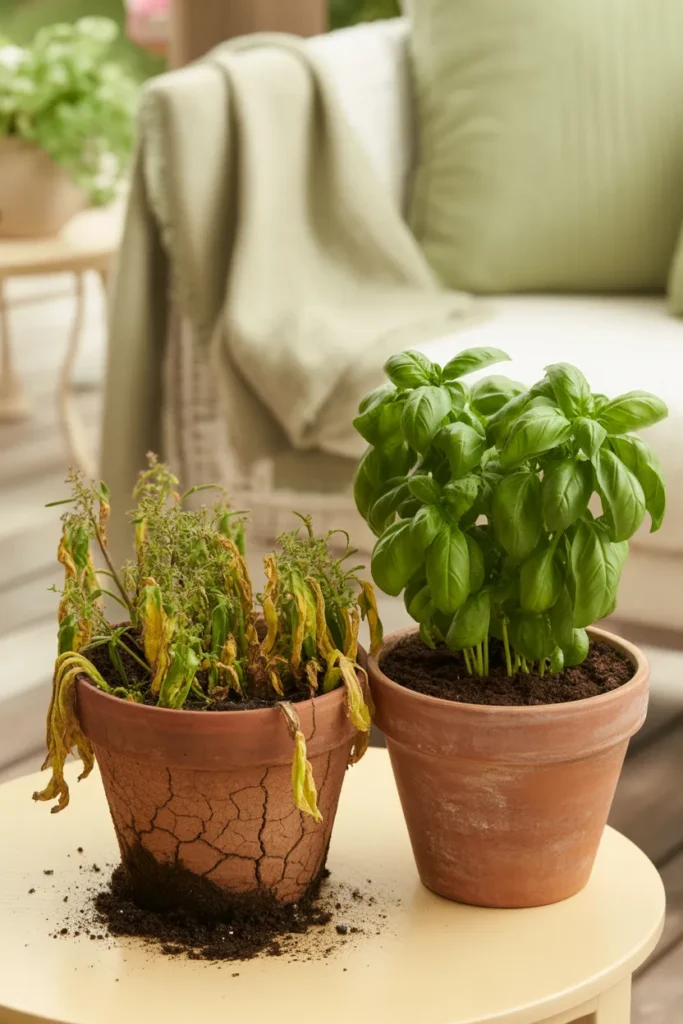
Common Container Gardening Mistakes to Avoid
I made every one of these in my first season. Save yourself the trouble.
- Picking pots that are too small. Small pots dry out fast and stunt root growth. When in doubt, size up.
- Using garden soil instead of potting mix. Garden soil compacts in containers and suffocates roots.
- Skipping drainage. A pretty pot with no holes is a plant grave. Drill or use a cachepot.
- Watering on a fixed schedule. Weather changes. Check the soil with your finger every time.
- Crowding too many plants in one pot. Read the spacing on the plant tag. Three petunias in a 12 inch pot, not seven.
- Forgetting to fertilize. Potting mix runs out of nutrients in 4 to 6 weeks. Pale leaves and slow growth are the warning.
- Putting sun-lovers in shade (or vice versa). Lettuce in full afternoon sun bolts and turns bitter. Tomatoes in shade barely fruit.
- Buying plants without checking your zone. Some perennials sold in big-box stores won’t survive your winter. Check the tag for USDA hardiness zone (the USDA Plant Hardiness Zone Map tells you yours).
- Letting pots sit on saucers full of standing water. Roots rot. Empty saucers after every deep watering.
- Giving up after one dead plant. Even commercial growers lose plants. One failure is data, not a verdict.
For more on the science of container watering and soil chemistry, the University of Maryland Extension container gardening guide is a solid free reference written by horticulturists.
Your First-Month Checklist (Screenshot This)
- Week 1: Buy pots, potting mix, and 3 to 5 starter plants. Plant on day one.
- Week 2: Check soil daily. Water when top inch is dry. Note how much sun the spot actually gets.
- Week 3: Add slow-release fertilizer if you didn’t at planting. Pinch back basil and herbs to encourage bushy growth.
- Week 4: Deadhead spent flowers. Harvest first lettuce or herbs. Photograph the patio for your before-and-after.
Frequently Asked Questions
How do I start a container garden as a complete beginner?
Pick three things: a 12 to 14 inch pot with drainage holes, a bag of potting mix, and one easy plant (basil, a cherry tomato, or a petunia). Plant it on day one. Water when the top inch of soil feels dry. That’s the entire starting point. Add more pots once you’ve kept the first one alive for two weeks.
What vegetables grow best in containers for beginners?
Cherry tomatoes (in a 5 gallon pot), bush beans, lettuce, peppers, radishes, and any herb in the basil-rosemary-thyme-oregano-mint family. All of these forgive watering mistakes and produce within 30 to 90 days.
How do I do container gardening in a small space or rental?
Use over-the-rail planter hooks (no drilling), fabric grow bags (lightweight on balconies), and vertical solutions like tiered plant stands. Stick to plastic or fabric containers if your balcony has a weight limit. A 4 by 6 foot balcony can hold 8 to 12 plants with the right vertical setup.
What is the budget version of a container garden setup?
5 gallon buckets from Home Depot ($4.50 each, drilled with drainage holes), one bag of potting mix ($12 to $15), and seed packets ($2 to $4 each) instead of nursery plants. A full four-bucket vegetable garden costs under $40 start to finish.
What if I do not have full sun on my patio?
Pick shade-tolerant plants. Lettuce, leafy greens, coleus, ferns, hostas, impatiens, begonias, and herbs like mint and parsley all do well with 4 hours of sun or less. Skip tomatoes, peppers, and most full-sun flowers.
How long does it take to set up a beginner container garden?
About 30 to 45 minutes total for the first three pots once you have your supplies. Each pot takes around 10 minutes to plant. Pick everything up in one trip to a garden center on a Saturday morning and you’ll be done before lunch.
How often should I water my container garden?
Check the soil with your finger every morning. Water when the top inch is dry. In peak summer, small pots may need water twice a day, large pots every 2 to 3 days. Self-watering planters stretch to 5 to 10 days between refills.
What is the best soil for container gardening?
A bag labeled “potting mix” or “container mix,” not “garden soil” or “topsoil.” Look for one with peat or coco coir, perlite, and a starter fertilizer. Espoma Organic, FoxFarm Ocean Forest, and Miracle-Gro Performance Organics are reliable picks for beginners.
Ready to Start?
Your first container garden is one trip to the garden center away. Pick one pot, one bag of potting mix, and one plant you actually want to eat or look at. Plant it this weekend. Take a photo of the empty patio first so you have your before shot.
Save this guide to your gardening board so you can come back when it’s time to size up to a second pot, or when you’re ready to layer in the styling tricks that turn a patio into an outdoor room. And if you’re thinking about graduating to a raised bed alongside your containers next spring, the metal raised bed inspiration is already waiting on the blog.
What’s the first plant going in your first pot? That decision is the entire start.


