

The U Shaped Raised Garden Bed Layout That Makes Every Square Foot Work Harder
A u shaped raised garden bed is the closest thing backyard gardening has to a genuine efficiency hack. Three connected panels wrap around you, putting every inch of soil within arm’s reach so you never have to lean, strain, or step inside the bed. I filled my first 4×8 cedar frame with bagged Miracle-Gro Performance Organics Raised Bed Mix alone and learned that swapping the bottom third for free organic fill would have saved me $80. The U-shape redesign I did the following spring cut my weeding time by half and gave me nearly 40% more planting surface in the same footprint.
If you’re ready to use every square inch of your growing space, this guide covers real dimensions by user type, a trellis integration most builders miss, fill ratios, a material comparison table worth screenshotting, and a planting layout that follows the sun from back panel to front corners. Before you commit to a shape, our full breakdown of raised garden bed layout ideas for small backyards shows how a U-shape stacks up against every other layout option so you can choose with confidence.
Why a U Shaped Raised Garden Bed Changes the Way You Garden
The standard straight raised bed has one built-in problem. You can only reach half of it comfortably. A 4-foot-wide bed sounds right until you’re thinning carrots at the far edge in 90°F August heat. You either lean too far, step inside (compacting the very soil you just filled), or abandon that half to weeds by July.
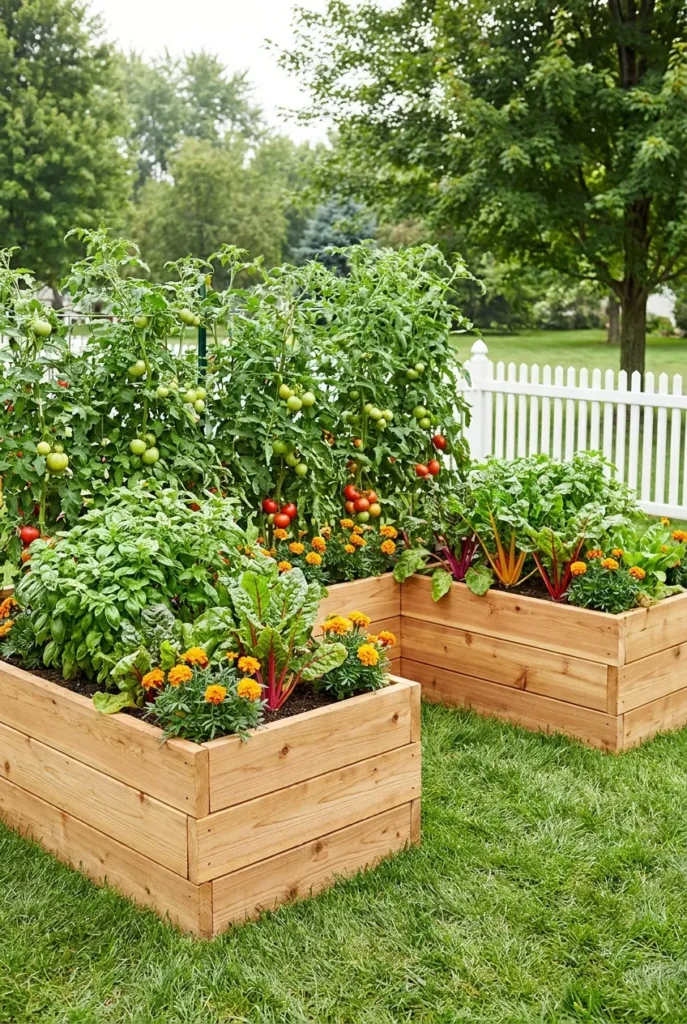
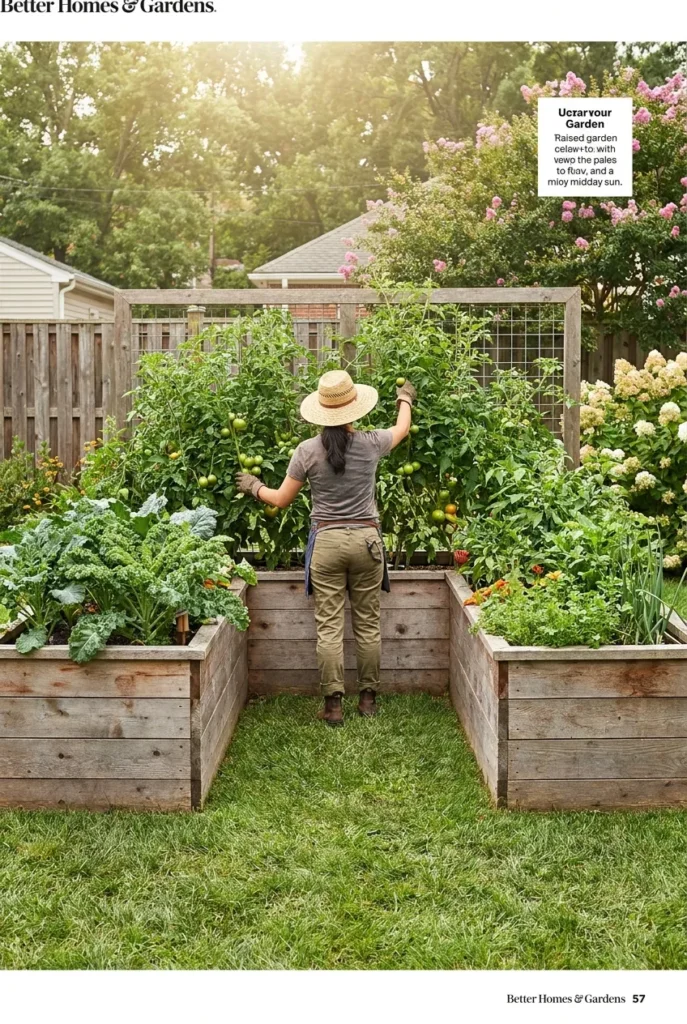
A U shaped raised garden bed solves this by wrapping the growing space around a center aisle. You stand in the middle, turn to whichever panel needs attention, and reach every single plant from that one position. The three-panel structure also creates a natural microclimate. Connected walls trap soil warmth better than a single plank bed, which matters in Zone 5 and Zone 6 where late springs eat into your growing window. That retained warmth can push your first tomato planting forward by a full week.
Home gardeners using this layout consistently report a 30 to 50 percent reduction in time spent harvesting, because everything is within a two-step radius. In a garden that demands attention every two to three days through peak season, that’s not a small return.
Who Gets the Most From This Layout
Four types of gardeners consistently get the biggest return from a U-shape build:
- Older gardeners and people with limited mobility love it because the center aisle eliminates all deep reaching, and the bed can be built counter-height for zero bending
- Parents teaching kids to garden love it because a child can stand in the middle and reach every plant independently without help from an adult
- Small backyard owners love it because the footprint is compact while the planting surface is significantly more generous than a single rectangle
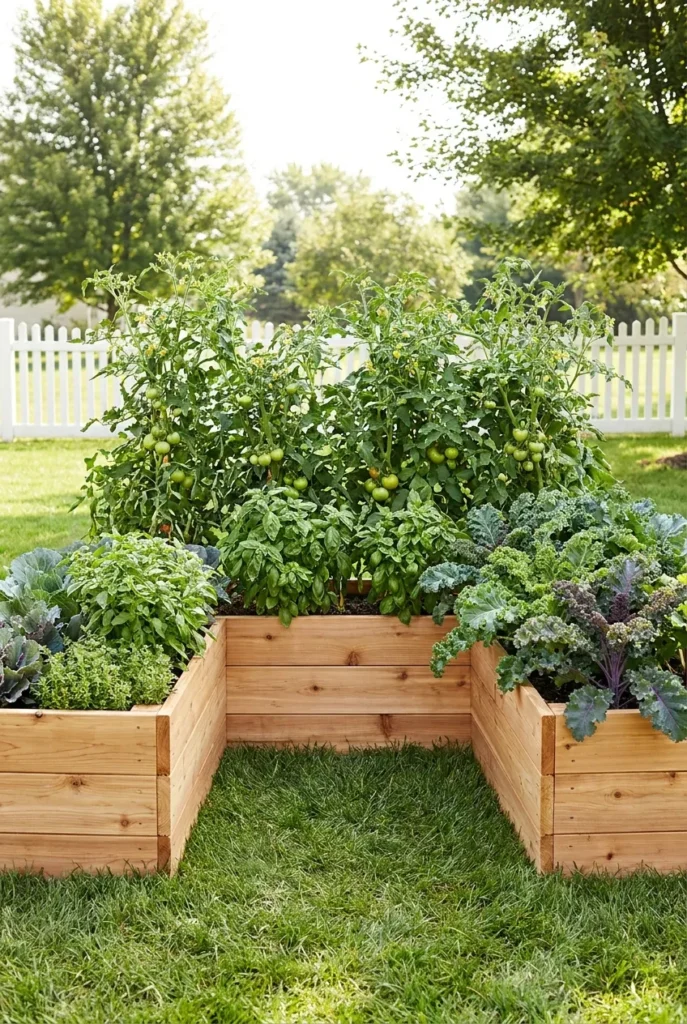
- Serious kitchen gardeners love it because the shape naturally organizes crops by sun exposure, tall climbers on the back panel and low greens anchoring the front corners
The shape is also renter-friendly. No concrete footings, no permits required for a standard-height build under 24 inches, and you can disassemble the whole thing in a single afternoon if you move.
U Shaped Raised Garden Bed Dimensions That Fit Real Yards
This is where most u shaped raised garden bed plans let you down. One set of measurements, called universal. Real yards are not universal, real gardeners have different arm spans and mobility, and the four-person household has different needs than the senior gardener building solo.
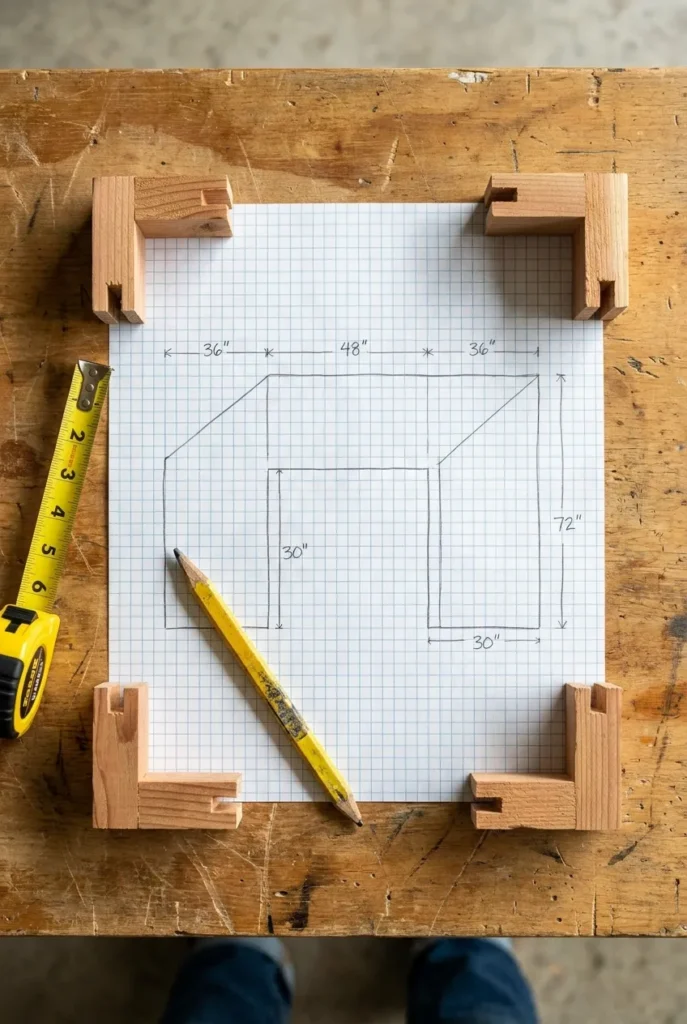
The baseline standard U-shape uses two side panels at 4 feet long by 2 feet wide and one back panel at 4 to 6 feet long by 2 feet wide, all at 12 to 14 inches tall. The center aisle must be at least 24 inches wide. Thirty inches is better if you ever kneel inside it or use a garden kneeler.
According to the USDA Plant Hardiness Zone Map, soil in Zones 4 and 5 benefits from taller bed walls because deeper soil retains warmth longer into fall and warms faster in early spring. If you garden in Chicago, Denver, or Boston, add 4 inches to the standard wall height before cutting your first board.
Sizing by Scenario
Standard adult gardener: Side panels 4 ft long x 2 ft wide, back panel 4 to 6 ft long x 2 ft wide, height 12 to 14 inches, aisle 24 to 30 inches wide. Total footprint roughly 8 ft x 6 ft for a standard build.
ADA or wheelchair accessible: Side panels 2 to 3 ft long x 2 ft wide, back panel 4 ft long x 2 ft wide, height 24 to 30 inches (countertop height), aisle minimum 36 inches wide for wheelchair clearance with turning radius.
Kids’ garden: Side panels 3 ft long x 18 inches wide, back panel 3 ft long x 18 inches wide, height 8 to 10 inches, aisle 20 inches wide. A child can reach every corner without climbing.
Senior or limited-bending build: Same footprint as standard adult, height bumped to 18 to 24 inches to eliminate crouching. A Vego Garden 17-inch metal raised bed ($169 to $299) hits this range right out of the box with no carpentry required.
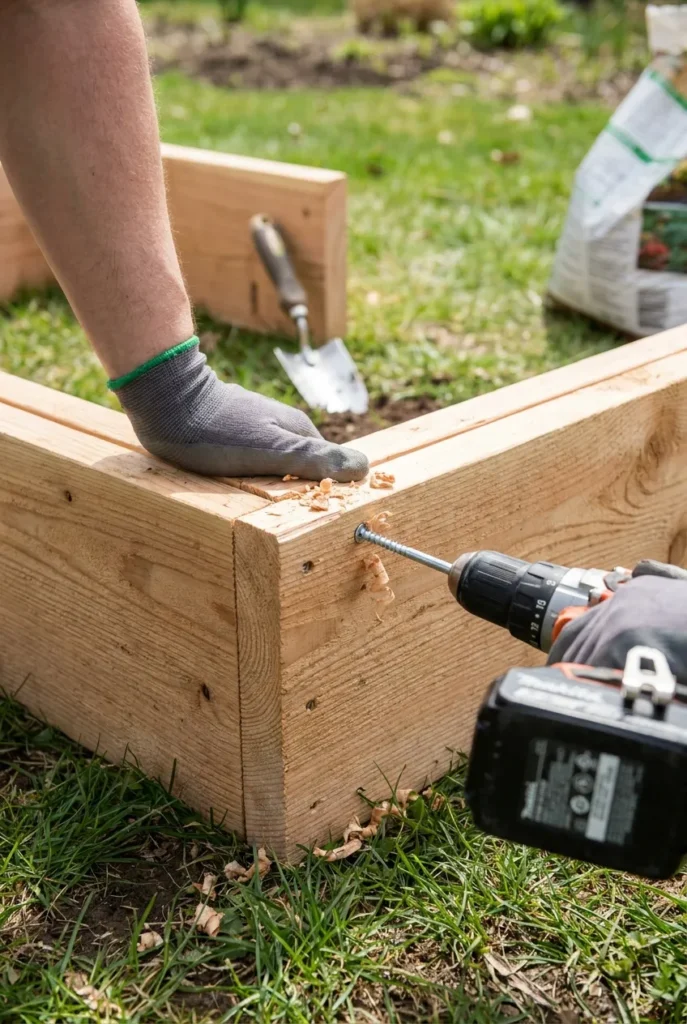
How to Build a DIY U Shaped Raised Garden Bed Step by Step
You don’t need a contractor. You need a circular saw, a cordless drill, and a Saturday morning. Use the Greenes Fence cedar raised bed kit from Home Depot ($60 to $140 depending on panel size) for a no-cut option, or buy Lowe’s pressure-treated 2x6x8 cedar boards at $14 to $22 each for a fully custom footprint.
Tools and Materials You’ll Need
- Circular saw (skip entirely if using a pre-cut kit)
- Cordless drill with a Phillips head bit
- 3-inch exterior wood screws (never nails)
- Heavy-duty L-bracket corner connectors ($4 each, Home Depot)
- Tape measure and carpenter’s square
- Stakes and string to mark the aisle before you cut anything
Build steps:
- Mark the center aisle with stakes and string before you cut a single board. The aisle width determines everything else.
- Cut your two side panels to your chosen length. Cut the back panel. No panel should exceed 24 inches in width.
- Pre-drill holes 1 inch from each board end to keep cedar from splitting on the screw.
- Stack two boards per panel for 12-inch height. Screw together with 3-inch exterior screws.
- Connect side panels to back panel at each corner with L-brackets on all four inner joints.
- Set the assembled U-frame on a double layer of cardboard as a no-dig weed barrier. Cardboard suppresses grass for the full first season without herbicides.
- Fill using the layered method in the next section before you plant anything.
Screws over nails, always. Nails back out in wood that expands and contracts through freeze-thaw cycles. Three winters in, screw joints stay tight while nailed corners rack and open.
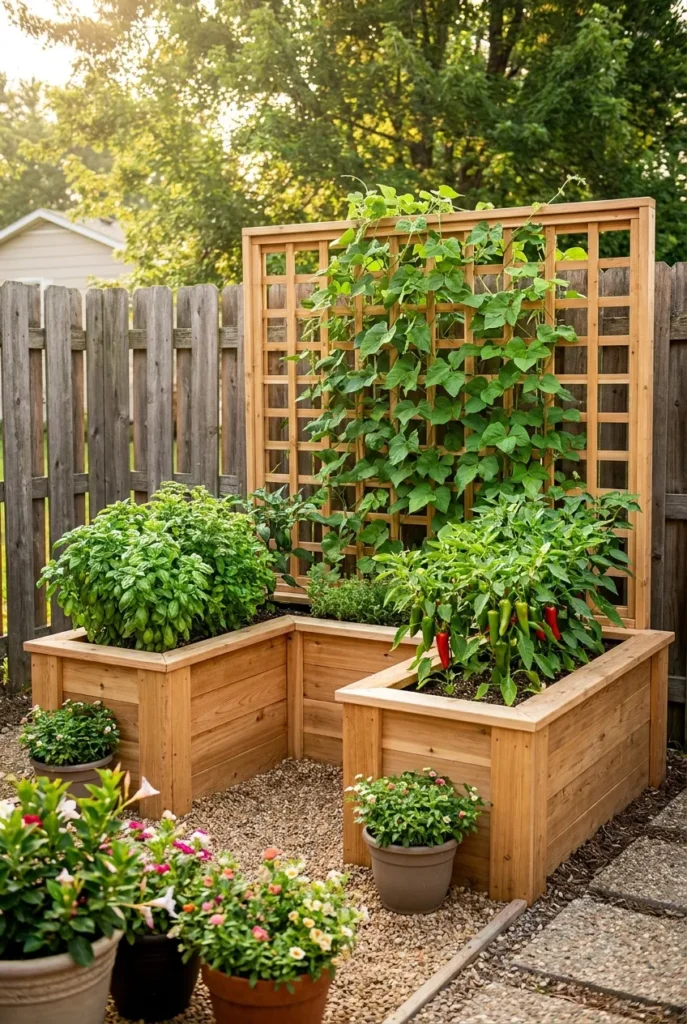
U Shaped Raised Garden Bed with Trellis: The Upgrade Nobody Builds For
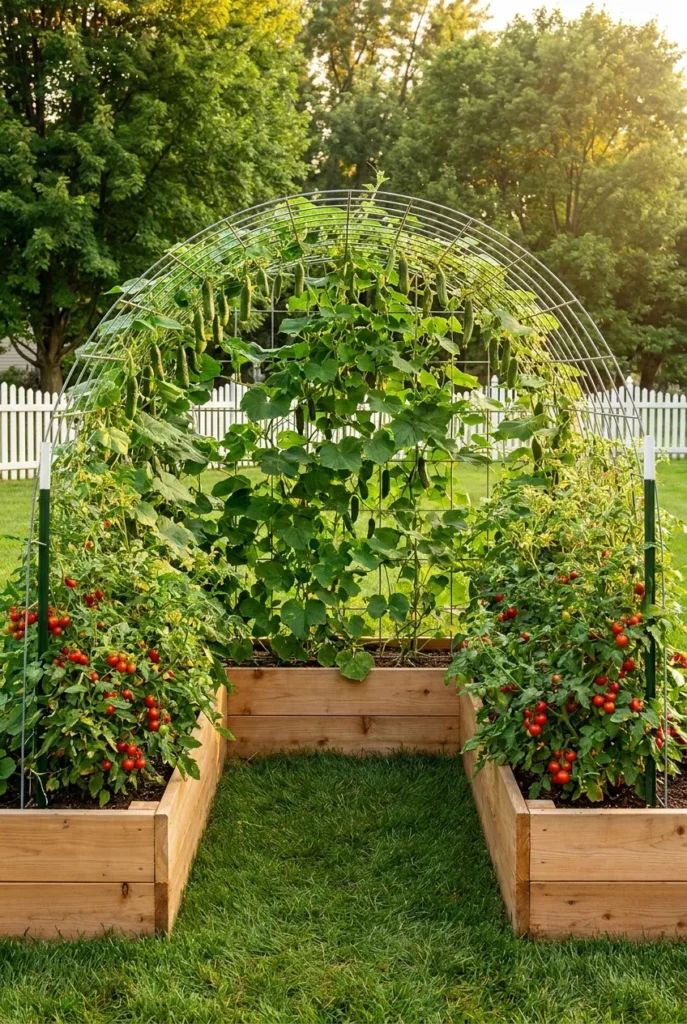
Here’s the angle most diy u shaped raised garden bed guides skip entirely. The back panel of your bed is a natural trellis anchor, and leaving it bare costs you 4 to 5 feet of vertical growing surface every single season.
A cattle panel arch (about $30 at Tractor Supply) bent from one back corner to the other creates a tunnel trellis that covers the back panel width. Cucumbers, pole beans, and sugar snap peas climb up and over, fruit hangs down for easy picking, and air circulation through the plant canopy improves dramatically because you’re growing vertical. A single 16-foot cattle panel bent into an arch gives you a full growing tunnel with zero permanent footings.
For heavier crops like indeterminate tomatoes, set a 4×4 cedar post 12 inches behind the back panel (outside the bed, not inside it) with two horizontal conduit runs at 3 and 5 feet height. Tie plants to the conduit with soft garden velcro rather than wire, which cuts into tomato stems by the third week of July.
Trellis timing matters. Install your trellis structure before planting, not after. Plants woven around a trellis post after the fact get damaged. Add the arch or post the weekend you build the frame.
One more use for the structure: Brightech Ambience Pro G40 string lights ($45 for 48 feet on Amazon) draped over a u shaped raised garden bed trellis after harvest season turn the whole frame into a backyard ambiance moment through November. Two seasons of function from one build.
What to Fill Your U Shaped Raised Garden Bed With
Don’t fill a u shaped raised garden bed entirely with bagged potting soil. We tried the lasagna fill method in 2024 and watched the soil level drop 6 full inches the first winter as everything compressed and broke down. We topped it with $14 worth of Espoma Organic Potting Mix in March and it recovered fully by May. Plan for settling. It’s normal in year one.
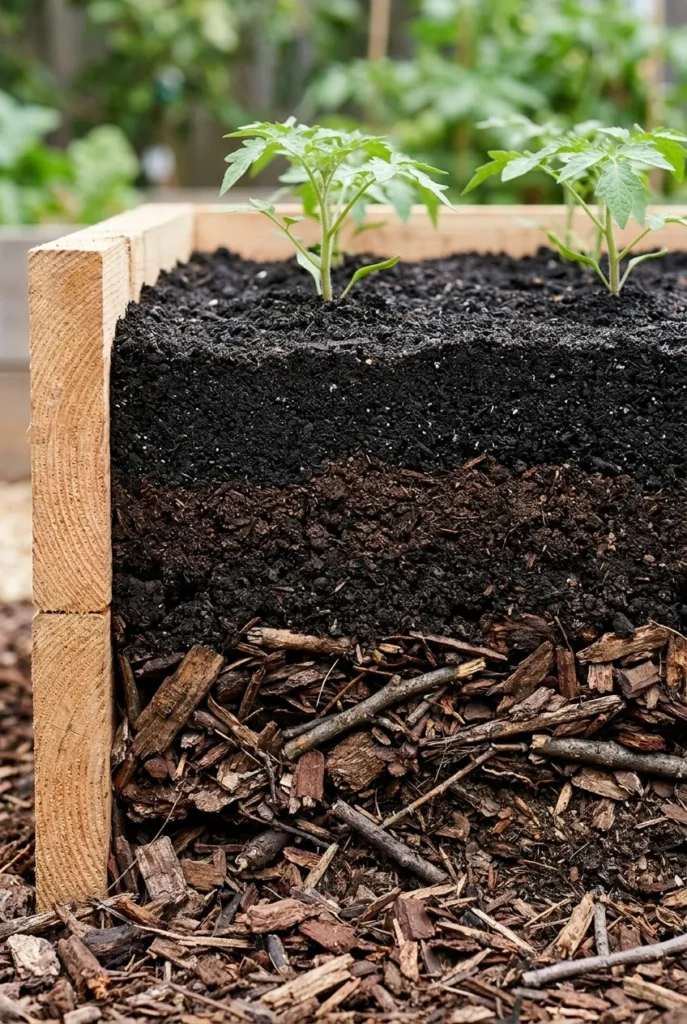
The layered approach costs 40 to 60% less than straight bagged fill and grows just as well by the second season:
- Bottom 4 inches (in a 12-inch bed): Free organic fill. Shredded leaves, straw, small branches, cardboard boxes. This is a simplified hugelkultur base that decomposes slowly and feeds the bed from below for 2 to 3 seasons without additional fertilizer.
- Middle 4 inches: Compost. Espoma Organic Potting Mix at $15 per 8 qt or Black Gold All Purpose at $10 per 16 qt both perform well as the middle layer.
- Top 4 inches: Quality raised bed mix. Kellogg Garden Patio Plus at $12 per 1.5 cu ft from Lowe’s is our go-to for Zones 6 through 9. Miracle-Gro Performance Organics Raised Bed Mix at $18 per 1.5 cu ft is the step-up pick for higher immediate nitrogen.
For an ADA-height bed at 24 to 30 inches deep, fill the bottom 14 to 16 inches entirely with wood scraps, pine branches, or packed cardboard boxes. The top 10 to 12 inches get the full layered mix above. The decomposing base layer improves drainage and feeds roots for seasons without any additional amendment.
For the exact cubic foot math broken down by panel size, our layered method guide on what to fill a raised garden bed with has a full calculation so you don’t overbuy bags at Home Depot.
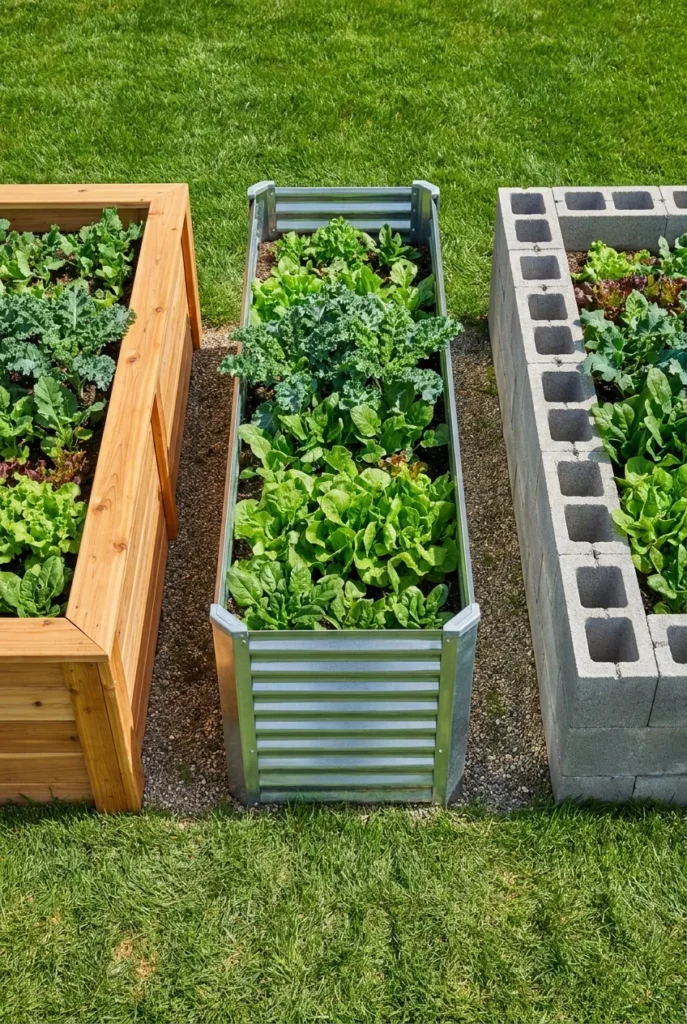
Cedar vs. Galvanized vs. Cinder Block: Which Material Wins for U-Shape Builds
Material choice changes your build cost, how long the structure survives, and whether your backyard looks intentional or improvised. The U-shape footprint amplifies every choice because you’re wrapping three sides, so visual consistency shows more than on a single straight bed.
| Material | Upfront Cost | Lifespan | Best Use Case |
|---|---|---|---|
| Cedar (Greenes Fence kit or Lowe’s 2×6 boards) | $60 to $180 | 10 to 15 years | Beginner builds, traditional look, Zones 4 to 9 |
| Galvanized metal (Vego Garden or Birdies) | $169 to $320 | 20 to 30 years | Modern look, permanent install, Zone 7 to 10 |
| Cinder block (8x8x16 units at $1.85 each, Home Depot) | $80 to $140 | 30+ years | Budget heavy-duty, fully DIY, adjustable height by stacking |
| Pressure-treated pine (2x6x8, Lowe’s) | $40 to $100 | 15 to 20 years | Budget custom builds, cold Zone 4 to 6 yards |
My Vego Garden 17-inch metal raised bed ran hot enough in July that the basil planted along the south-facing side panel bolted by week three. Metal U-shapes in Zone 8 and Zone 9 work best with heat-tolerant crops on the south panel (peppers, okra, sweet potatoes) and shade-sensitive herbs tucked into the shaded interior corners where the two side panels meet.
Here’s the sleeper pick most gardeners overlook: cinder block. You can stack two or three blocks high for near-ADA height without a single screw. You rearrange the layout next spring if you want a different shape. And the hollow cores along the rim can be filled with soil for bonus herb planting pockets all the way around the perimeter. At $1.85 per block, a standard U-shape in cinder block runs about $90 total in materials.
U Shaped Raised Garden Bed with Fence: Privacy and Productivity in One Layout
A u shaped raised garden bed positioned against a fence turns your fence into a working fourth wall and the whole setup into one of the most productive small-backyard configurations you can build without breaking ground.
Push the back panel 6 to 12 inches from the fence, not flush against it. That gap gives you airflow along the back boards, pest inspection access you’ll actually use, and room for a trellis post if you add one later. Flush against the fence traps moisture and accelerates rot in both the bed frame and the fence boards.
String a cattle panel horizontally between the two back corners of your U-shape and the fence pickets directly behind and you’ve got a free trellis wall that cost nothing extra. Pole beans and cucumbers fill it from corner to corner by the second week of July in Zone 7, and the visual effect from inside the yard is a full green privacy screen through the entire growing season.
Renters: if you can’t attach anything to the fence, a freestanding cedar lattice panel ($25 at Home Depot) zip-tied to the back panel corners holds peas, beans, and cucumbers all season without touching the landlord’s fence. No deposit risk. Zero drilling.
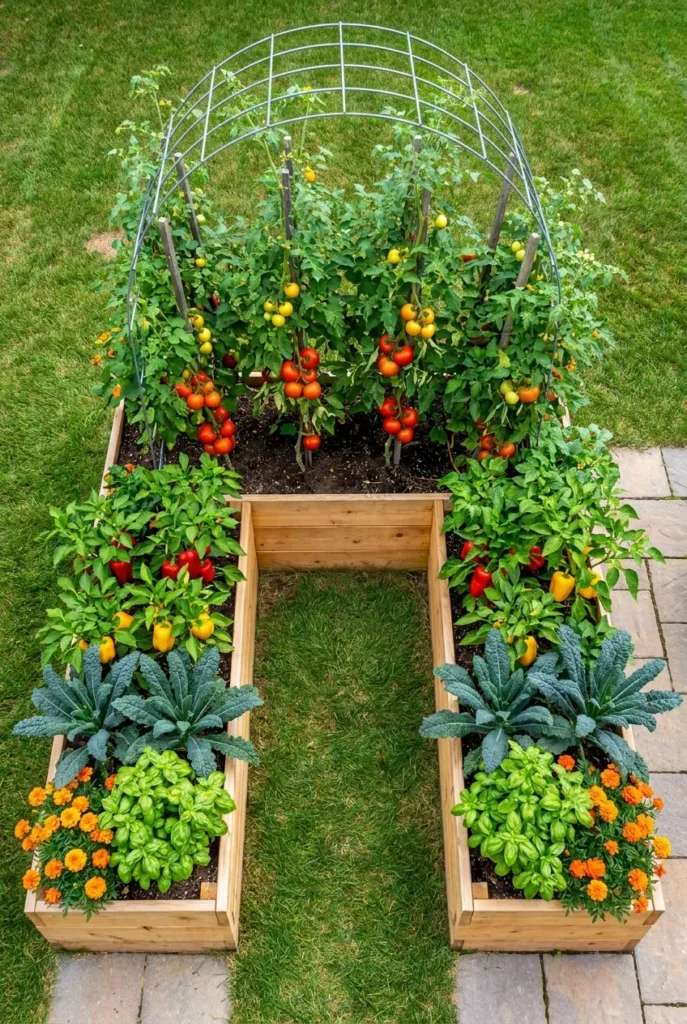
Planting Layout Inside a U Shaped Raised Garden Bed
The U-shape gives you a built-in sun gradient from the back panel to the front corners. Respecting that gradient is the single decision that separates a productive bed from a crowded one.
Sun Mapping Your U-Shape
Before you plant, stand in the center aisle at noon and look at where the shadow from the back panel falls. That shadow line divides your growing zones:
Back panel (full sun, tallest position): Indeterminate tomatoes, pole beans, cucumbers, sunflowers. Anything that needs full direct sun and has height to grow into.
Side panels (part shade by midday from back-panel crops): Bush beans, peppers, eggplant, kale, Swiss chard. These handle afternoon shade and they won’t compete with the climbers behind them.
Front corners (lowest, most open): Basil, parsley, leaf lettuce, radishes, and marigolds along the very edge. Marigolds deter aphids and whiteflies from the whole bed naturally, and they look intentional.
Aisle (vertical space only): A hanging strawberry planter or a wall pocket strip for dwarf herbs uses vertical aisle space without crowding any panel.
Mark a 12-inch square grid on your top boards with a paint marker. Plant each square to its seed-packet spacing: one tomato per square, 9 bush bean plants per square, 16 radishes per square, 1 pepper per square. According to University of Minnesota Extension’s raised bed spacing guidelines, succession planting every two to three weeks inside a grid like this keeps production continuous from mid-May through mid-October in Zone 5. Skip succession planting once and you get a two-week glut in August and nothing by September.
Worth doing right from the start. The beds that quit producing by August are almost always the ones where sun mapping got skipped.
Once your panels are built, our full crop-by-crop guide on how deep a raised garden bed should be breaks down minimum depth by vegetable so you know exactly how tall to build your panels before a single screw goes in.
Frequently Asked Questions
Are U-shaped garden beds good?
Yes, and for one specific reason: you reach every plant from the center aisle without stepping inside the bed. Compacted soil is the single biggest yield killer in raised beds, and the U-shape removes every reason to ever step in. For kitchen gardeners, mobility-limited gardeners, and anyone working in a small yard, it’s the most productive shape per square foot of material cost.
What are three mistakes to avoid when gardening with raised beds?
First, filling entirely with bagged potting mix, which costs 2 to 3 times more than a layered approach and settles harder in year one. Second, skipping a weed barrier below the frame, because grass pushes through an open-bottom bed within 4 to 6 weeks. Third, making any panel wider than 24 inches, because anything beyond that means leaning and eventually stepping inside.
How do I layout my raised garden bed?
Tall crops on the back panel in full sun, medium crops on the side panels in part afternoon shade, low crops at the front corners most open to light. Mark a 12-inch square grid on your top boards with a paint marker and plant each square to its seed-packet spacing. Succession-plant every two to three weeks to keep harvests continuous rather than all arriving at once.
How to create curved raised beds?
For a true curve, use flexible corrugated metal panels (Vego Garden sells curved extension inserts) or 1×4 pine strips bent around rebar stakes at intervals. Cinder blocks approximate a curve with small angular gaps between units. True curved beds cost more to build than U-shapes and produce less growing surface for the same material spend. The U-shape is a better return on most budgets.
How deep should a U shaped raised garden bed be?
Twelve inches for most vegetables. Carrots and parsnips need 18 inches. Tomatoes and peppers do fine at 12 inches if soil quality is high. For ADA-height or countertop builds, 24 to 30 inches is the sweet spot for standing access with zero bending. Deeper beds also accommodate the hugelkultur-style free fill base, cutting your soil cost significantly.
What is the best soil mix for a U shaped raised garden bed?
One-third compost (Espoma Organic Potting Mix or Black Gold All Purpose), one-third raised bed mix (Kellogg Garden Patio Plus or Miracle-Gro Performance Organics Raised Bed Mix), and one-third free organic material in the bottom layer. This keeps cost under $70 for a standard U-shape footprint and grows as well as 100% premium bagged mix.
Do raised garden beds need a bottom?
No. Open bottoms are better in almost every situation. Roots extend downward, drainage improves, and earthworms move in from the native soil below. If you’re building on a concrete patio or wood deck, a double layer of cardboard or landscape fabric works as a temporary base that breaks down in the first season and becomes part of the organic layer.
Conclusion
A u shaped raised garden bed is not just a layout choice. It’s a decision about how much of your growing space you actually want to use. Three panels, one center aisle, every plant within arm’s reach, and a back-panel trellis that adds vertical growing height most single beds never even consider.
Start with your scenario sizing from the table above. Match your material to your climate and your long-term budget. Build your trellis anchor before the first plant goes in. Map the sun across your panels at noon before you decide what grows where. The beds that produce hard through every week of summer are the ones that got those four decisions right before the first board hit the ground.
Now go build your U.


