
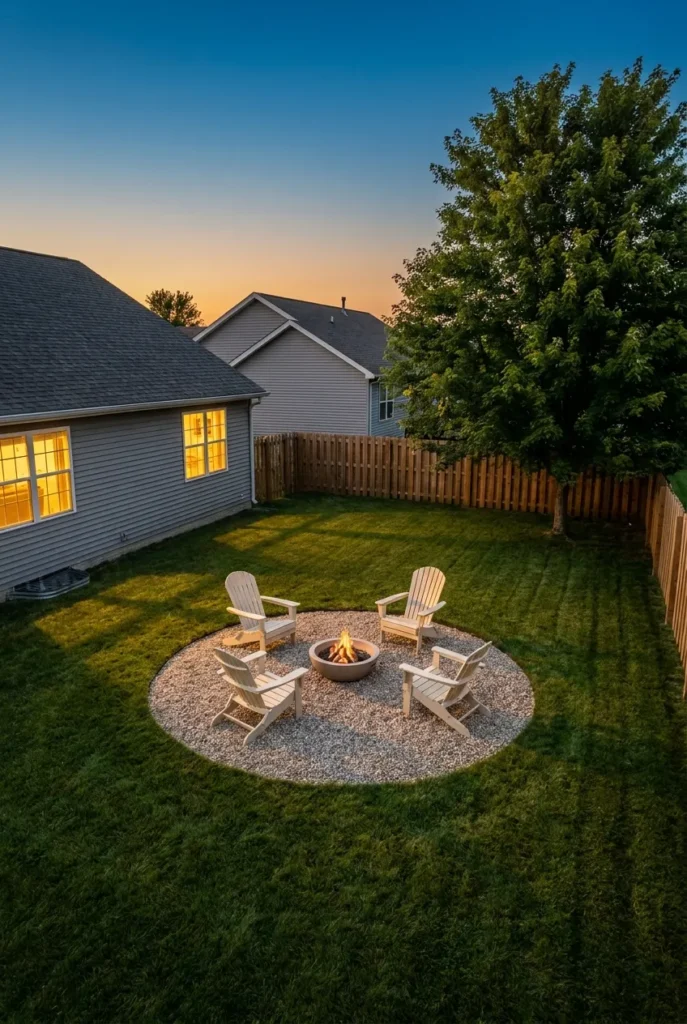
You picture the night first. Friends folded into chairs, a low fire doing the work no overhead light can do, somebody finally putting down their phone. Then you walk out back, see the bare patch where the grill used to live, and have no clue where to start. A DIY fire pit seating area is the cheat code that turns that dead corner into the best room in your house, and you do not need a contractor, a permit, or a Pinterest budget to build one. Our first Solo Stove Bonfire 2.0 sat on bare grass for one weekend. The dead ring stayed for 11 months. We rebuilt it the right way for under $300, and this is the exact playbook.
Why Most DIY Fire Pit Seating Areas Fall Apart by Year Two
Here’s the truth nobody selling you fire pit inspiration says out loud. A pretty pit dropped on bare grass looks amazing for one summer, then the lawn dies in a perfect circle, the chairs sink into wet ground every spring, and the whole setup looks like a stalled project by year two. That is the default outcome. We’ve seen it in three of our neighbors’ yards on the same street.
The fix is boring and cheap. A real base. A 6 to 10 ft compacted gravel or paver pad that handles heat, sheds rain, and keeps your seating off mud. Skip it and your DIY fire pit seating area will look great for one season and apologetic forever after.
Most weekend warriors also under-spec the seating circle. They eyeball the distance between the pit and the chairs, end up with knees almost in the flames, and then never use the setup because it’s uncomfortable. There’s actual math here, and we’ll get to it in a minute.
One more thing competitors miss. Wind direction matters more than you think. Set the pit so the prevailing wind blows smoke away from the back door and the seating circle, or you’ll spend every Friday night relocating chairs. Our solo stove backyard layout guide goes deeper on that placement decision if you want the full breakdown.
The Real Cost of a DIY Fire Pit Seating Area (Three Honest Budget Tiers)
People search “DIY fire pit seating area cheap” and get articles that quietly cost $1,200 by the last line item. Here is what the project actually runs at three realistic price points, with the exact products we’d buy at each tier.
| Tier | Total | Fire Pit | Base / Pad | Seating | Lighting |
|---|---|---|---|---|---|
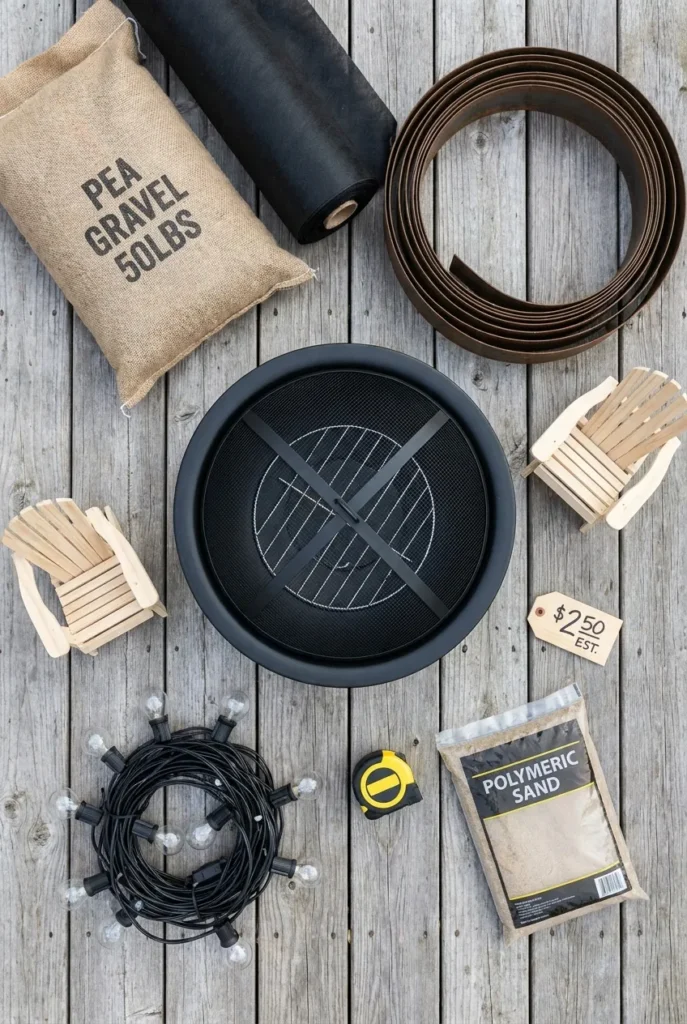
| Bare Bones | Under $200 | Walmart Mainstays 28″ steel ($69) | 10 bags pea gravel + landscape fabric ($45) | Two $25 plastic Adirondacks ($50) | Costco Feit 48 ft string lights ($24) |
| Mid Range | $300 to $450 | Sunnydaze cast iron 30″ ($150) | 10 ft pea gravel pad with steel edging ($90) | Two Walmart Better Homes wood Adirondacks ($120 pair) | Brightech G40 48 ft ($45) |
| Splurge | $750+ | Solo Stove Bonfire 2.0 ($349) | Flagstone or paver pad ($250) | Two Polywood Adirondacks ($498 pair) | Govee outdoor smart string lights ($70) |
The bare bones tier really does come in under $200 if you shop the Walmart and Costco sides of the project. The mid range is where most readers land, and where the build actually starts to look like the Pinterest photo. Splurge buys you a 20 year setup that won’t need replacing. Pick a tier and resist the urge to mix splurge furniture with a bare bones pit, the proportions go off and the whole vibe collapses.
Where to Put It (Distance, Wind, and the 10 Foot Rule)
Placement decides 80% of how much you actually use the setup. Three rules cover almost every yard.
Distance from the house. According to Consumer Product Safety Commission fire pit safety guidance, you want a minimum 10 ft clearance between any open flame pit and your home siding, deck overhang, or fence. Local codes can demand more. Check before you dig.
Distance from low branches. Look up before you commit. Anything within a 15 to 20 ft vertical cone above the pit is a problem. Maple, oak, and cedar branches catch sparks fast.
Wind direction. Stand in the spot at 7 p.m. on three different evenings. Notice where the breeze pushes. Place the seating circle so the most-used chair sits upwind of the pit. Smoke chases people who park downwind, and that is the single fastest way to kill a fire pit habit.
One more move that pays off. Sight your seating area from inside the kitchen window. The pit should be visible when you’re filling glasses or grabbing the bug spray. A fire pit you can’t see from the back door gets used half as often.
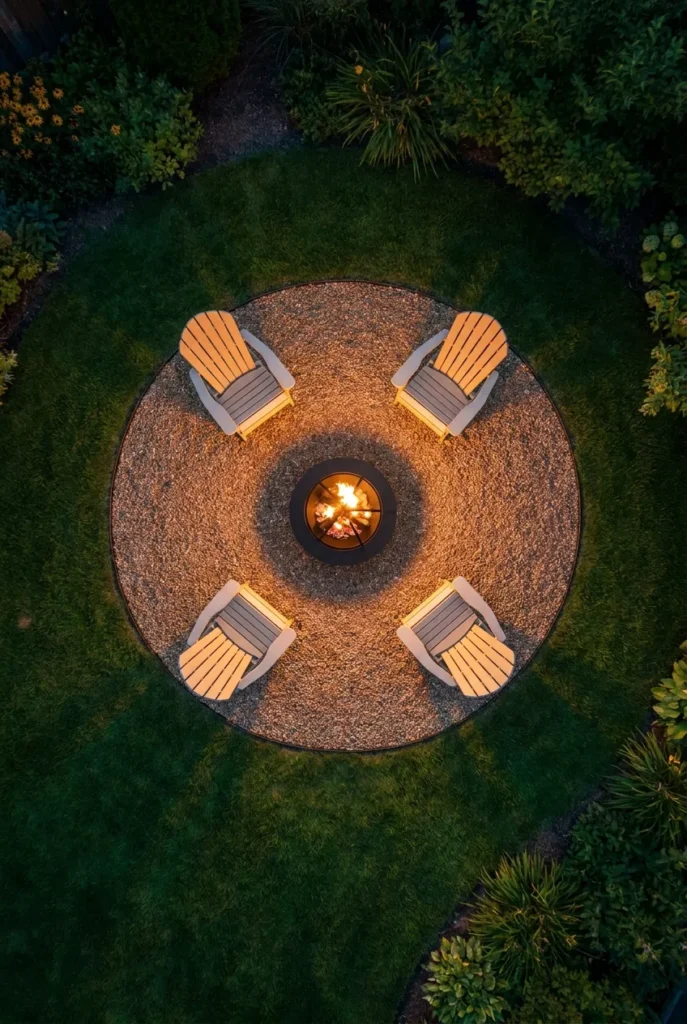
How to Size the Seating Circle (The Math Nobody Tells You)
This is the part every other DIY fire pit seating area article skips. The total diameter of your pad is not a feeling. It’s a sum.
Here’s the formula we use on every layout:
Pit diameter + 3 ft safe clearance on each side + chair depth + walking pad behind chairs = total seating circle diameter.
Plug in real numbers. A 30 in (2.5 ft) fire pit plus 3 ft of clear gravel on each side plus a 33 in (2.75 ft) Adirondack depth plus 1.5 ft of walking pad behind each chair equals roughly 12 to 13 ft total diameter for a four chair setup. For six chairs you need closer to 14 ft. For two chairs and a love seat, 10 ft works.
The 3 ft safe clearance is the part that protects shins from radiant heat. Anything less and you’ll be subconsciously leaning back the whole night. The 1.5 ft walking pad behind chairs is what lets people pass each other without stepping into the fire zone. Skip it and one person leaves the circle every time someone needs a refill.
Quick gut check. If you want a “conversation distance” feel where everyone can hear without raising their voice, keep the seating circle under 14 ft. Past that and the fire stops being the anchor and starts looking like a campfire across a field.
The Base That Decides Whether It Lasts
A fire pit seating area is 10% pit and 90% base. Get the base right and the project survives 10 years. Get it wrong and you’ll be rebuilding it next spring.
Our 12×12 paver patio heaved twice before we tore it up and laid 4 inches of compacted gravel base in 2024. Zero movement since. That single retrofit taught us more about backyard builds than any YouTube tutorial. The base does the work. Always. The same lesson applies to a fire pit seating area, and you can read the full retrofit story over in our paver patio playbook on a budget.
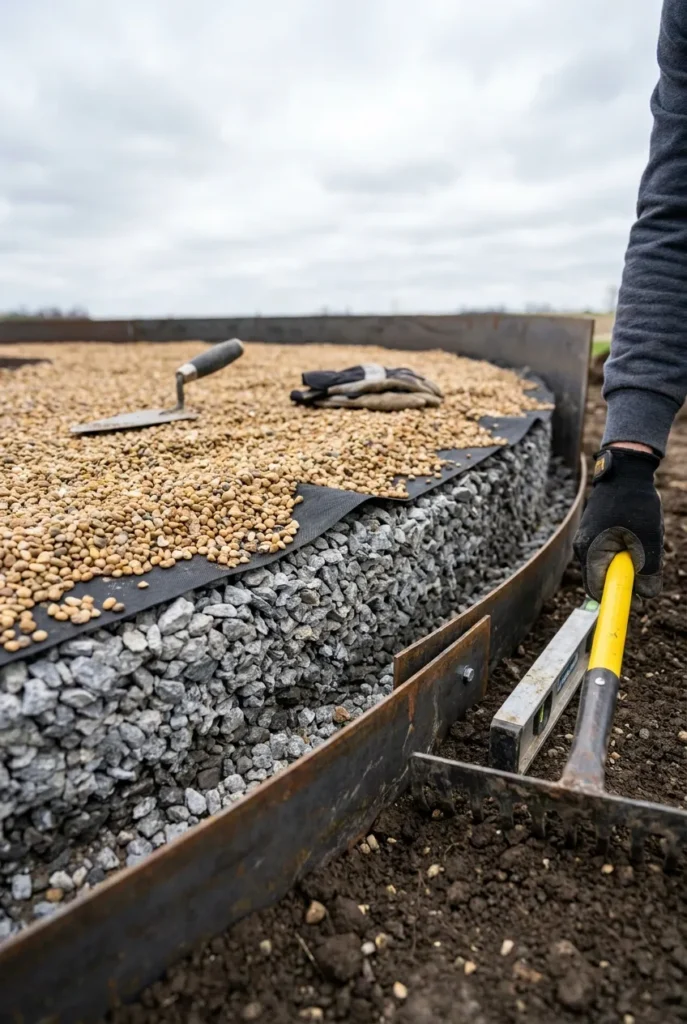
For a DIY fire pit seating area, the base sequence looks like this:
- Mark the circle with marking paint or a string and stake.
- Strip 4 in of sod.
- Lay landscape fabric, overlapping seams by 6 in.
- Drop 3 in of crushed gravel (the 3/4 minus, not pretty pea gravel) and tamp it flat.
- Top with 1 in of pea gravel or decomposed granite for the finish look.
- Install steel landscape edging or a paver border to lock it in.
The whole thing takes a Saturday and one cubic yard of mixed gravel for a 10 ft circle.
Pea Gravel vs Decomposed Granite vs Pavers
Pea gravel runs the cheapest at roughly $4 to $6 a bag from Home Depot, drains fast, and feels great underfoot. It also kicks out of the circle and migrates into the lawn. Steel edging fixes that.
Decomposed granite compacts tighter and stays put, but it tracks orange dust onto white sneakers and into the house all summer. Worth knowing.
Pavers and flagstone cost 3 to 5 times more but read luxury and last forever. Use polymeric sand in the joints to lock out weeds. Per NFPA guidance on outdoor flame and clearance, any solid pad under a pit needs a non-combustible material rated for direct heat exposure. Concrete pavers and natural stone qualify. Wood and composite decking do not, ever.
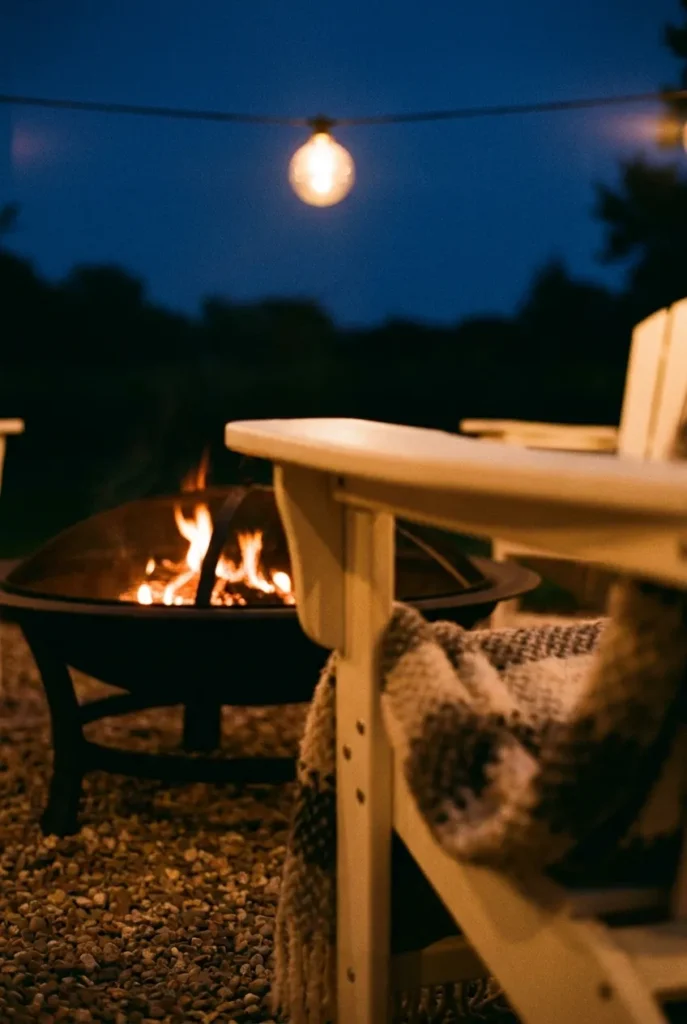
Pea gravel under our DIY ring keeps the surrounding lawn safe and dries out fast after rain. Three summers in, the pad still looks new.
Seating That Pulls People In
The chairs decide whether the fire pit gets used twice a summer or twice a week.
The Adirondack Choice
Adirondacks are the default for a reason. The deep angled back tilts you toward the fire. Two Polywood Adirondacks at $249 each (made in the US, lifetime, weatherproof) is the splurge move. Walmart Better Homes wood Adirondacks at $60 each is the mid range pick. Skip the $19 plastic ones unless you literally need chairs by Saturday, they tip backward in soft gravel.
The Sectional Move
A small outdoor sectional swapped for two of the Adirondacks turns the fire pit into the most popular seat in any backyard party. Walmart’s Better Homes Belle Haven sectional runs $499 and seats four. Pair with two single chairs across the fire and you’ll never need a second seating zone.
DIY Pallet Bench (With One Honest Warning)
Pinterest loves a pallet bench around a fire pit. Built right, sanded smooth, sealed with outdoor poly, it’s a $40 weekend project. Built wrong, with untreated pallets and no sealer, it’s a splinter generator that goes gray in one season. If you go pallet, source only HT (heat treated) stamped pallets, never MB (methyl bromide) treated. The stamp is on the side rail.
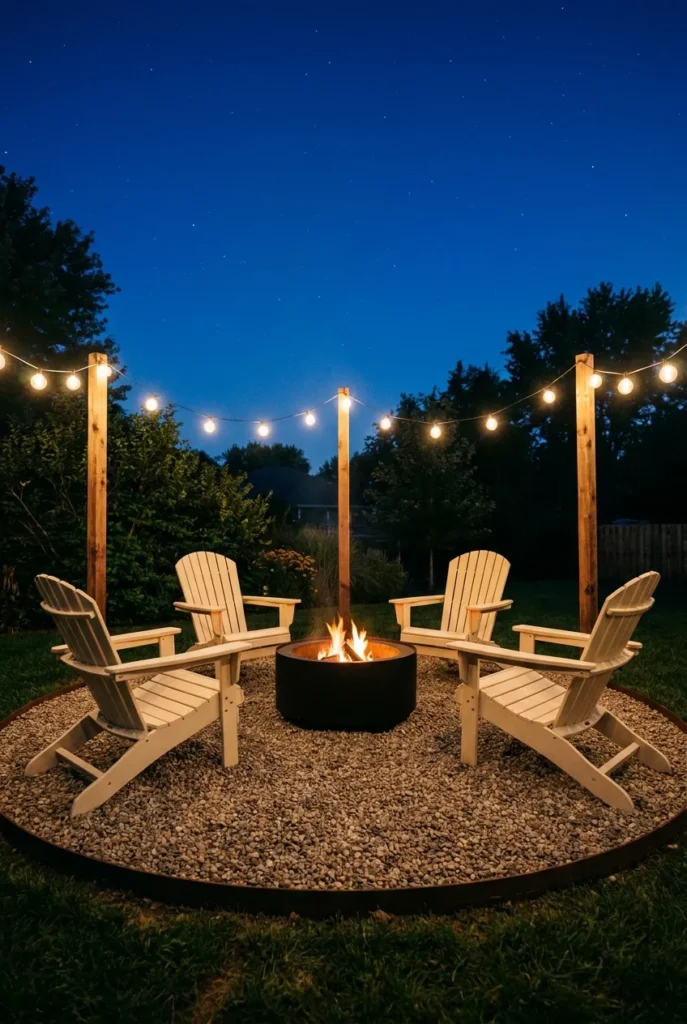
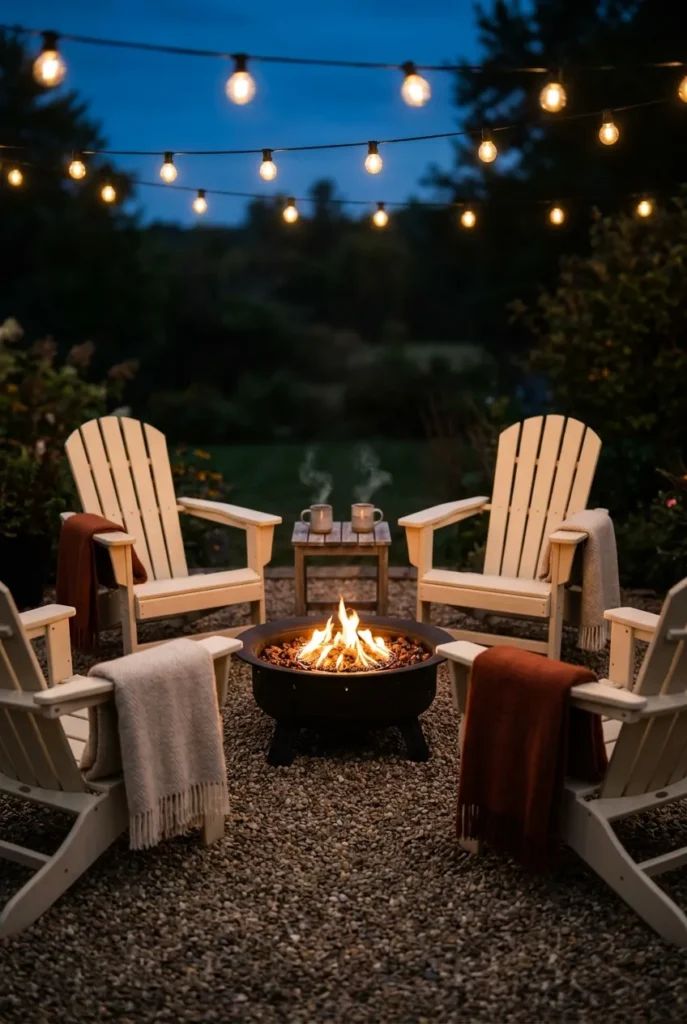
Lighting and Layering for After Dark
The fire is one light source. Two more is the magic number.
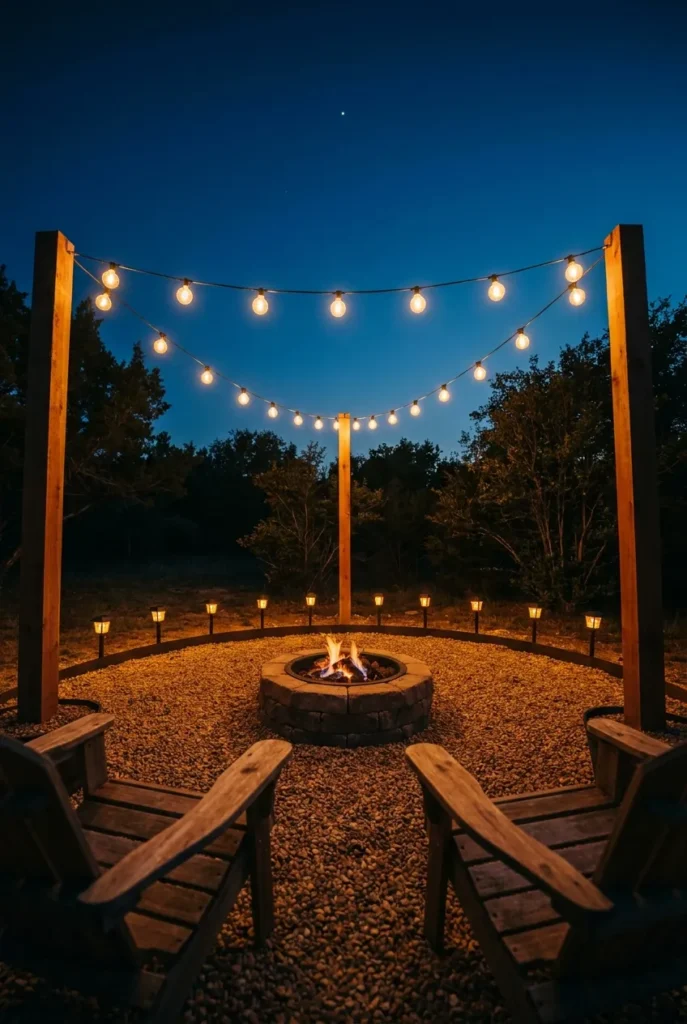
Run a single strand of warm white G40 globe string lights overhead. Brightech G40 lights at $45 for 48 ft beats almost anything in their price range. If you have no posts or trees to anchor to, two 8 ft Hampton Bay light poles at $35 each turn any open yard into a Pinterest pin. Our guide to hanging string lights without trees covers the exact pole spacing and guide wire setup we use.
Add a low layer at gravel level. Three Dollar Tree solar lanterns at $1.25 each line the edge of the seating circle and read way more expensive than they cost. We tried four solar lanterns one summer in Atlanta and three were still going strong by Labor Day.
The Renter Friendly No Dig Version
Most fire pit articles assume you own the yard and a shovel. Plenty of readers rent, lease, or just aren’t ready to dig up sod for a maybe. Here is the deposit safe version.
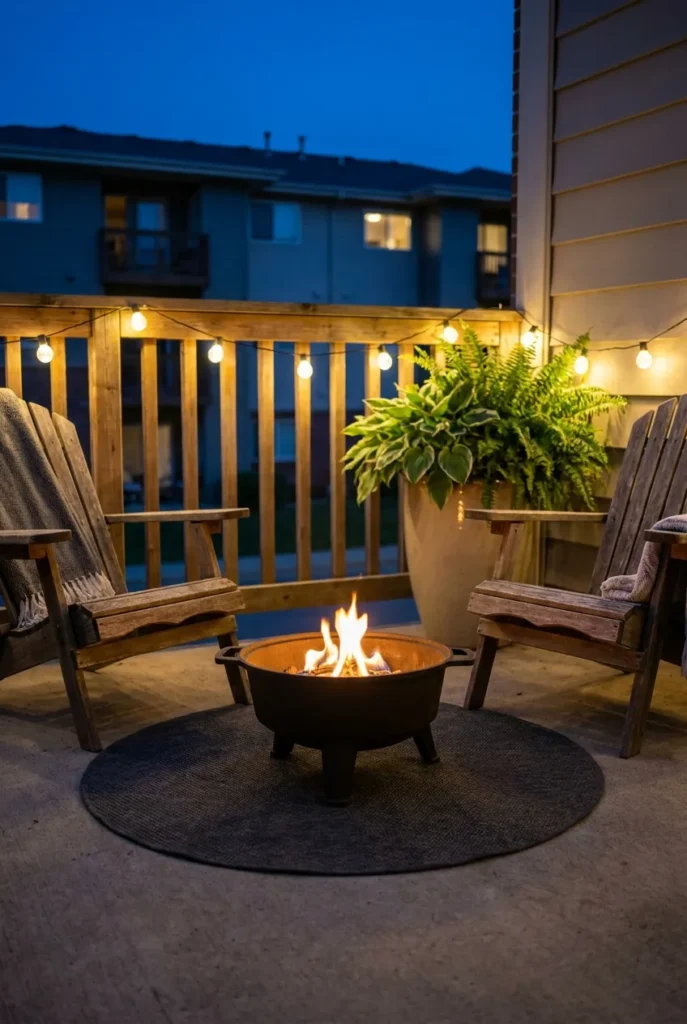
Skip the gravel pad entirely. Use a 36 in fire pit mat from Amazon (roughly $40) as a non combustible buffer between the pit and existing concrete, pavers, or even bare ground for a removable setup. Pair with a portable cast iron pit like the Sunnydaze 30 in at $150 that lifts into a car trunk when you move. Folding wood chairs or two of the Costco Sunbrella zero gravity loungers at $79 each finish the setup. Battery powered string lights from Target hang off existing fence posts with adhesive hooks, leaving zero holes behind.
Total renter version: about $310 and a 90 minute setup. When you move, everything packs into a sedan.
Finishing Touches That Make It Pinterest Worthy
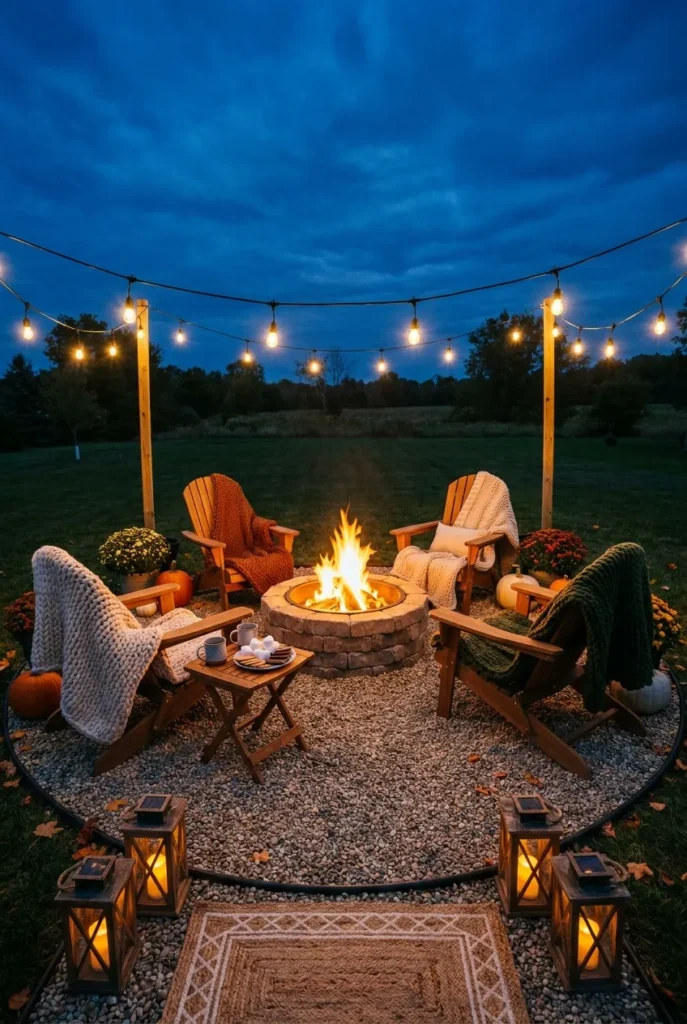
Three small moves add the most visual payoff for the least money:
- A jute or indoor outdoor rug at the entry to the gravel circle. HomeGoods carries them for around $30.
- A small acacia side table or wood crate for drinks and a s’mores caddy.
- Two chunky knit throws draped over chair arms. Amazon Basics has them for $25 each.
That’s it. Resist the urge to add more. The fire is the focal point, and over-styling around it makes the whole thing feel staged.
Frequently Asked Questions
What is the best material for a fire pit seating area?
Pea gravel is the winner for budget builds. It drains fast, costs about $4 to $6 a bag, and stays put once you install steel landscape edging. Pavers or flagstone read more premium and last longer, but cost 3 to 5 times as much. Skip mulch or wood chips entirely, they catch sparks.
How big should I make my fire pit seating area?
For four chairs around a 30 in pit, plan on a 12 to 13 ft total diameter. For six chairs, go 14 ft. The formula: pit diameter + 3 ft safe clearance on each side + chair depth + 1.5 ft walking pad behind chairs.
What is a cowboy fire pit?
A cowboy fire pit is a flat steel grill grate set over an open fire ring, designed for outdoor cooking the way trail cooks worked over a campfire. It pairs well with a DIY fire pit seating area when you want the pit to double as a cooking surface, not just an ambience source.
How far should a fire pit be from the house?
Minimum 10 ft from siding, decks, fences, and overhangs, with local codes sometimes pushing that to 15 or 25 ft. Always check your municipal code and HOA rules before you build.
Can you put a fire pit on a wood deck?
Not a wood burning one. Wood and composite decks are combustible and the heat will scar or ignite the surface. A propane or smokeless pit with a heat shield mat is the only safe deck option, and even then, follow the manufacturer’s clearance instructions exactly.
Do you need a pad under a Solo Stove?
Yes. The Solo Stove base reflects significant heat downward. A non combustible pad, fire pit mat, or stone surface protects the lawn, deck, or patio underneath from scorching. Bare grass will brown in one evening and stay dead for the better part of a year.
Bringing It All Together
A DIY fire pit seating area on a budget is not a trick. It’s a base, a sensible circle, a pit that fits, and two chairs you actually want to sit in. Build the bare bones version this weekend for under $200 and live with it for a month. Upgrade the base, then the chairs, then the lighting, in that order. By the end of summer you’ll have the cozy backyard everyone else is still pinning. If lighting it up is your next move, our string light playbook covers the exact poles, bulbs, and guide wire setup we use over our own pit.


