The first summer I hung G40 globes in our yard, I screwed hooks straight into a cedar fence post and the whole strand sagged by Memorial Day. Three weeks later I bought a 50 ft spool of 2 mm aircraft cable for $14, ran it under the lights, and the droop disappeared overnight. That single fix changed how I think about every outdoor light project since.
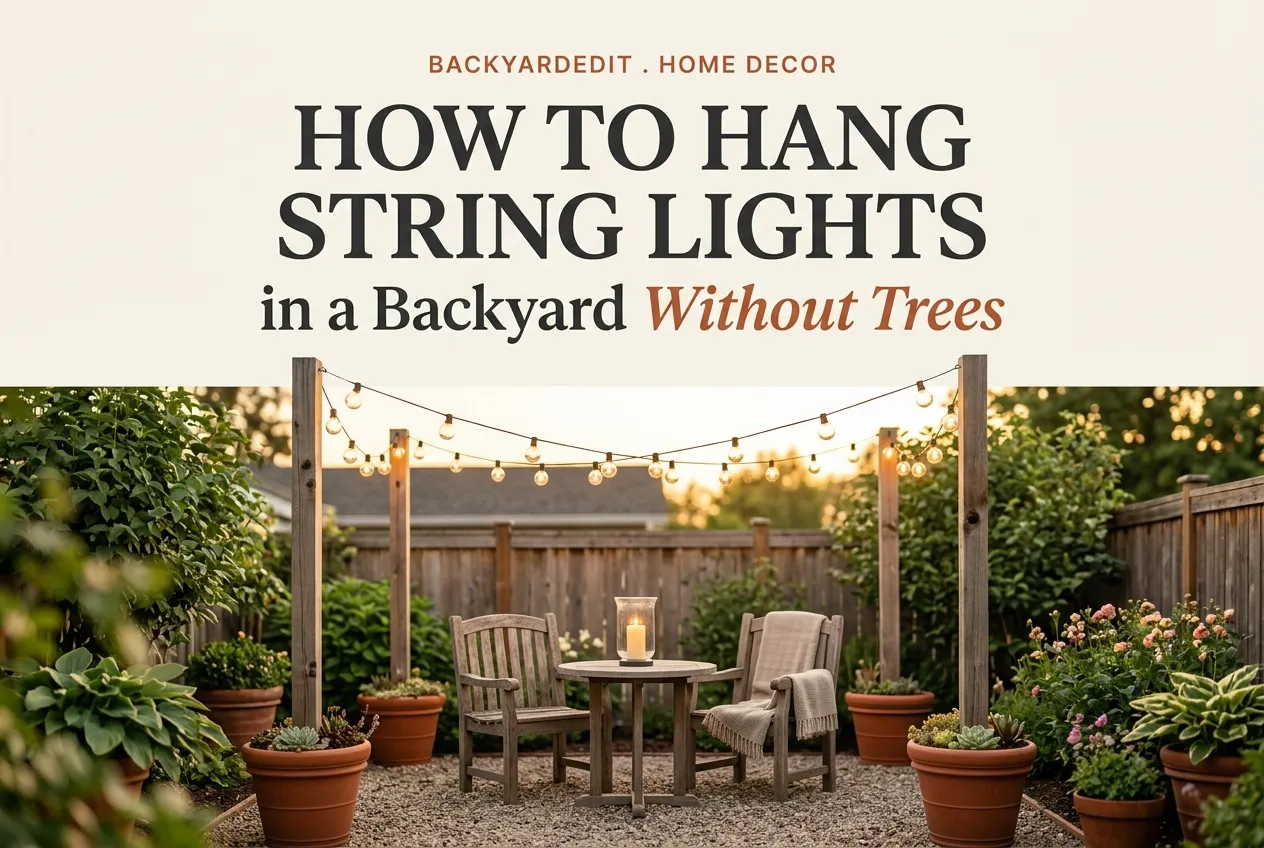
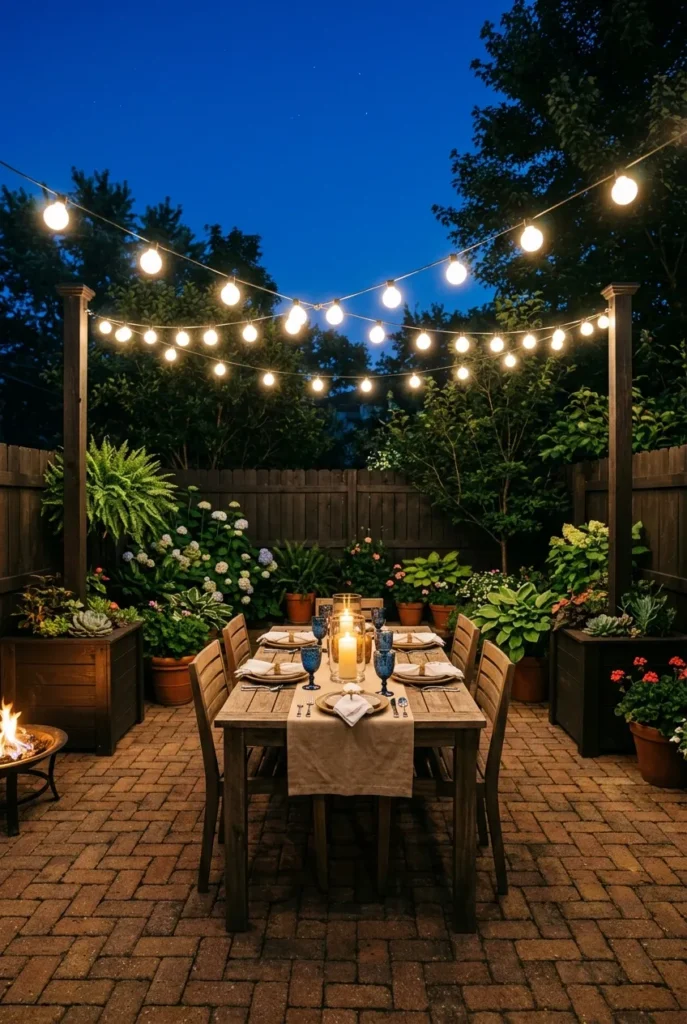
If you have been trying to figure out how to hang string lights backyard style without two perfectly placed mature trees, this is the playbook. We will cover nine mounting methods that actually survive a full summer, the bulb and wattage math nobody talks about, a renter-safe option that protects your deposit, and the one trick that makes cheap Costco lights look like a designer install. Most of these can be done in a weekend with $50 to $250 in materials.
Why Most Backyard String Light Setups Fail by July
Three things kill a fresh string light setup. The strand sags because the cord itself cannot hold its own weight at full span. The plug end melts because too many strands got daisy-chained on one outlet. And the screw hooks rip loose because they went into siding instead of a structural anchor. Every method below solves at least one of these.
For a budget-friendly hardscape that pairs well with a lit canopy, our budget patio playbook built around $200 covers the gravel-base groundwork that makes string light poles in planters stay upright through wind. Get the surface right first, then light it up.
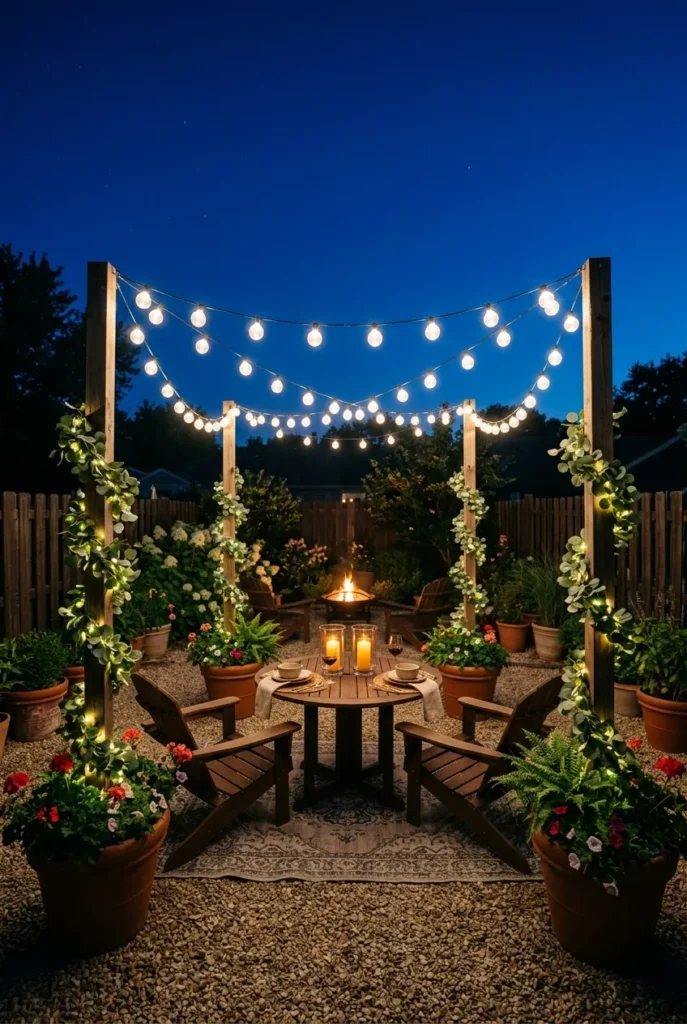
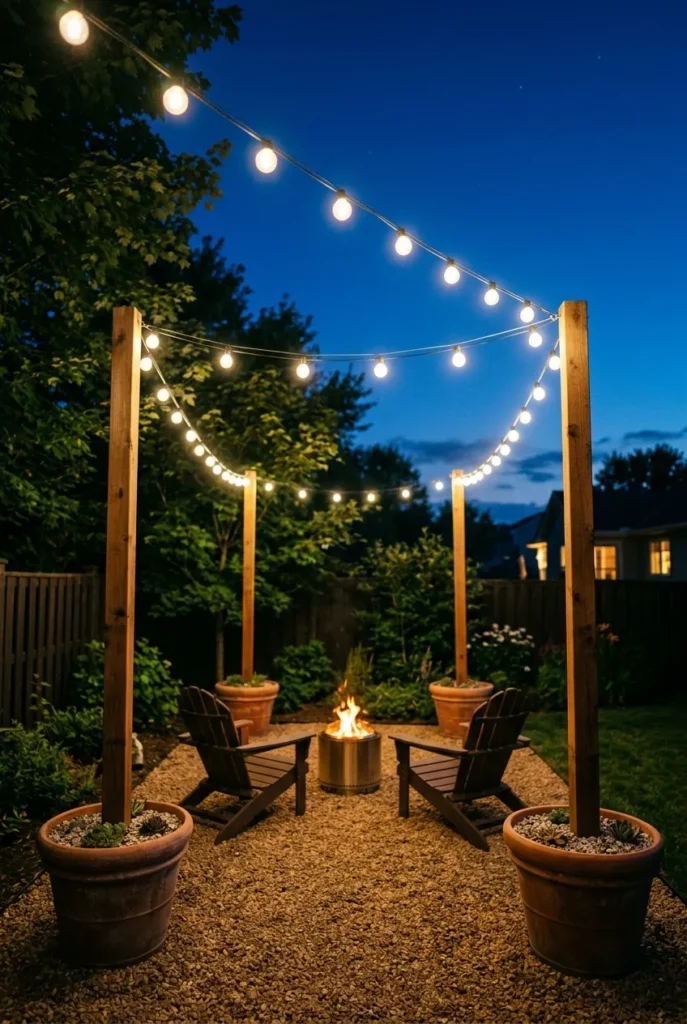
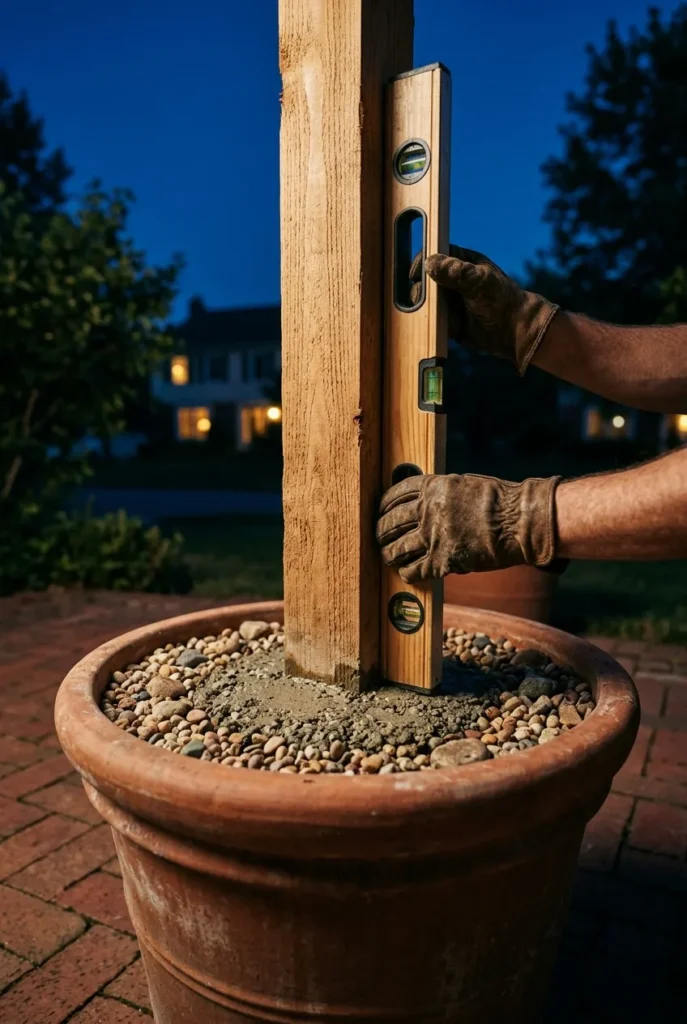
Method 1: Cedar 4×4 Poles in Terracotta Planters
This is the gold-standard method for a yard with no trees, no pergola, and no fence in the right spot. You buy two 8 ft pressure-treated cedar 4×4 posts ($14 to $22 each at Lowe’s), drop each one into a 16 to 20 inch terracotta or galvanized planter, and pour quick-set concrete around the base. Add gravel on top to hide the cement and you have a freestanding anchor that weighs about 90 lbs.
Set the planters where you want each end of your light run. Drive a 1.5 inch screw hook into the top inside face of each post about 6 inches down from the top. Hang your strand. The whole thing reads as intentional landscape design, not a temporary fix.
What you need
- Two 8 ft cedar or pressure-treated 4×4 posts
- Two 16 to 20 inch heavy planters (terracotta, galvanized, or concrete)
- Two 50 lb bags of Quikrete fast-setting concrete ($6 each at Home Depot)
- Pea gravel to cover the concrete top
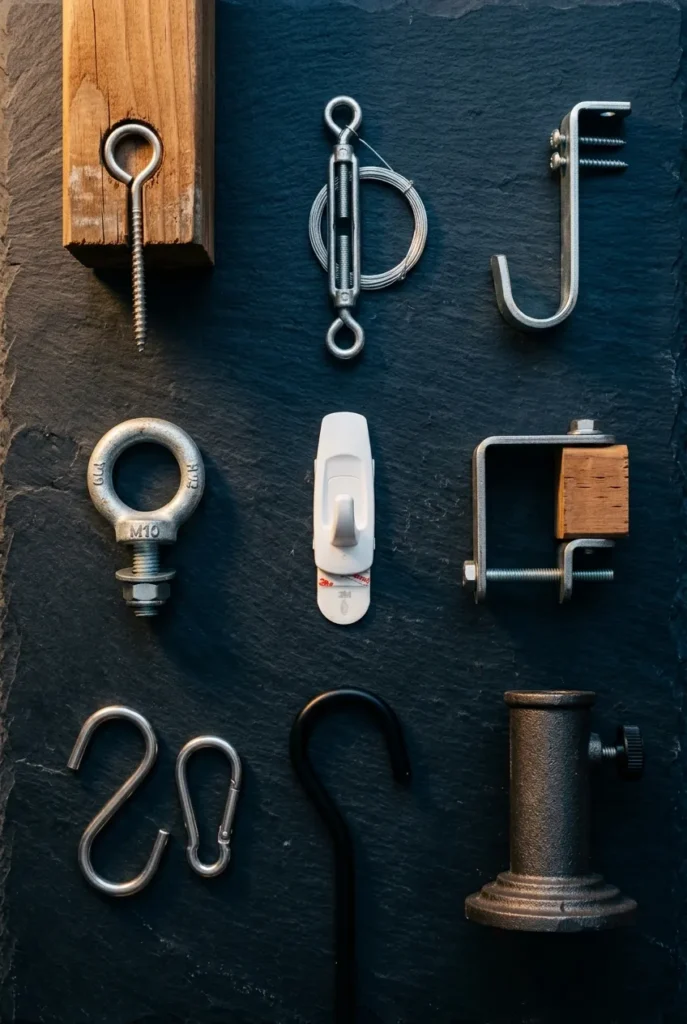
- Two 1.5 inch zinc screw hooks
- A 4 ft level
Total cost for a two-pole setup runs about $80 to $120 before you even add lights. Worth every dollar because the planters double as decor.
Method 2: Add a Guide Wire and Watch the Sag Disappear
Here is the trick that separates a Pinterest-worthy install from a saggy mess. Most G40 and S14 strands are not meant to be load-bearing across spans over 25 ft. They will droop in the middle no matter how tight you pull. The fix is a 2 mm stainless steel aircraft cable run above or below the strand, anchored with turnbuckles at each end so you can crank the tension.
Buy a 50 ft spool of vinyl-coated stainless cable ($12 to $18 on Amazon), two turnbuckles ($4 each), and four cable clamps. Run the wire first, tension it until a 4 lb load in the center deflects no more than 2 inches, then use small zip ties or S-hooks every 18 to 24 inches to attach the light strand to the wire.
The strand becomes decoration. The wire does the work. Your G40 globes look like they are floating on a perfect horizontal line.
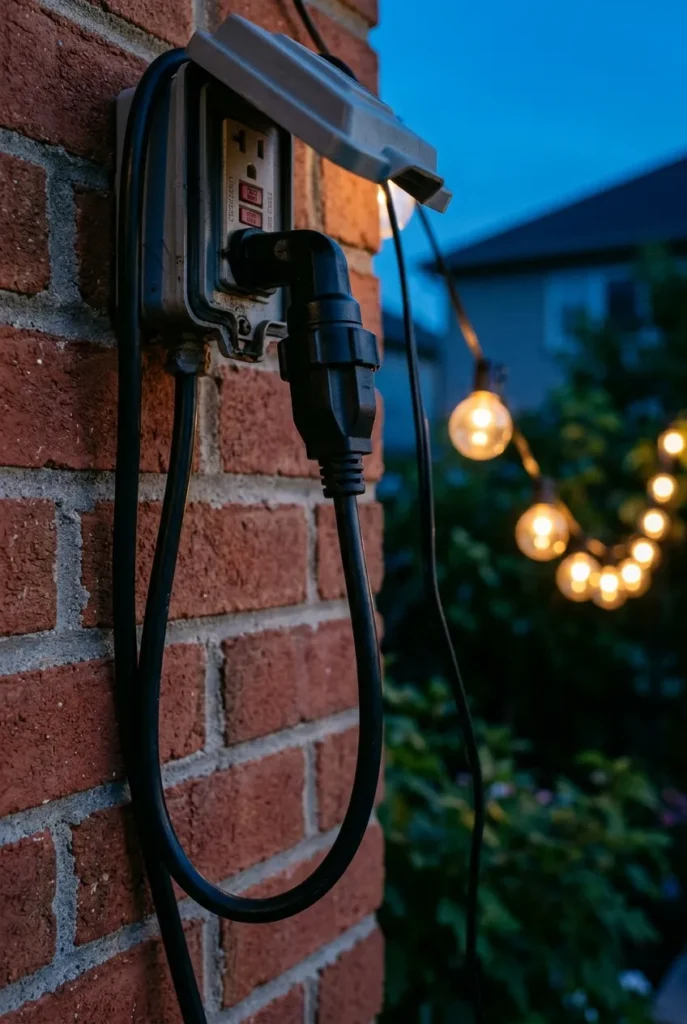
According to UL guidance on outdoor electrical safety, any outdoor lighting setup should be protected by a ground fault circuit interrupter, and your support hardware should be rated for outdoor weather exposure. The vinyl coating on aircraft cable matters because raw stainless can rust at the cable clamp pinch points after enough freeze-thaw cycles.
Method 3: Fence Mount with the Right Hardware
If you have a wood fence in the right spot, you already have your anchors. The mistake people make is screwing hooks into the fence boards instead of the structural posts. Boards split. Posts hold.
Find your fence posts by sighting along the top rail. Drive a 1.5 inch zinc-coated screw hook into the top of each post on the yard-facing side. For a 4 ft to 6 ft fence, the lights will hang at the perfect eye level for a seated guest at a dining table.
A galvanized eye bolt is the upgrade move if you plan to leave the lights up year-round. Drill a 3/16 inch pilot hole, thread the bolt in, and run your guide wire through the eye. The hardware costs about $1.20 per anchor at Ace Hardware.

Method 4: House to Pole Configuration
When one end of your run is the side of your house and the other end is open yard, you set a single pole in a planter at the far end and use a heavy-duty eye bolt on the house side. Drill into a stud or into the fascia board where it meets a rafter tail. Never drill into vinyl siding alone, it will not hold.
This setup works beautifully over a 12×12 ft to 16×16 ft patio because you get the angled-up light line that creates an outdoor room feel. The bulbs trail from a high anchor point on the house down to a 7 ft post at the corner of your patio, which is the exact geometry photographers and stylists use in the cozy small backyard layouts that started this whole obsession.
Method 5: Pergola or Gazebo Top Rails
If you already have a pergola, this is the easiest install in the book. Run your strand along the inner rim of the top rails, securing every 18 inches with a screw eye or with cable staples. For an even more polished look, run two parallel lines diagonally across the top to create an X pattern of warm light overhead.
Pergola installs are also where you can layer two types of lights. Outline the perimeter with S14 Edison bulbs for the structure, then drape G40 globes across the interior beams for ambient fill. The combination is the look every magazine shoots for and it costs about $90 total in lights.
Method 6: Deck Railing with Standoffs
For a raised deck with a railing, you do not want the lights flat against the rail because the bulbs will sit too low. Use a 24 inch wood standoff or a steel deck-rail pole bracket like the Hampton Bay 12 ft pole kit ($35 at Home Depot). Two of these clamped to opposite corners of your deck rail give you a 6 ft elevated light run with no permanent damage to the deck itself.
This is the move I tell every renter to use. Clamps, not screws.
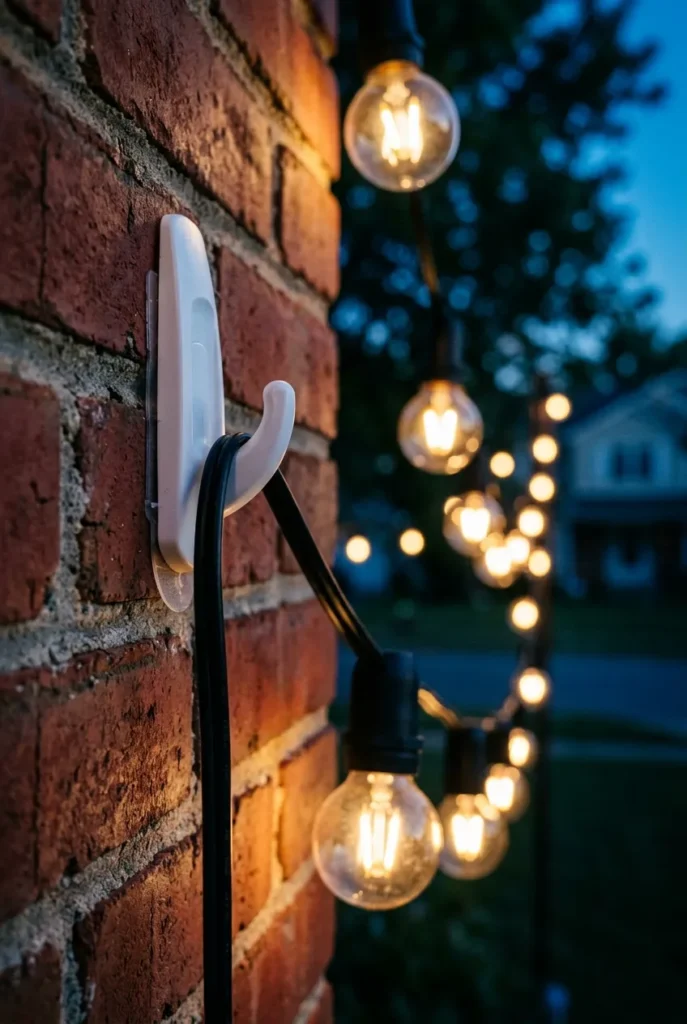
Method 7: The Renter-Safe No-Drill Method
If your lease forbids drilling, you still have options. Heavy-duty 3M Command outdoor hooks rated for 7.5 lbs each will hold a single strand of G40 globes (a 48 ft Brightech Ambience Pro strand weighs about 3 lbs). Press the hooks to clean stucco, brick, or painted wood, wait the full 60 minutes the package specifies, then hang.
Combine these with the renter-friendly Dollar Tree backyard tricks that look way more expensive than $1.25 and you can have a full ambient setup for under $60 that comes down clean when your lease ends.
The other no-drill option is a pair of weighted plant stands with vertical poles. Stack two 50 lb sandbags inside a tall cylinder planter, drop in an 8 ft pole, and you have a freestanding light anchor that you can move whenever you want.
Method 8: Umbrella Stand Pole Trick
A cantilever umbrella base or a heavy patio umbrella stand makes an instant pole anchor. Drop an 8 ft wooden dowel or 1 inch PVC pipe into the umbrella sleeve, secure with a few wedges of folded cardboard, and you have a movable light pole. Two of these positioned at opposite corners of an outdoor dining table give you a perfect canopy in 15 minutes.
This is also the easiest setup to break down and store before a storm. Pull the pole out, coil the lights, done.
Method 9: Shepherd Hooks for Garden Edges
For a winding path or a smaller scale ambient setup, push 6 ft to 8 ft metal shepherd hooks ($8 each at Home Depot) into the ground every 8 to 10 ft. Drape Costco Feit Electric 48 ft string lights ($24 seasonal) across the curve and you have a meandering light line that feels like a fairy garden.
Shepherd hooks are also the only method that works for a yard with zero hard structures, no fence, no deck, no pergola. You can install a complete run in 20 minutes with a rubber mallet.
The String Light Mounting Method Comparison
Before you commit to one method, this is the cheat sheet I wish I had three summers ago.
| Method | Cost | Difficulty | Permanence | Best For |
|---|---|---|---|---|
| Cedar poles in planters | $80–$120 | Medium | Removable | Open yards, no trees |
| Guide wire upgrade | +$30 | Medium | Adds to any method | Spans over 25 ft |
| Fence post anchors | $5–$15 | Easy | Permanent | Yards with wood fences |
| House to pole | $50–$70 | Medium | Semi-permanent | Patios against the house |
| Pergola or gazebo | $0–$20 | Easy | Permanent | Existing structures |
| Deck railing standoffs | $35–$80 | Easy | Removable | Raised decks |
| 3M Command hooks | $15–$25 | Easy | Renter-safe | Apartments, leases |
| Umbrella stand pole | $0–$30 | Very easy | Fully movable | Dining tables, decks |
| Shepherd hooks | $40–$80 | Very easy | Removable | Garden paths, open lawn |
The Bulb and Wattage Math Nobody Talks About
Most string light strands are rated to daisy-chain three to five strands end-to-end before the plug end starts to overheat. The math is simple. Add up the wattage of every bulb on every connected strand and stay under 210 watts on a standard 15 amp residential GFCI circuit, with margin for other things on the same circuit.
A 48 ft Brightech Ambience Pro strand with 24 G40 globe bulbs at 1 watt each (the LED version) draws 24 watts per strand. You can safely connect six or seven strands. The 7 watt incandescent G40 version of the same strand draws 168 watts. You can connect one safely.
This is why the LED versions of Costco Feit Electric 48 ft string lights at $24 are the better buy even though incandescent G40s look slightly warmer. The LED wattage gives you a 7x safety margin and a 10x lifespan.
A few more rules that save your install:
- Plug every outdoor strand into a GFCI-protected outlet only
- Add a drip loop at every connector, meaning let the cord dip below the connection before coming back up so rain runs off
- Never join more strands than the manufacturer prints on the tag
- Pull the plug before storms and pull it for the season if you live in a Zone 4 or colder
ENERGY STAR certified outdoor LED string lights are listed at the federal program’s outdoor lighting guide, and they use roughly 75% less energy than incandescent equivalents while lasting many seasons longer.
Choosing the Right Bulb for the Look You Want
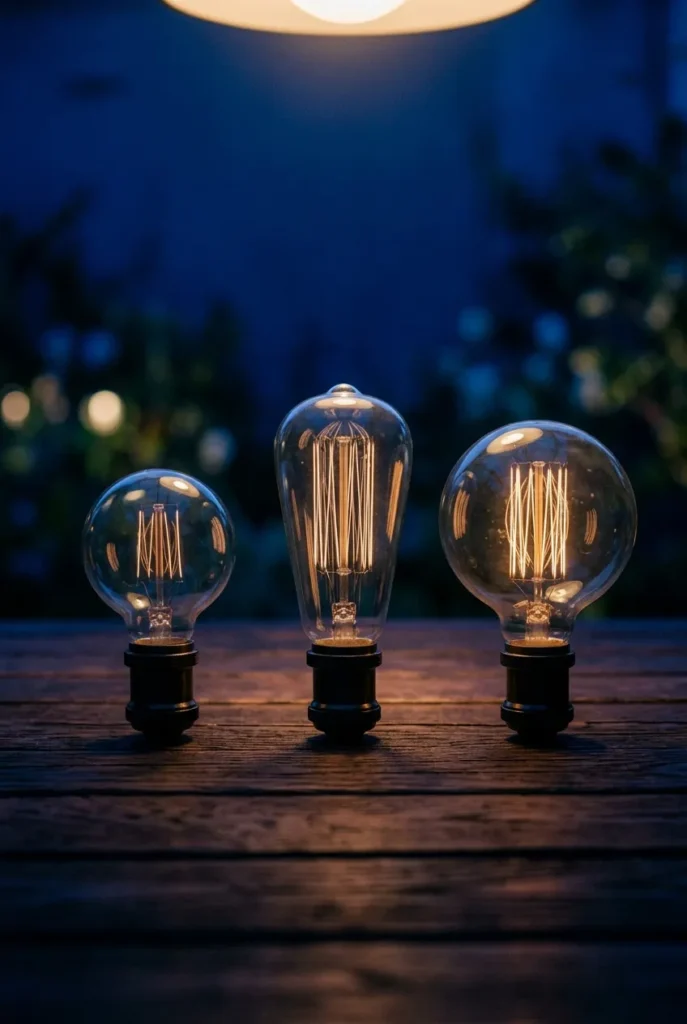
Bulb style does more for the final aesthetic than mounting method. Three bulb shapes dominate the backyard market.
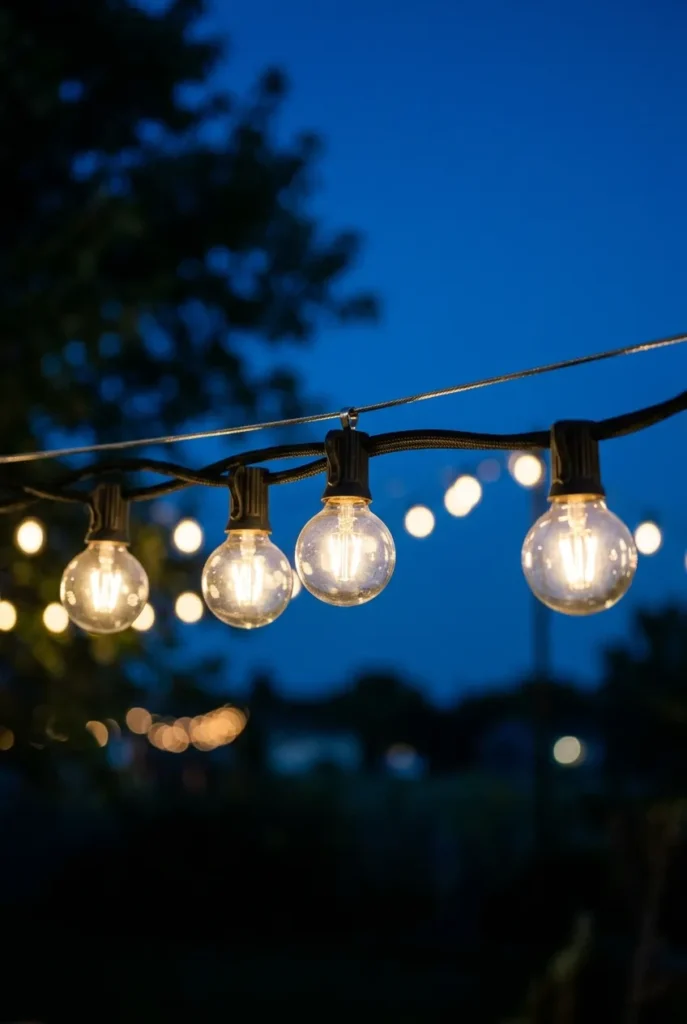
G40 globe bulbs are the round 1.5 inch glass globes you see in most café and bistro shots. Soft glow, classic Pinterest look. Brightech Ambience Pro is the gold standard at $45 for a 48 ft strand on Amazon.
S14 Edison bulbs are slightly taller and oval-shaped with a visible filament. They read as more rustic, more wedding, more reception venue. Excellent over a dining table.
G50 or larger globe bulbs are 2 inch and up, more dramatic, less subtle. Good for big open spans where smaller bulbs would feel underwhelming.
For warmth, stick to 2200K to 2700K color temperature. Anything cooler than 3000K will make your yard look like a parking lot. Color-changing smart options like Govee outdoor strands ($55 to $80) are fun for parties but I would not run them as the daily ambient layer.
How to Plan Your Run Before You Buy
Sketch your yard on paper. Mark the two endpoints where each light strand will attach. Measure the diagonal distance with a tape, then add 15% for sag and drape. A 20 ft span needs at least a 24 ft strand if you want a soft curve, a 23 ft strand if you are running it taut on a guide wire.
For a 200 sq ft patio you want at least 96 to 144 ft of total lit length, which usually means two parallel runs of a 48 ft strand. For a 400 sq ft setup, four strands in a crosshatch pattern. Cheap big-box paver patios at $0.98 each work fine as the surface under your lit canopy as long as you have a properly compacted gravel base, otherwise frost heave will tilt your poles by year two.
What to Do When the Wind Picks Up
Wind is the silent killer of every freestanding pole install. Three things help. First, weight your planters with at least 80 lbs of concrete plus 20 lbs of gravel on top. Second, run a single guide wire as outlined in Method 2 because the taut cable distributes wind load instead of letting one pole take all the lateral force. Third, store a 2 ft length of paracord at the base of each pole so you can quickly stake the pole to a ground anchor when a thunderstorm rolls in.
For coastal yards or anywhere Zone 9 hurricane season hits, take the strands down at the first weather alert. The poles can stay. The lights cannot.
Three Style Upgrades That Cost Almost Nothing
A finished string light install is great. A styled one is what gets saved on Pinterest 4,000 times. Three small moves push the look:
- Add a second perpendicular strand to create a crosshatch overhead canopy
- Wrap a few feet of faux eucalyptus garland around each pole base where it meets the planter
- Place a battery-operated pillar candle in a hurricane glass on the dining table directly under the lights
That third one is the trick that adds the most depth because it gives the camera a near-light, a mid-light (the strands), and a far-light (the sky). Photographers call this lighting layers and it is the entire reason Magnolia Network shots look the way they do.
Maintenance Through the Seasons
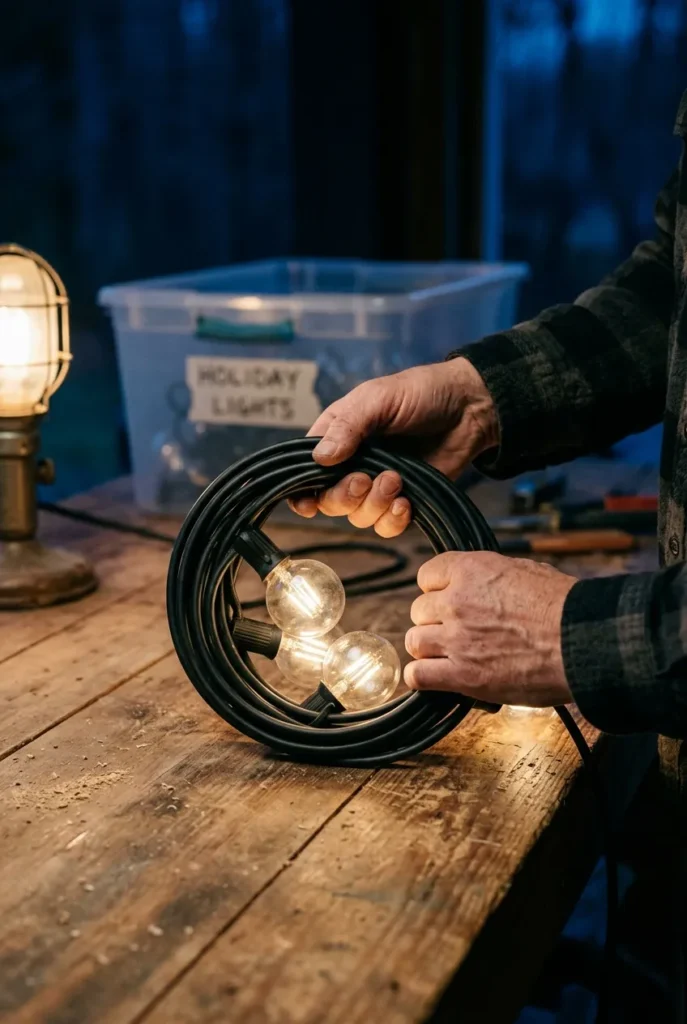
LED string lights rated for outdoor use can survive a full year outside in Zones 7 and warmer. In Zones 6 and colder, take them down before the first hard freeze in October to keep the cord jackets from cracking. Coil them in loose 18 inch loops, store them in a labeled bin in the garage, and they will give you four to six full seasons.
Bulbs are the part that fails first. Order one extra pack of replacements with your initial strand. The Brightech Ambience Pro 6-bulb replacement pack runs $12 and you will use it.
Frequently Asked Questions for How to Hang String Lights Backyard
What is the best way to hang outdoor string lights?
The best way depends on what you have to anchor to. For yards without trees, cedar 4×4 poles set into concrete-filled planters give you a permanent-looking install that is fully removable. For yards with fences, screw hooks driven into structural fence posts (not the boards between them) work for under $5. For renters, heavy-duty 3M Command outdoor hooks rated for 7.5 lbs hold a single strand without damaging walls.
How do people light up their backyard?
Most backyards use three light layers. The first is overhead ambient light from string lights or pendants for general glow. The second is ground-level pathway lights along walkways for safety. The third is accent lighting like solar lanterns or candles to add depth. The Pinterest-saved look almost always combines all three.
How do I hang string lights without trees or gutters?
You build your own anchor points. Cedar 4×4 poles in concrete-filled planters create freestanding mounts that look intentional. Pergola top rails, deck railings with standoff brackets, and umbrella stand poles also work. For a no-build solution, 6 ft to 8 ft shepherd hooks pushed into the ground every 8 to 10 ft will hold a light strand across an open lawn in 20 minutes.
How do you hang outdoor string lights without hooks?
Use S-hooks looped over fence pickets, adhesive 3M Command outdoor strips, zip ties around pergola beams, or the umbrella stand pole trick. You can also wrap the strand around the top 6 inches of a fence post and secure it with a small bungee cord. None of these put a single screw hole anywhere.
Are outdoor string lights waterproof?
Most outdoor-rated string lights are weather-resistant but not fully submersible. Look for an IP44 rating or higher on the label, which means they handle splashing water from any direction but not heavy spraying. Always plug into a GFCI-protected outlet and add a drip loop at every connector to keep water from running into the plug.
How far apart should string light poles be?
For G40 globe strands without a guide wire, keep pole spans under 25 ft to avoid heavy sag. With a 2 mm aircraft cable guide wire and turnbuckles, you can span up to 50 ft cleanly. The sweet spot for most backyards is 16 to 20 ft between poles, which uses one 24 ft section of a 48 ft strand per span.
Can you leave string lights up year-round?
In USDA Zones 7 and warmer, LED outdoor-rated string lights can stay up year-round if they are rated IP44 or higher. In Zones 6 and colder, take them down before the first hard freeze to prevent cord jacket cracking. Incandescent versions should always come down after the season ends because the filaments break easily in freezing temperatures.
Bringing It All Together
The reason so many backyards look magazine-ready by July is rarely the budget. It is the planning. Two cedar posts in planters, one 50 ft spool of aircraft cable, two strands of warm G40 globes, and an honest moment with the wattage math will outperform a $400 designer install every single time. The whole thing comes in around $200 if you shop the Lowe’s and Amazon side of the equation and around $80 if you raid Walmart and Costco for the lights and use scrap lumber for the poles.
Start with the simplest method that fits your space, pick one of the nine setups above, and resist the urge to over-light. Two well-placed strands always beat four chaotic ones.
For the seating area to match the canopy you just built, walk through our small backyard ideas with cozy lighting and budget-friendly furniture pairings next. Get the surface, the seats, and the lights working together and you have the cozy backyard everyone keeps saving.